This post is sponsored by Wayfair. All opinions are my own.
One aspect we love about our home is how we were able to customize a lot of the finishes. We went with standard lighting in most of the home, knowing we would change it out upon moving in. It’s been nice to take our time with certain light fixtures so we can really get a feel for the space, what we want and play around with different options. You can save a lot of money and you get to really pick something you want by changing out or adding light fixtures yourself. I believe anyone can do this! It doesn’t take an electrician – anyone can learn how to change a light fixture.
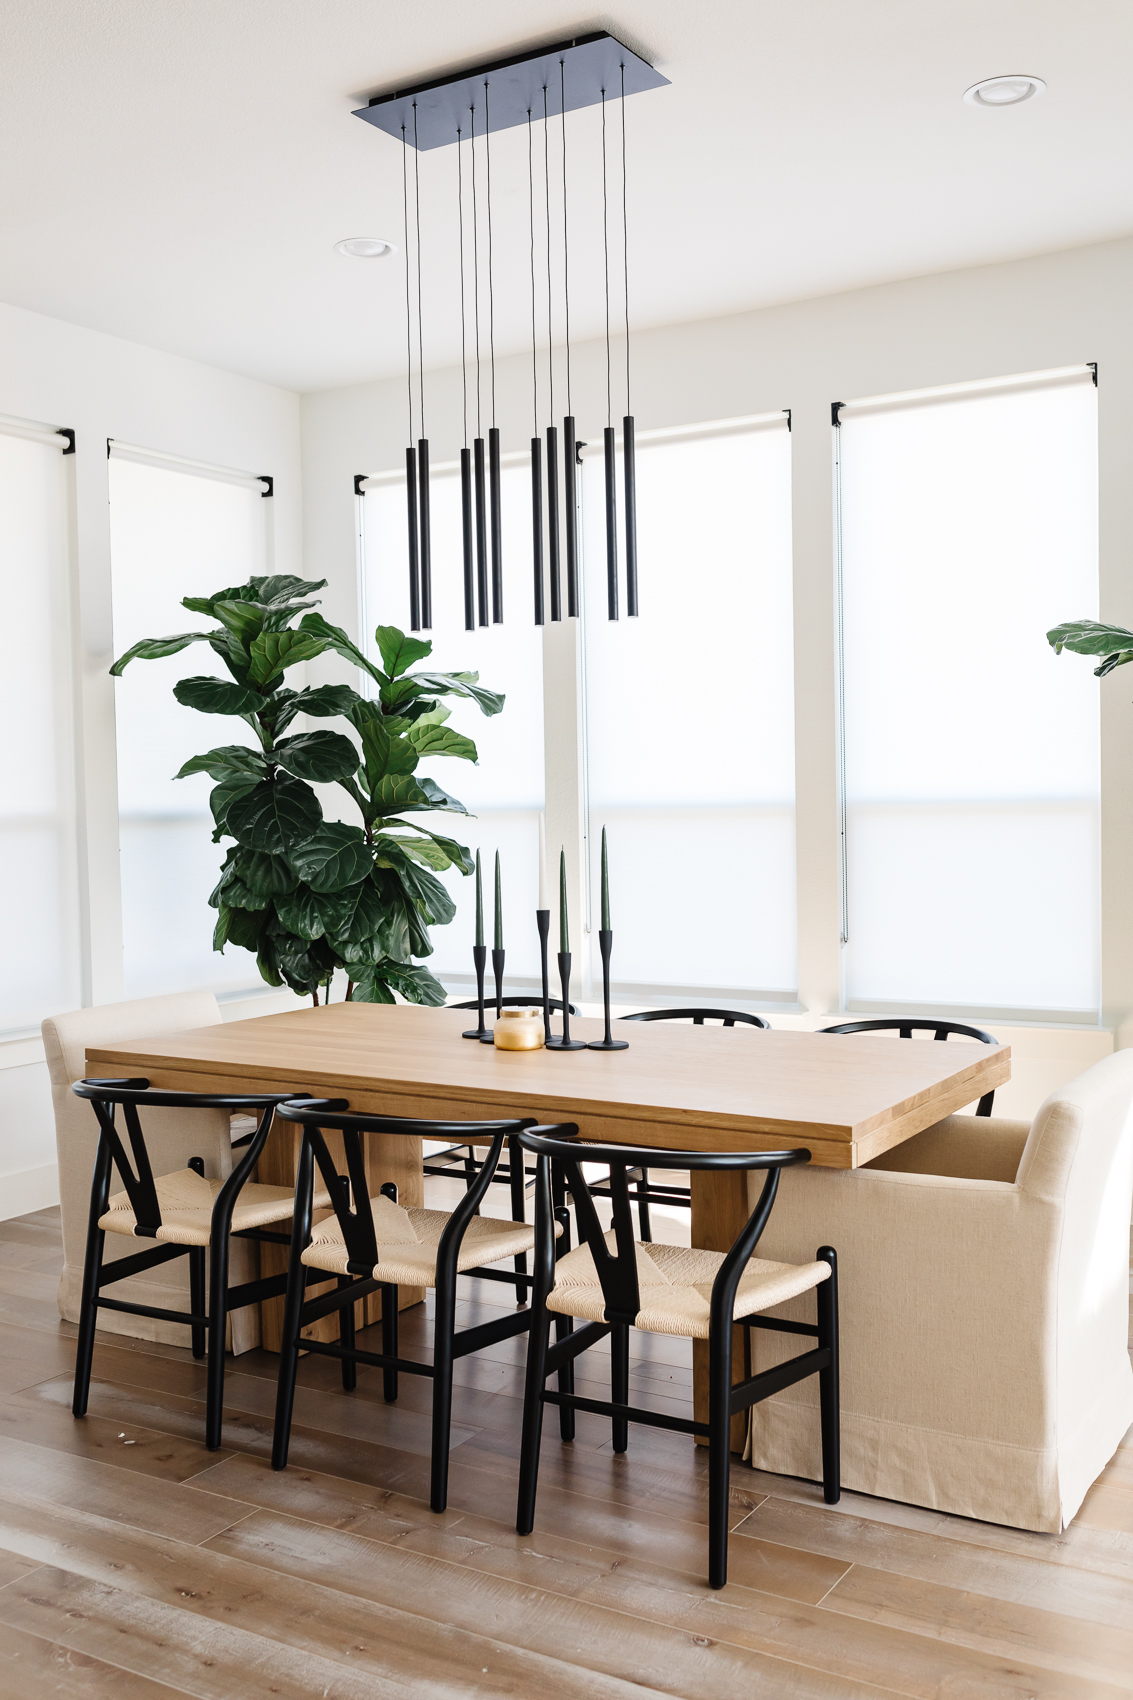
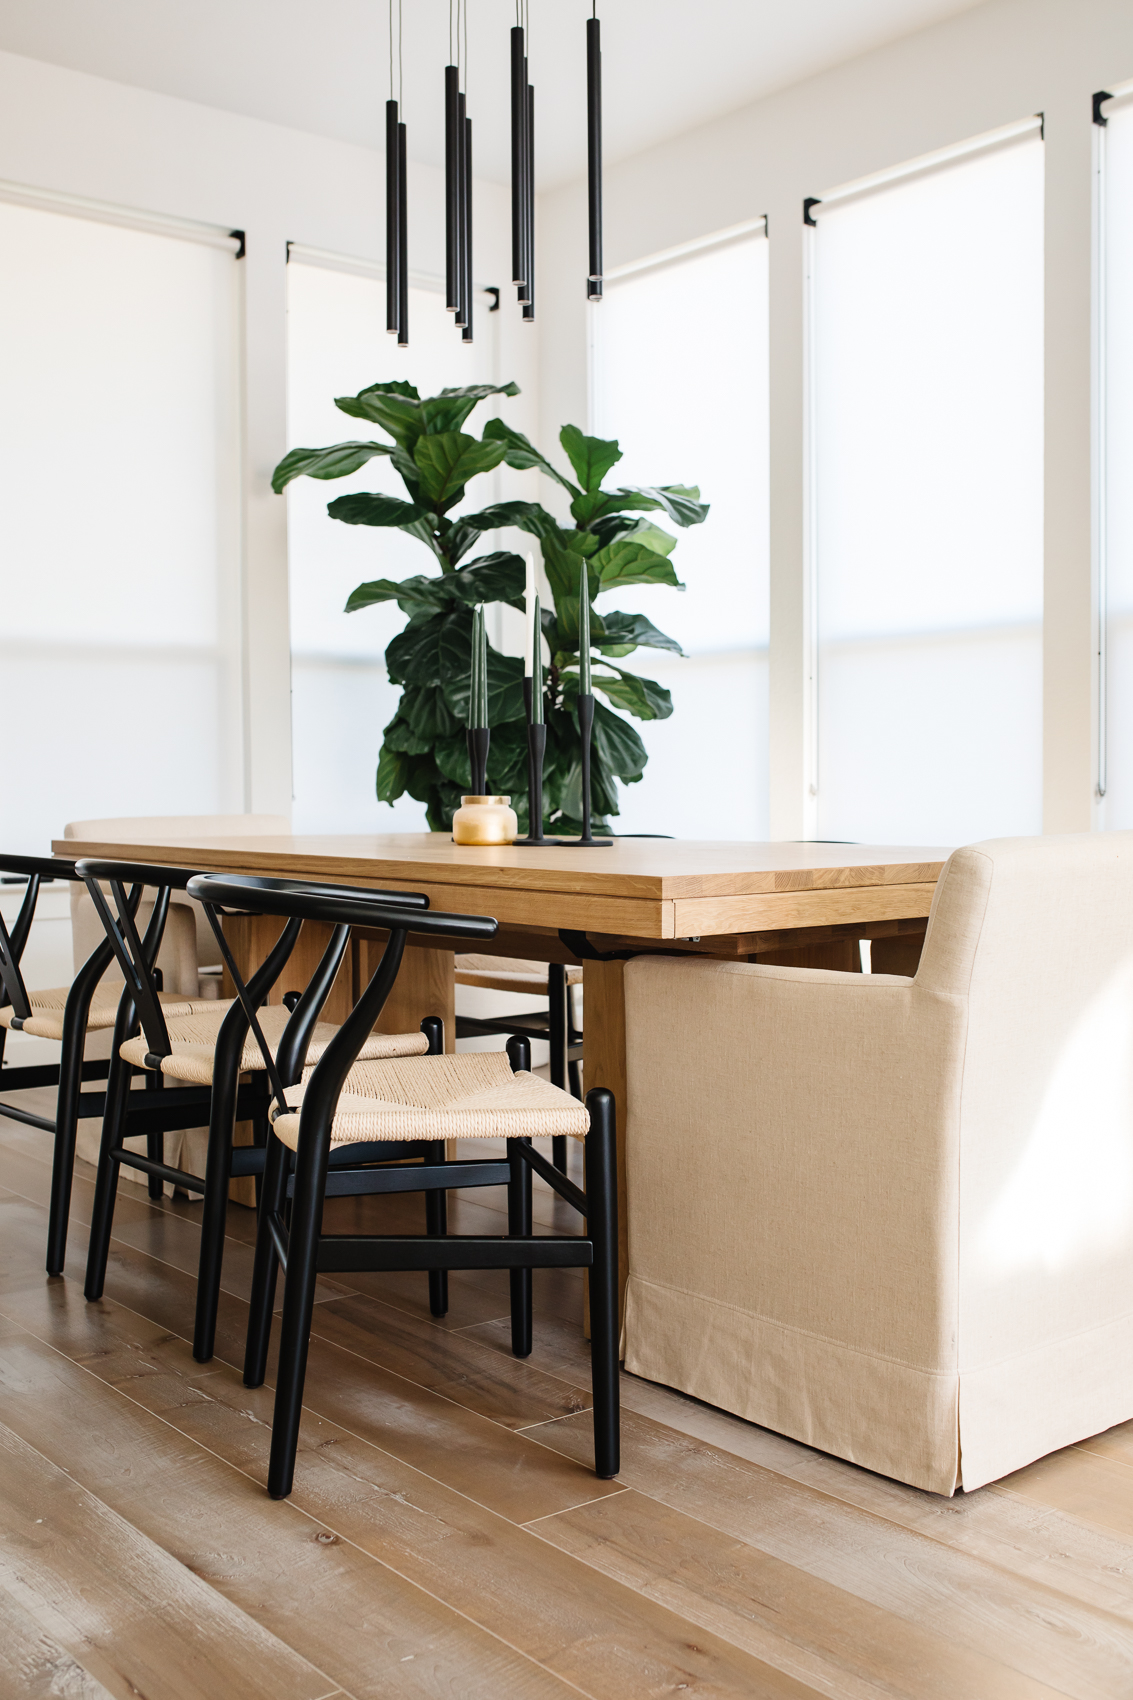
After nearly six months of an empty dining room space, we were able to pull everything together right in time for Thanksgiving dinner! Our dining table, chairs (albeit some of them are temporary) and light fixture were all in and looking good. Choosing the right light fixture can really make a space pop and I’m teaming up with Wayfair to share how to change a light fixture. Before we dive in, I do want to say you should set yourself up for success. If it’s your first time, make sure the power is off. Pick an easy light fixture (a singular pendant or flush mount that isn’t super heavy) to install so you feel like a pro and don’t have to struggle with size or weight. Finally, have someone there to help you just in case!

1. Prep the Space & Tools Required
If you are building a home, ask your construction manager to not install light fixtures if possible. Sometimes you’ll get a credit back and they’ll just put in a simple bulb. This will make the whole process easier since taking out the existing light is actually half the battle of learning how to change a light fixture. Also, depending on your light fixture, I find it easier if the light is already assembled. The only time we assembled a light after it was hung was our sputnik chandelier since the pieces added a lot of extra weight.
Also, if your light fixture’s height is adjustable measure the length you want it to be. For eight foot ceilings, you want at least 7 feet of clearance. For every foot taller than that, add 2 to three inches.
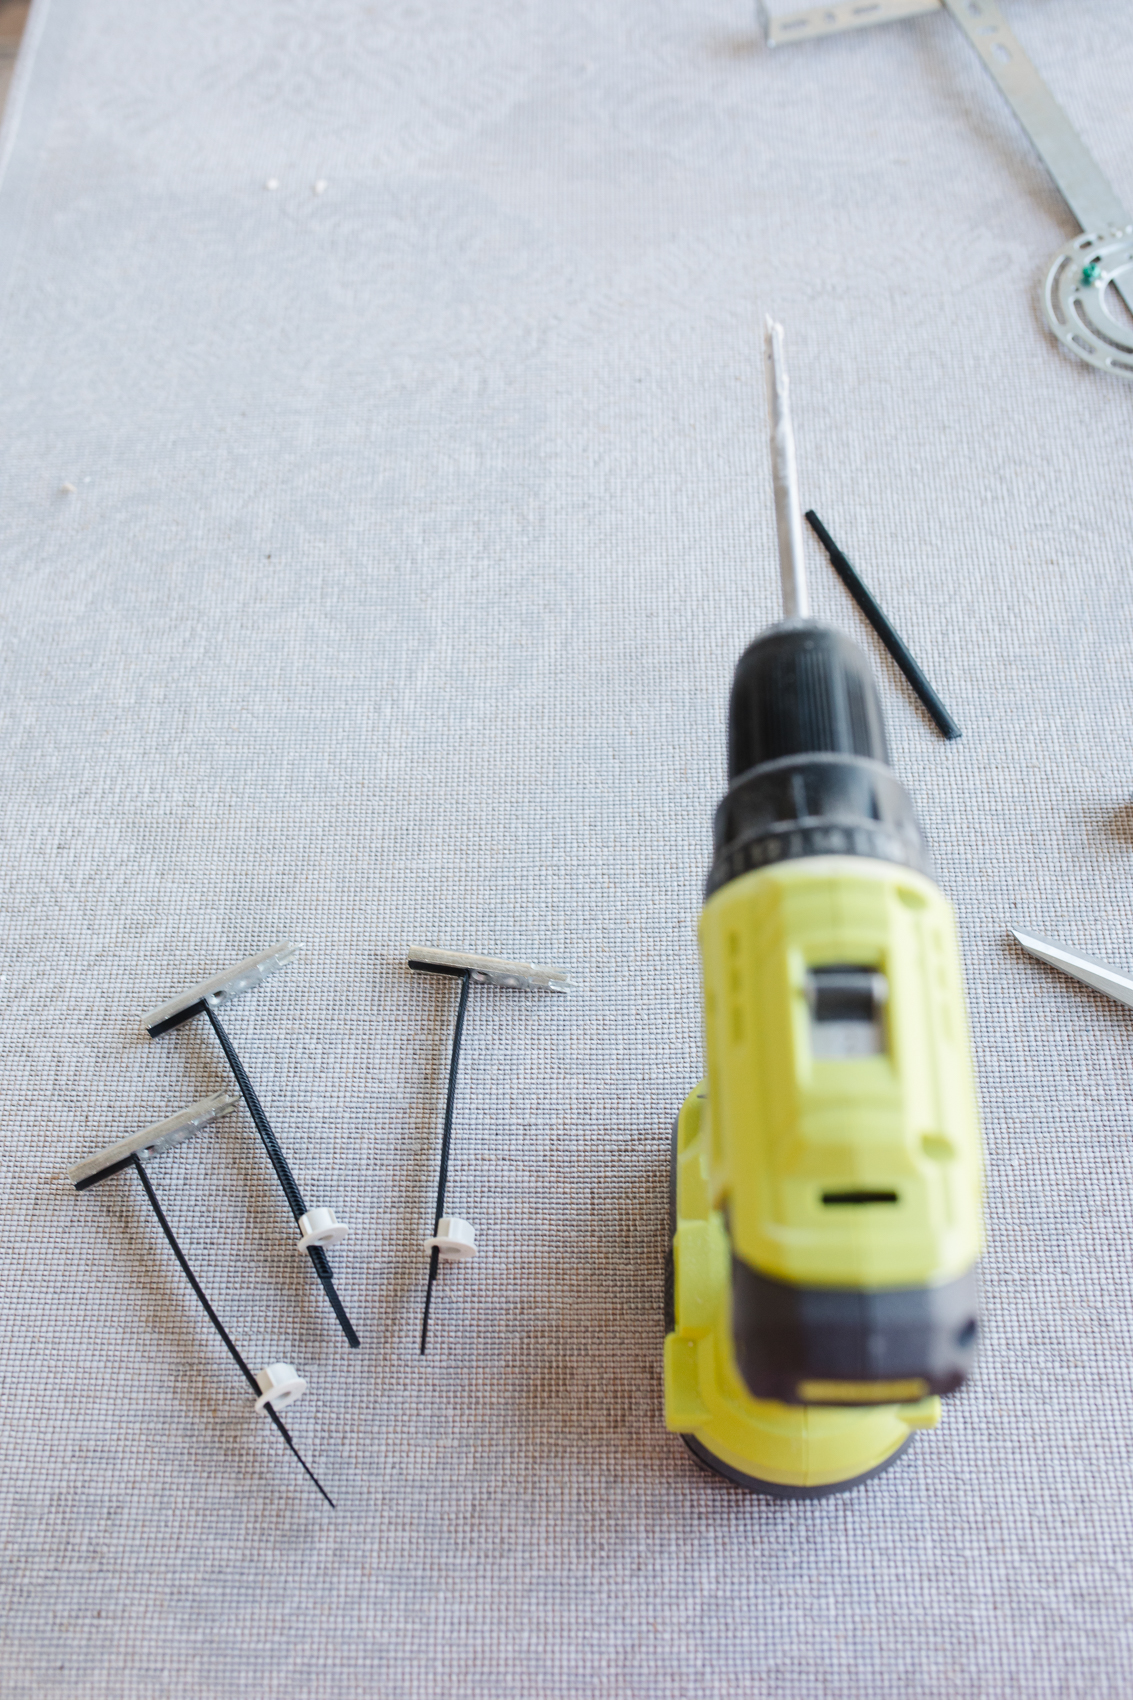
You’ll need a ladder, so make sure that’s all set up. Johnny and I prefer to have a little bit of “wiggle room” so our arms don’t get as tired during the process. Other tools you’ll need:
- Philips & flat head screwdrivers or a cordless drill with attachments
- Wire connectors (if you already have a light, most times you can reuse them)
- Wire strippers (not always necessary)
- Voltage tester (to be honest, we don’t have one, but would recommend it)
Now that you have your tools, turn off the electricity. Locate your electrical panel and turn off the electricity for the room you’re changing the light in. Do not skip this step! Double-check by either turning on the existing light or plugging something in.
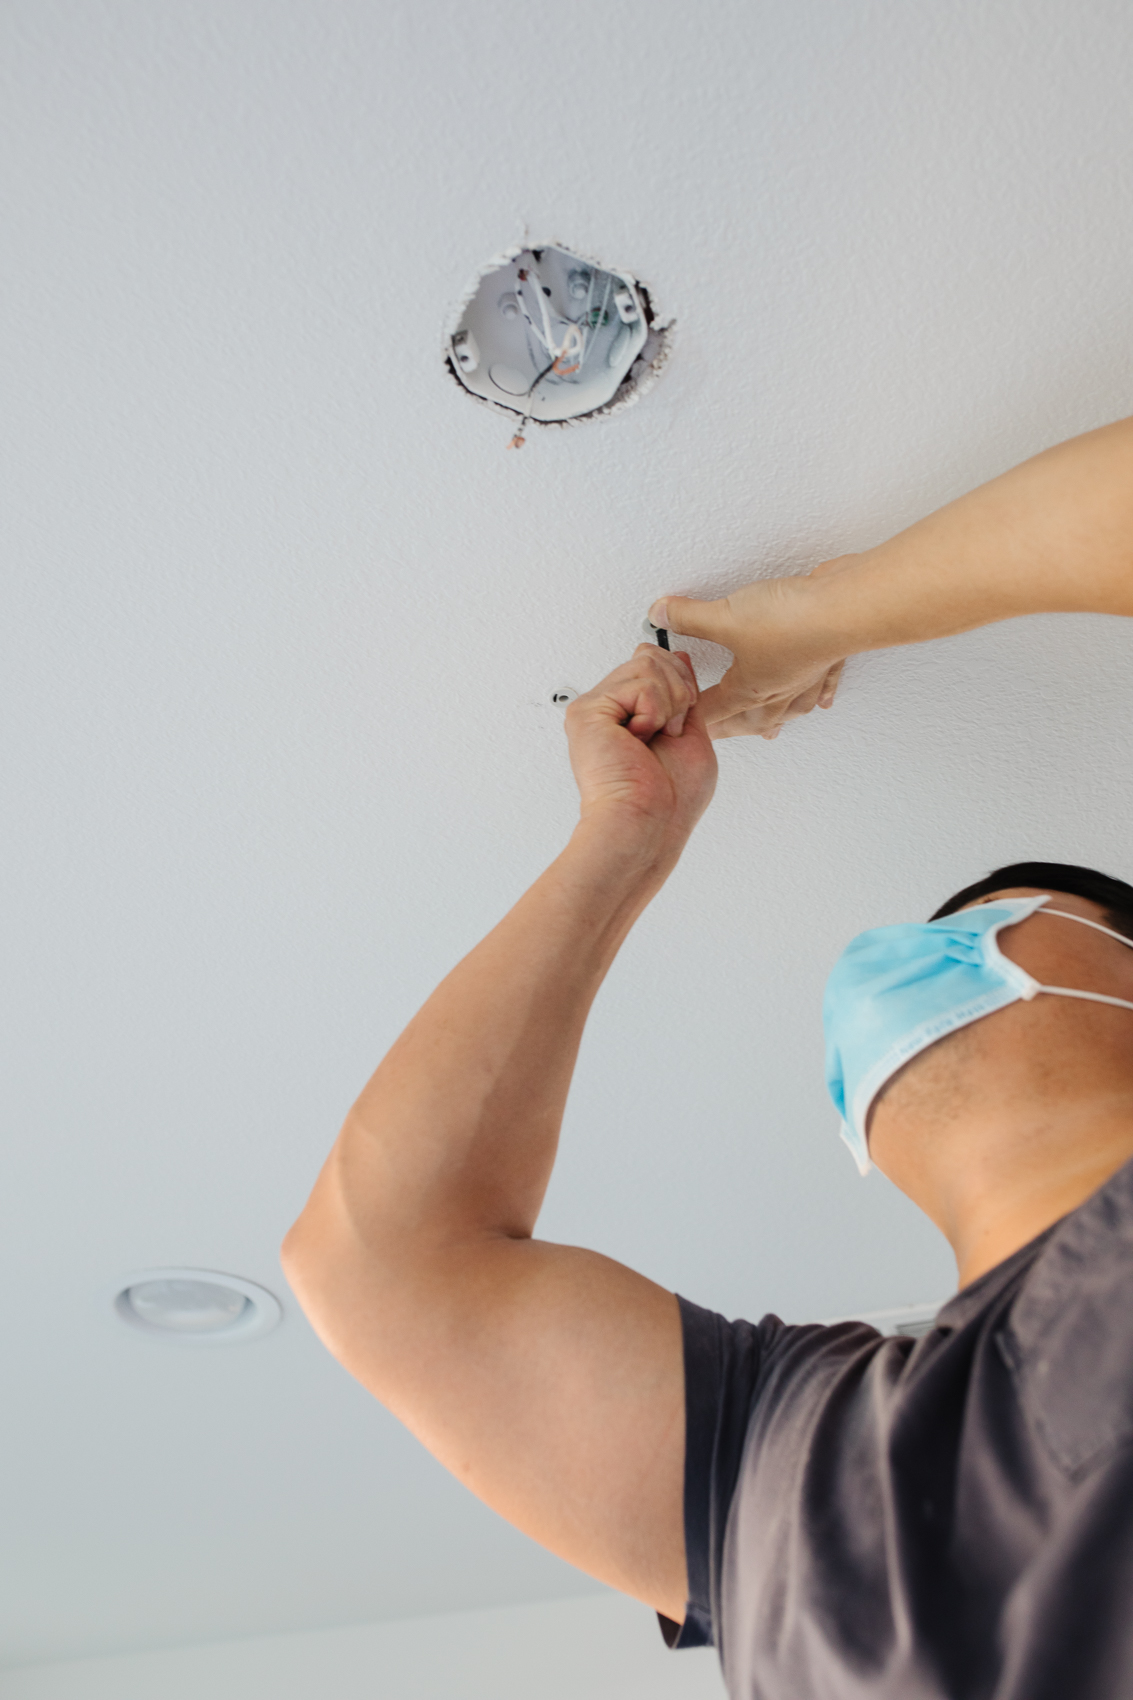

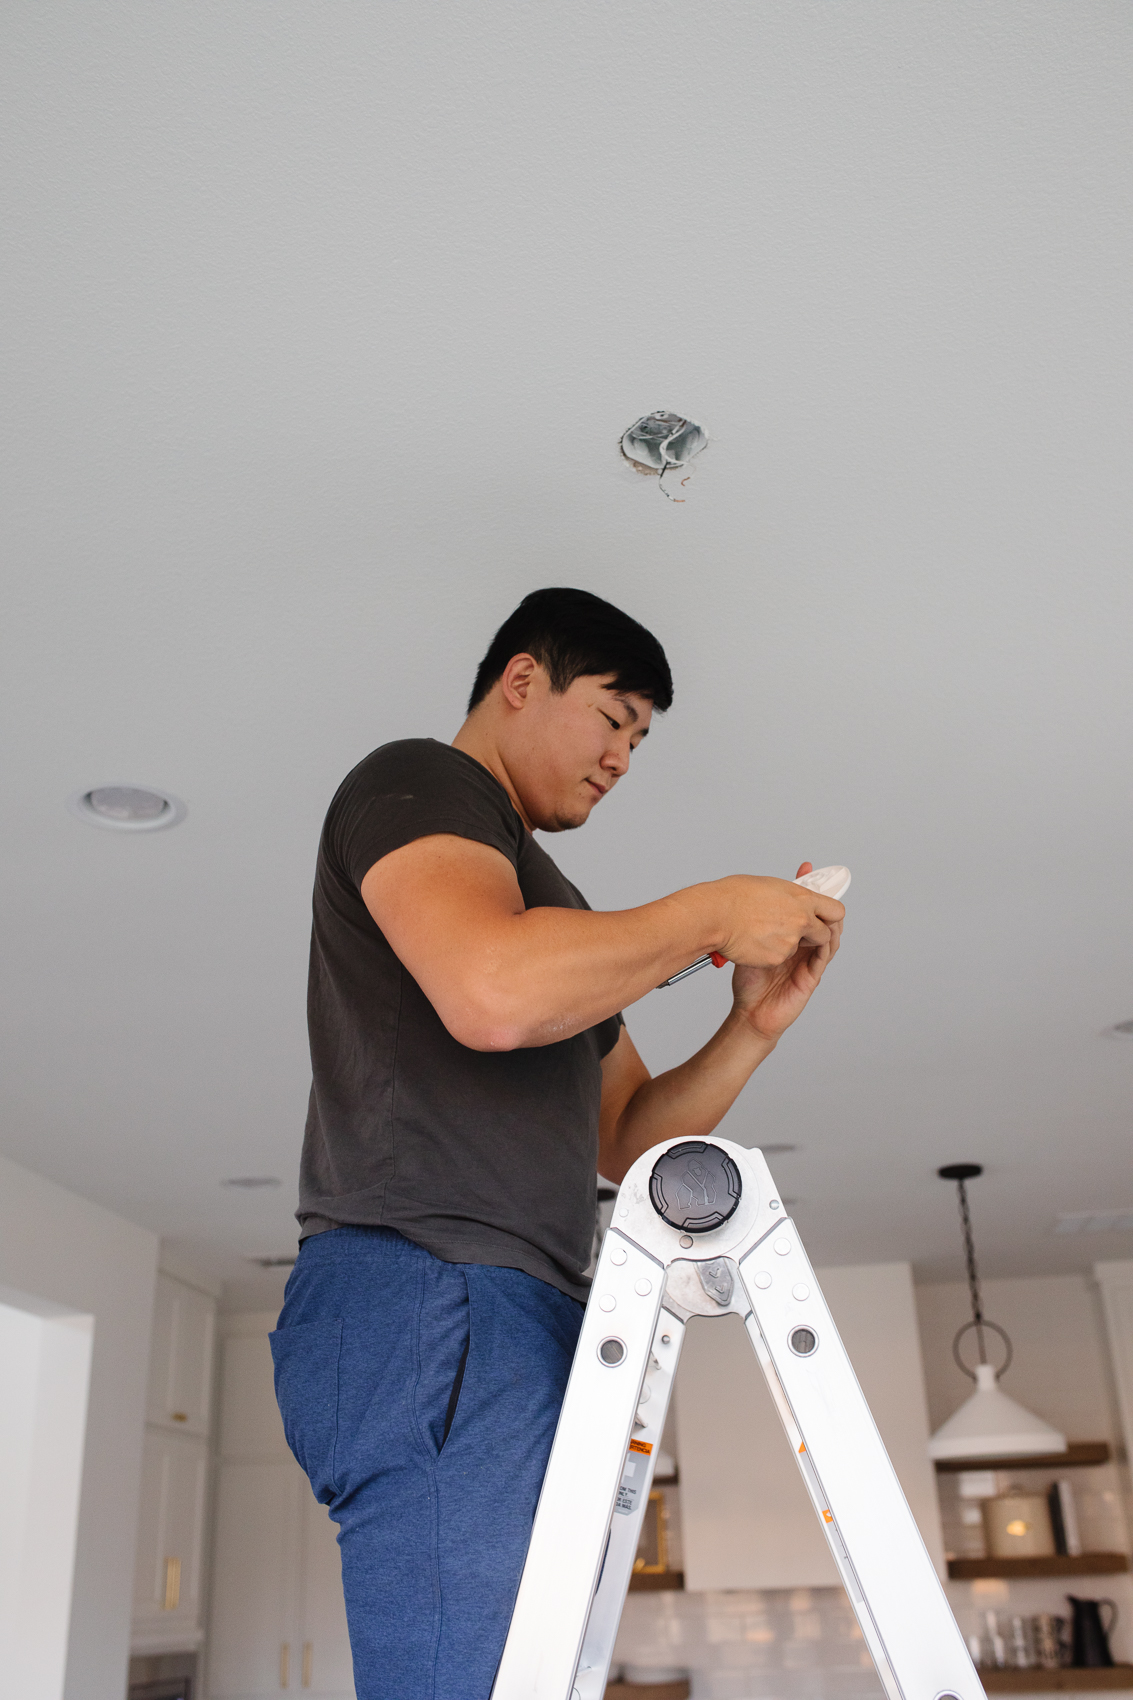
2. Unscrew the Fixture
Most light fixtures have a canopy or a decorative piece hiding the wiring. Unscrew this so you can get to the “the good stuff” and get to work. You’ll notice caps on the wires. Carefully unscrew these! After you’ve taken the canopy off, identify the two wires (they are usually black and white, but always two colors). One of them is live and you can use the voltage tester if you’d like to confirm. Then, unscrew the existing mounting bracket. There should be two screws holding the mounting bracket in place. Put these screws somewhere safe so you can use them to screw in the new bracket.
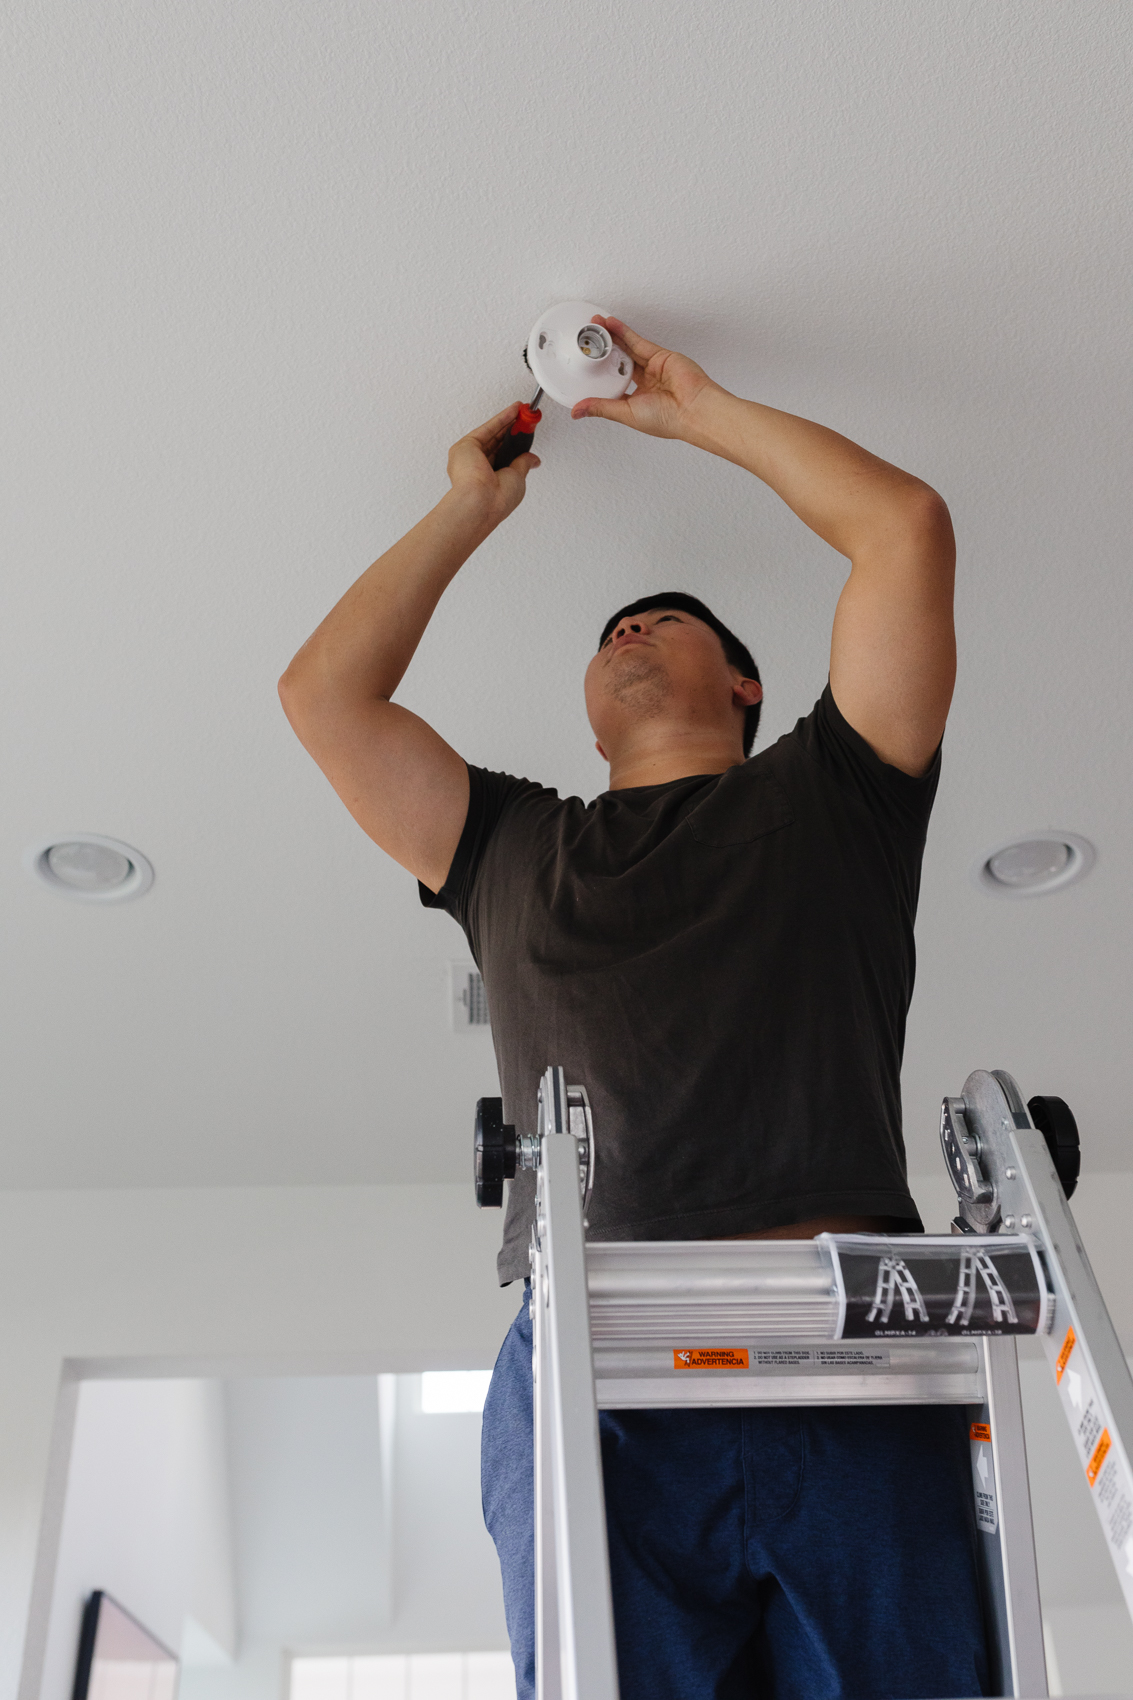
3. Mounting the New Fixture
Take the two mounting screws you put aside earlier and attach the new mounting bracket. Lift your light fixture (if it’s big enough you can use your ladder to help support the weight) and use the copper grounding wire from the fixture to attach it to the screw on the ceiling. This is what holds your light fixture in place.
Remember when I said to identify each of the two wires? If you’re lucky you’ll have wires that match (so attach the black to the black and white to white). If the wires you get with your fixture are the same color, there should be something printed on the coating such as serial number or something to identify the wires. Sometimes you’ll need wire strippers and/or wire cutters.
Just remember, there’s no going back after you’ve cut the wire so measure twice and cut once! The ground wire needs to touch so twist them together nicely.
4. Finish Assembling
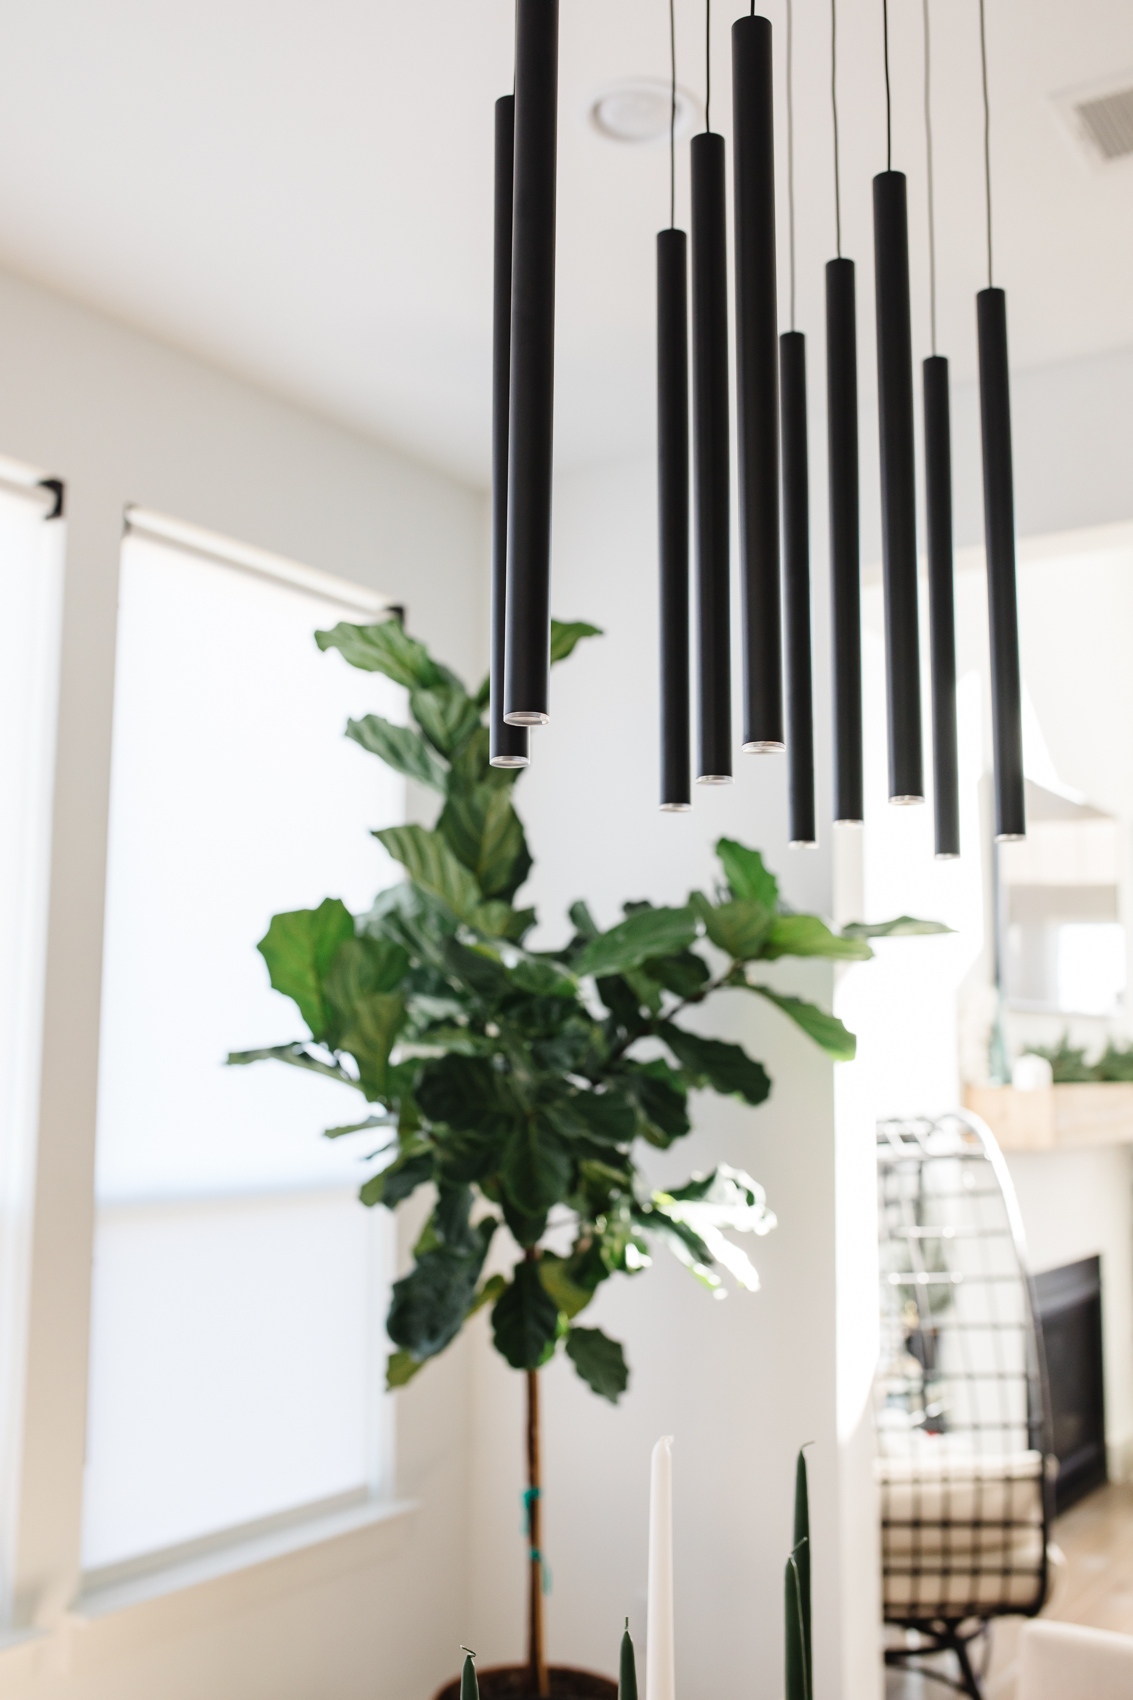
Neatly tuck all of the wires into the new canopy and screw it tight. If your chandelier has any pieces you still need to assemble, finish up and enjoy your work! On our chandelier, what took us the longest was assembling it and we had to do it before installing so it was just incredibly heavy and bulky. We love the modern look and to us, it’s like upside down candles.
Wayfair has lots of gorgeous light fixtures at all price ranges. Here are some we love:
Nordstrom Anniversary Sale 2021 Preview Picks
TOPS & SWEATERS

BOTTOMS
BLAZERS & COATS
ACTIVE
ACCESSORIES & SHOES
BEAUTY