
One of the finishing details for our new build home I was most excited about was our cabinet hardware. The hardware you choose can completely transform your space. You can choose something more traditional such as knobs or go for a sleeker look with pulls. Our builder did give us the option of buying one of their choices and getting it installed, but I really didn’t like their selection. Plus, growing up, my Dad always installed our cabinet hardware and I loved the idea of doing it ourselves. I’m excited to share how to easily install cabinet hardware. We’ve come a long way from installing hardware at my sister’s new build in October!

The Hardware Matters
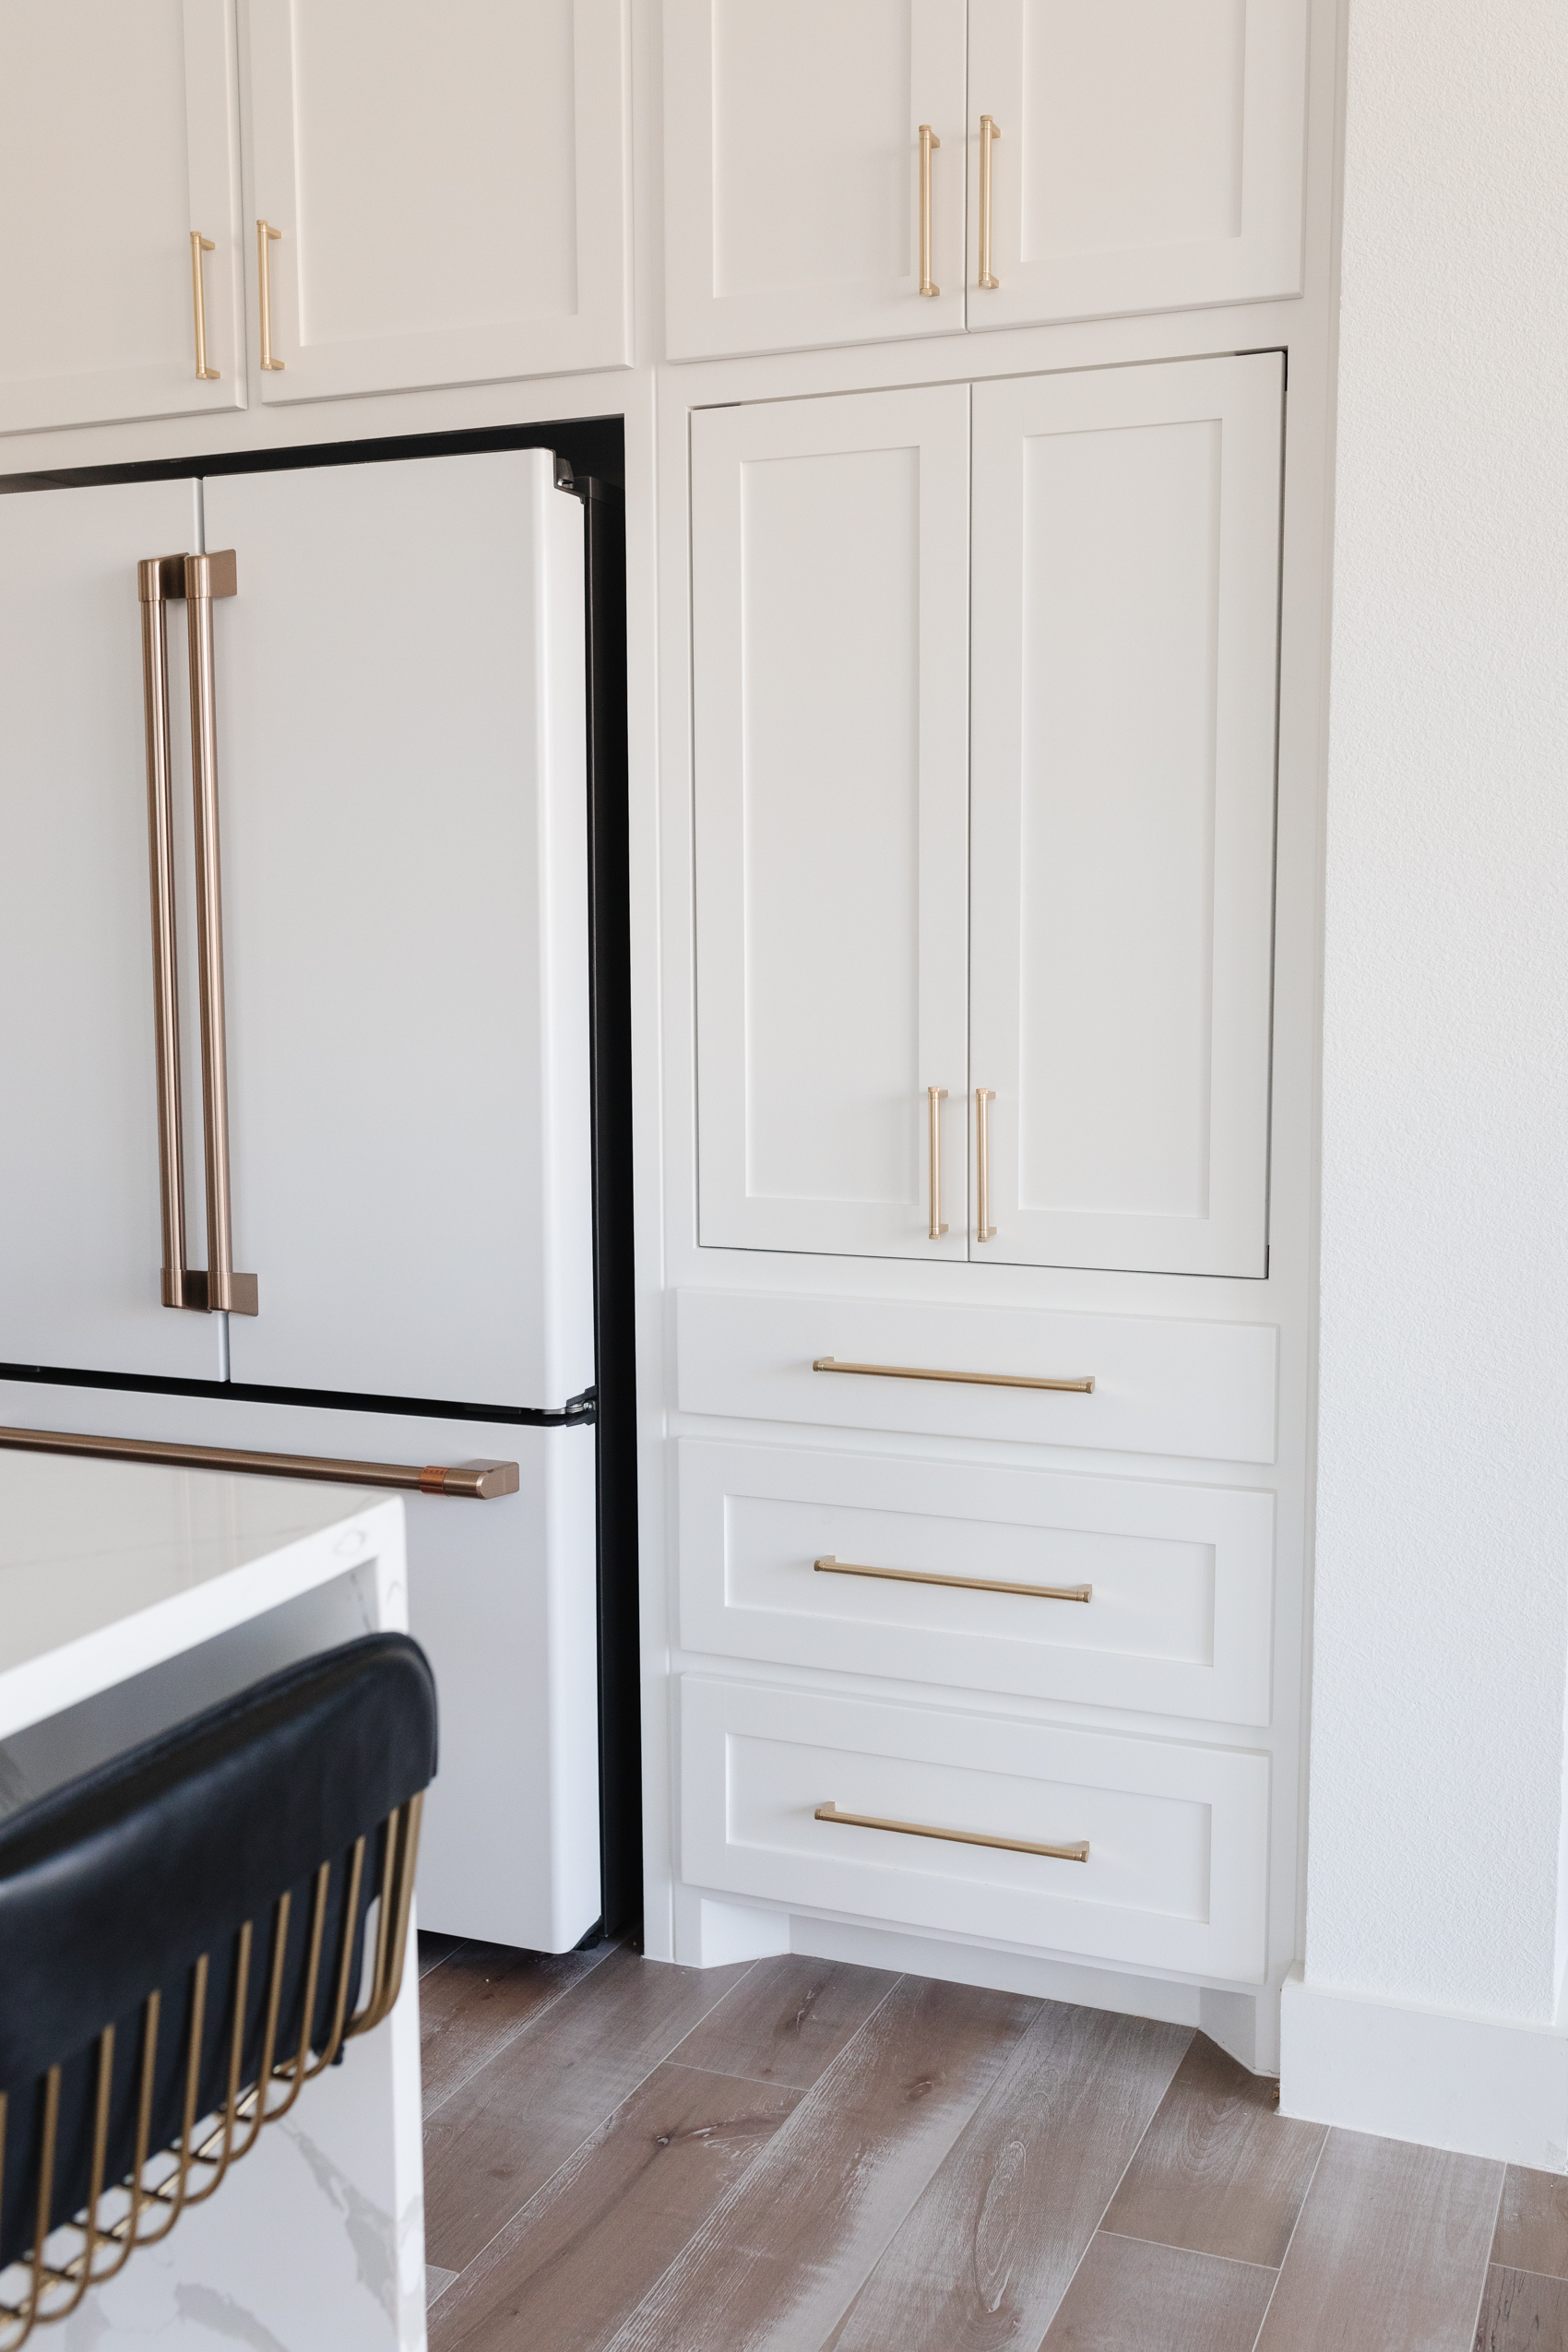
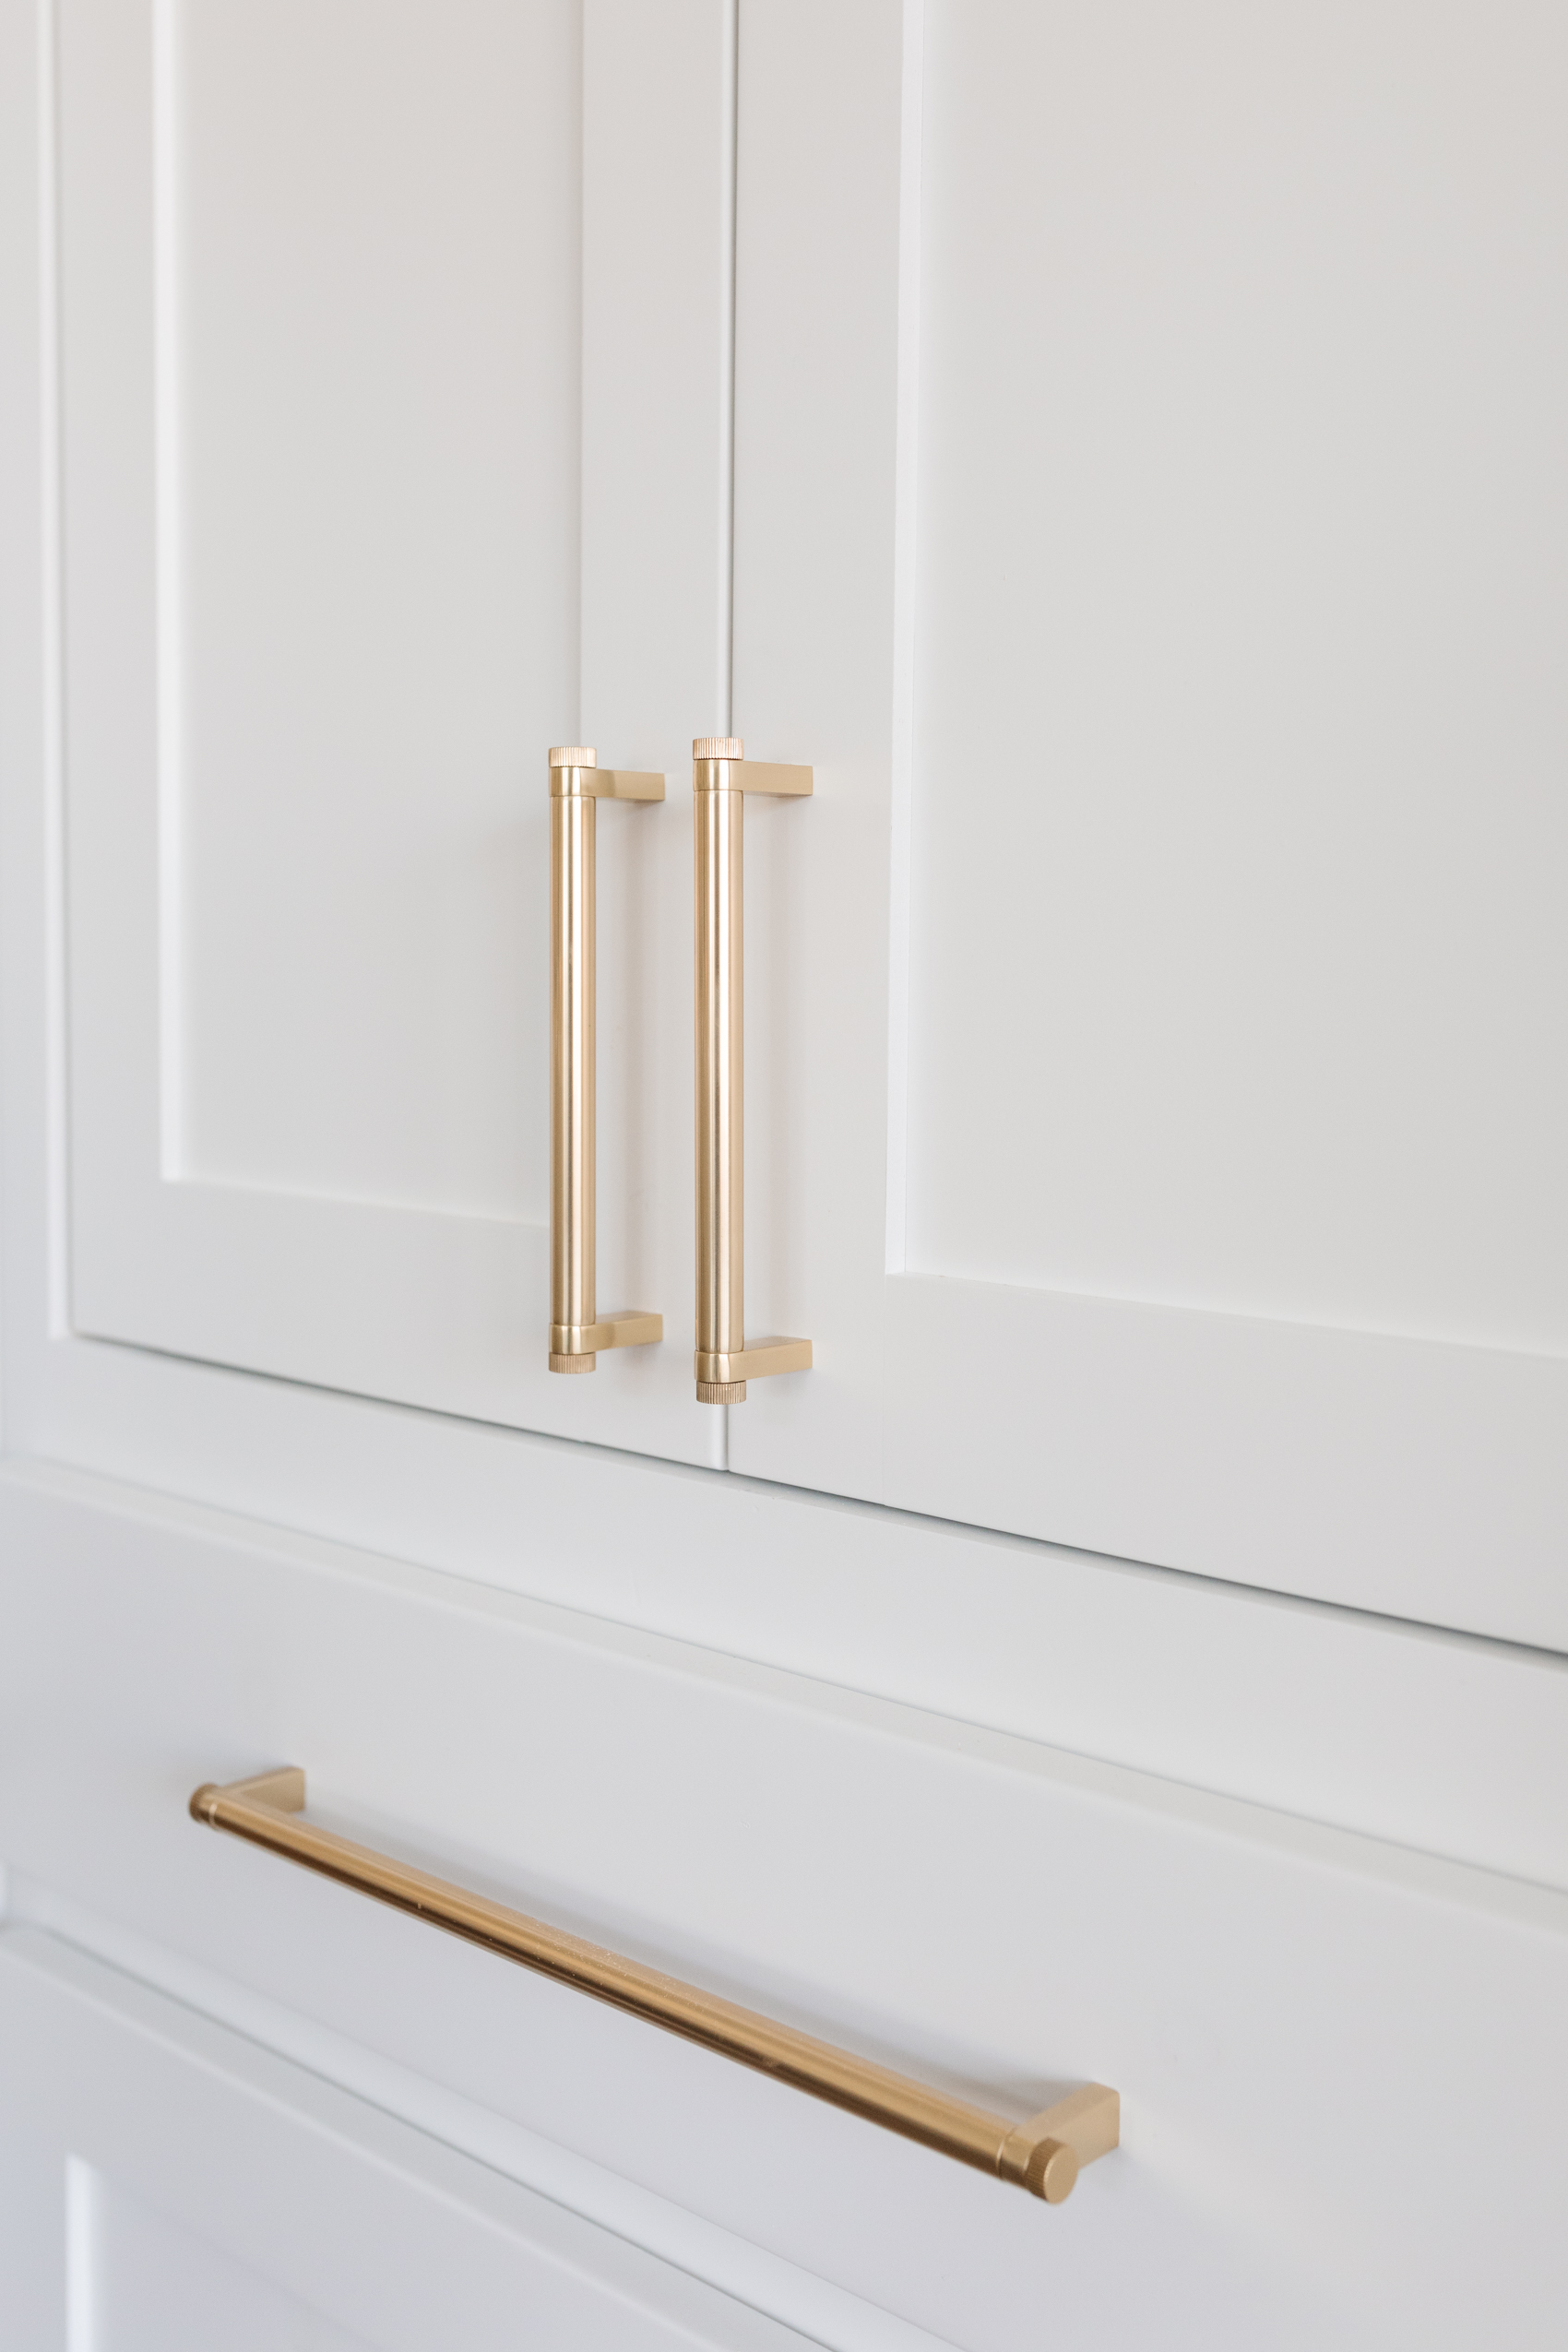
I’m a big fan of solid-brass hardware because of its quality and weight. Hold one piece of the substantial hardware in your hand and you can feel the difference. It will not chip or wear off as you handle it over the years. Now, just because it’s made of solid brass doesn’t mean that’s the finish you’re stuck with. Rejuvenation is one of my favorite places to source hardware and they have tons of options from polished chrome to unlacquered brass to a sleek oil-rubbed bronze that looks like black.
Yes, solid-brass hardware is expensive. But think about it: cabinet hardware is one of the most heavily used items in your home. From your kitchen to your bathroom, you are constantly opening and closing cabinets and drawers countless times a day. Plus, chances are you don’t live alone, so multiply that number and then add in when guests come to visit. I think it’s so important to invest in solid-brass hardware because it stands the test of time. It’s better to spend more money upfront rather than to have to replace your hardware as the finish or quality wears.
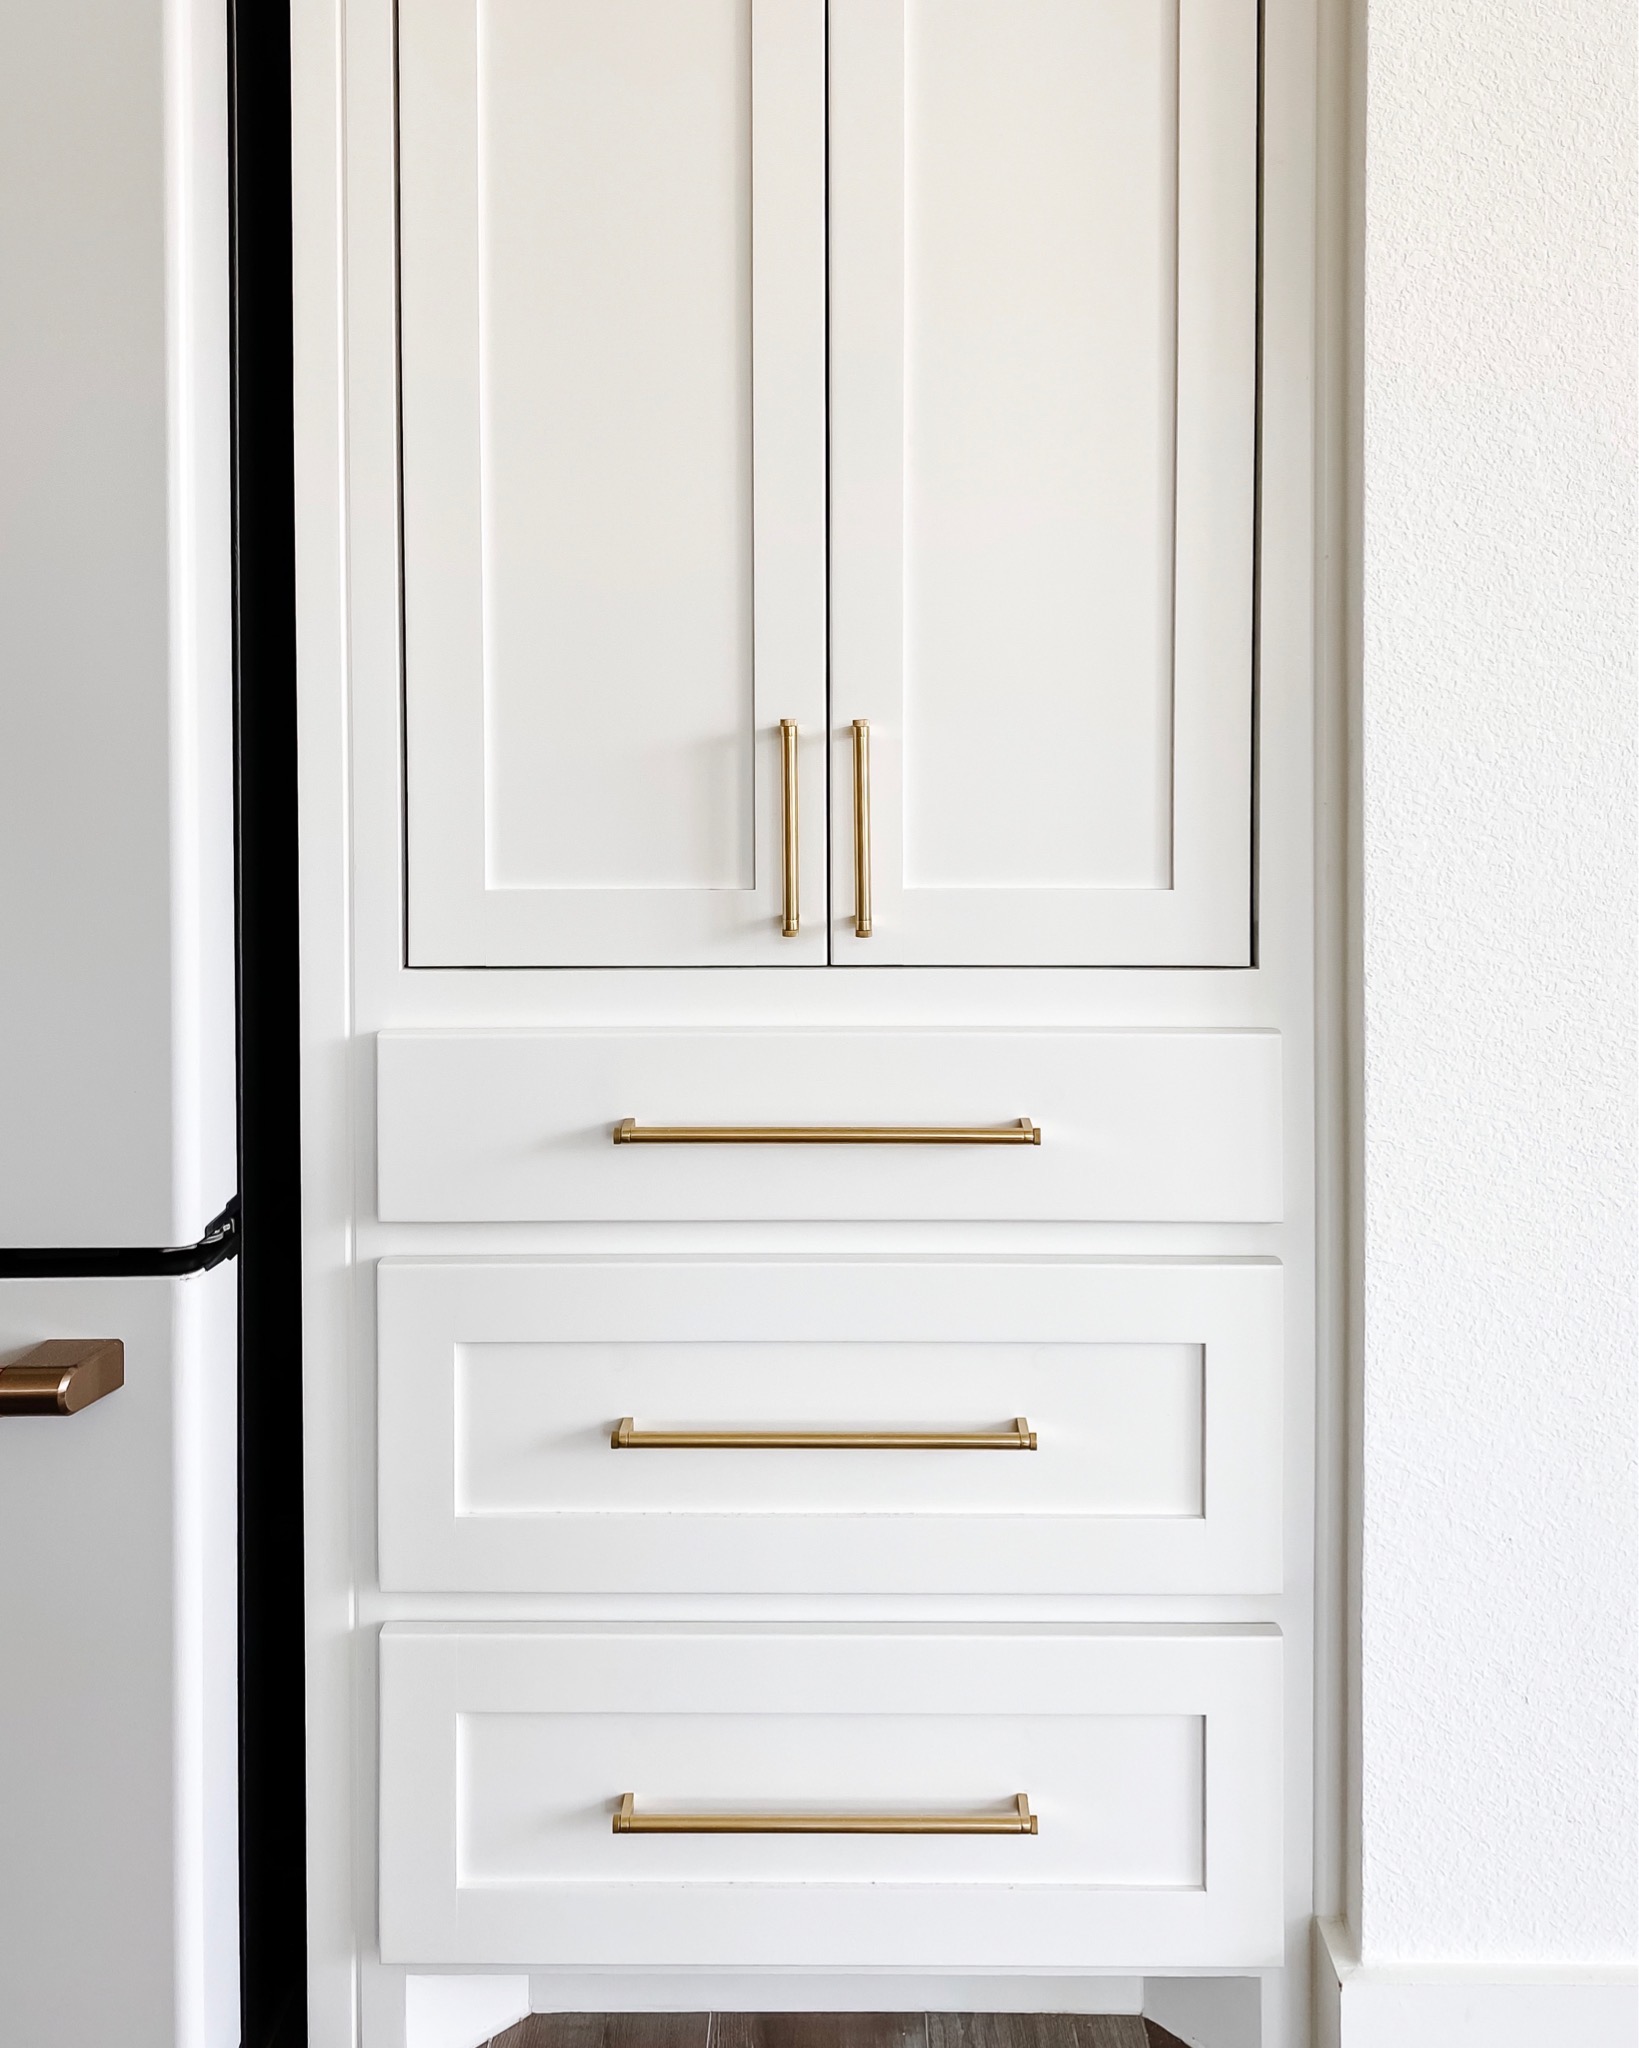
We used the West Slope Collection in our kitchen, the Sommerville in our Master Bathroom and Bowman in our guest bathroom. We used mostly 6″ pulls except for on super large drawers more than 20″ in width, we used 12″ pulls. All of our cabinet hardware is gold. Everything does not have to match, in fact I recommend mixing metals! We have black (oil rubbed bronze) door handles and hinges. Our kitchen pendants have black hardware. We went with brass to soften it up. We have stainless steel appliances but will eventually change out our dishwasher and kitchen faucet to be brass. I would just make sure anything on the same level is the same color. Don’t mix cabinet hardware finishes and you’ll be fine!

Tools & Items Needed
- Power Drill
- Ruler
- Level
- 3/16 Drill Bit
- Cardboard
The following items are optional depending on what kind of cabinets you have
- Thick Piece of Wood
- Clamps
1. Measure Your Cabinets/Drawers
- You’ll want to be as precise as possible so all of your knobs and pulls are level. We have shaker style cabinets, so we measured the stile (vertical frame on the cabinet), did some quick math, found the middle point and deducted where the holes for the pulls should go.
- I highly recommend making a stencil (we bought a template from Rejuvenation since it lined up with our hardware) to make your life easier. Use the piece of cardboard to replicate the size of your stile, making sure it lines up with the bottom of your cabinet to make it easy for you. Use a pencil to mark where the hole(s) should go. From here you have two options: Take a nail and make a small hole so you can mark on the cabinet with a pencil. Or, you can always use the nail and a hammer to make small dent in the cabinet where you need to drill. Since we had a stencil, we just used a pencil. A stencil is a must for easily install cabinet hardware.
- If you are installing pulls, double check your measurements with the actual piece of hardware and make sure it is level.
- Measure twice, cut once!
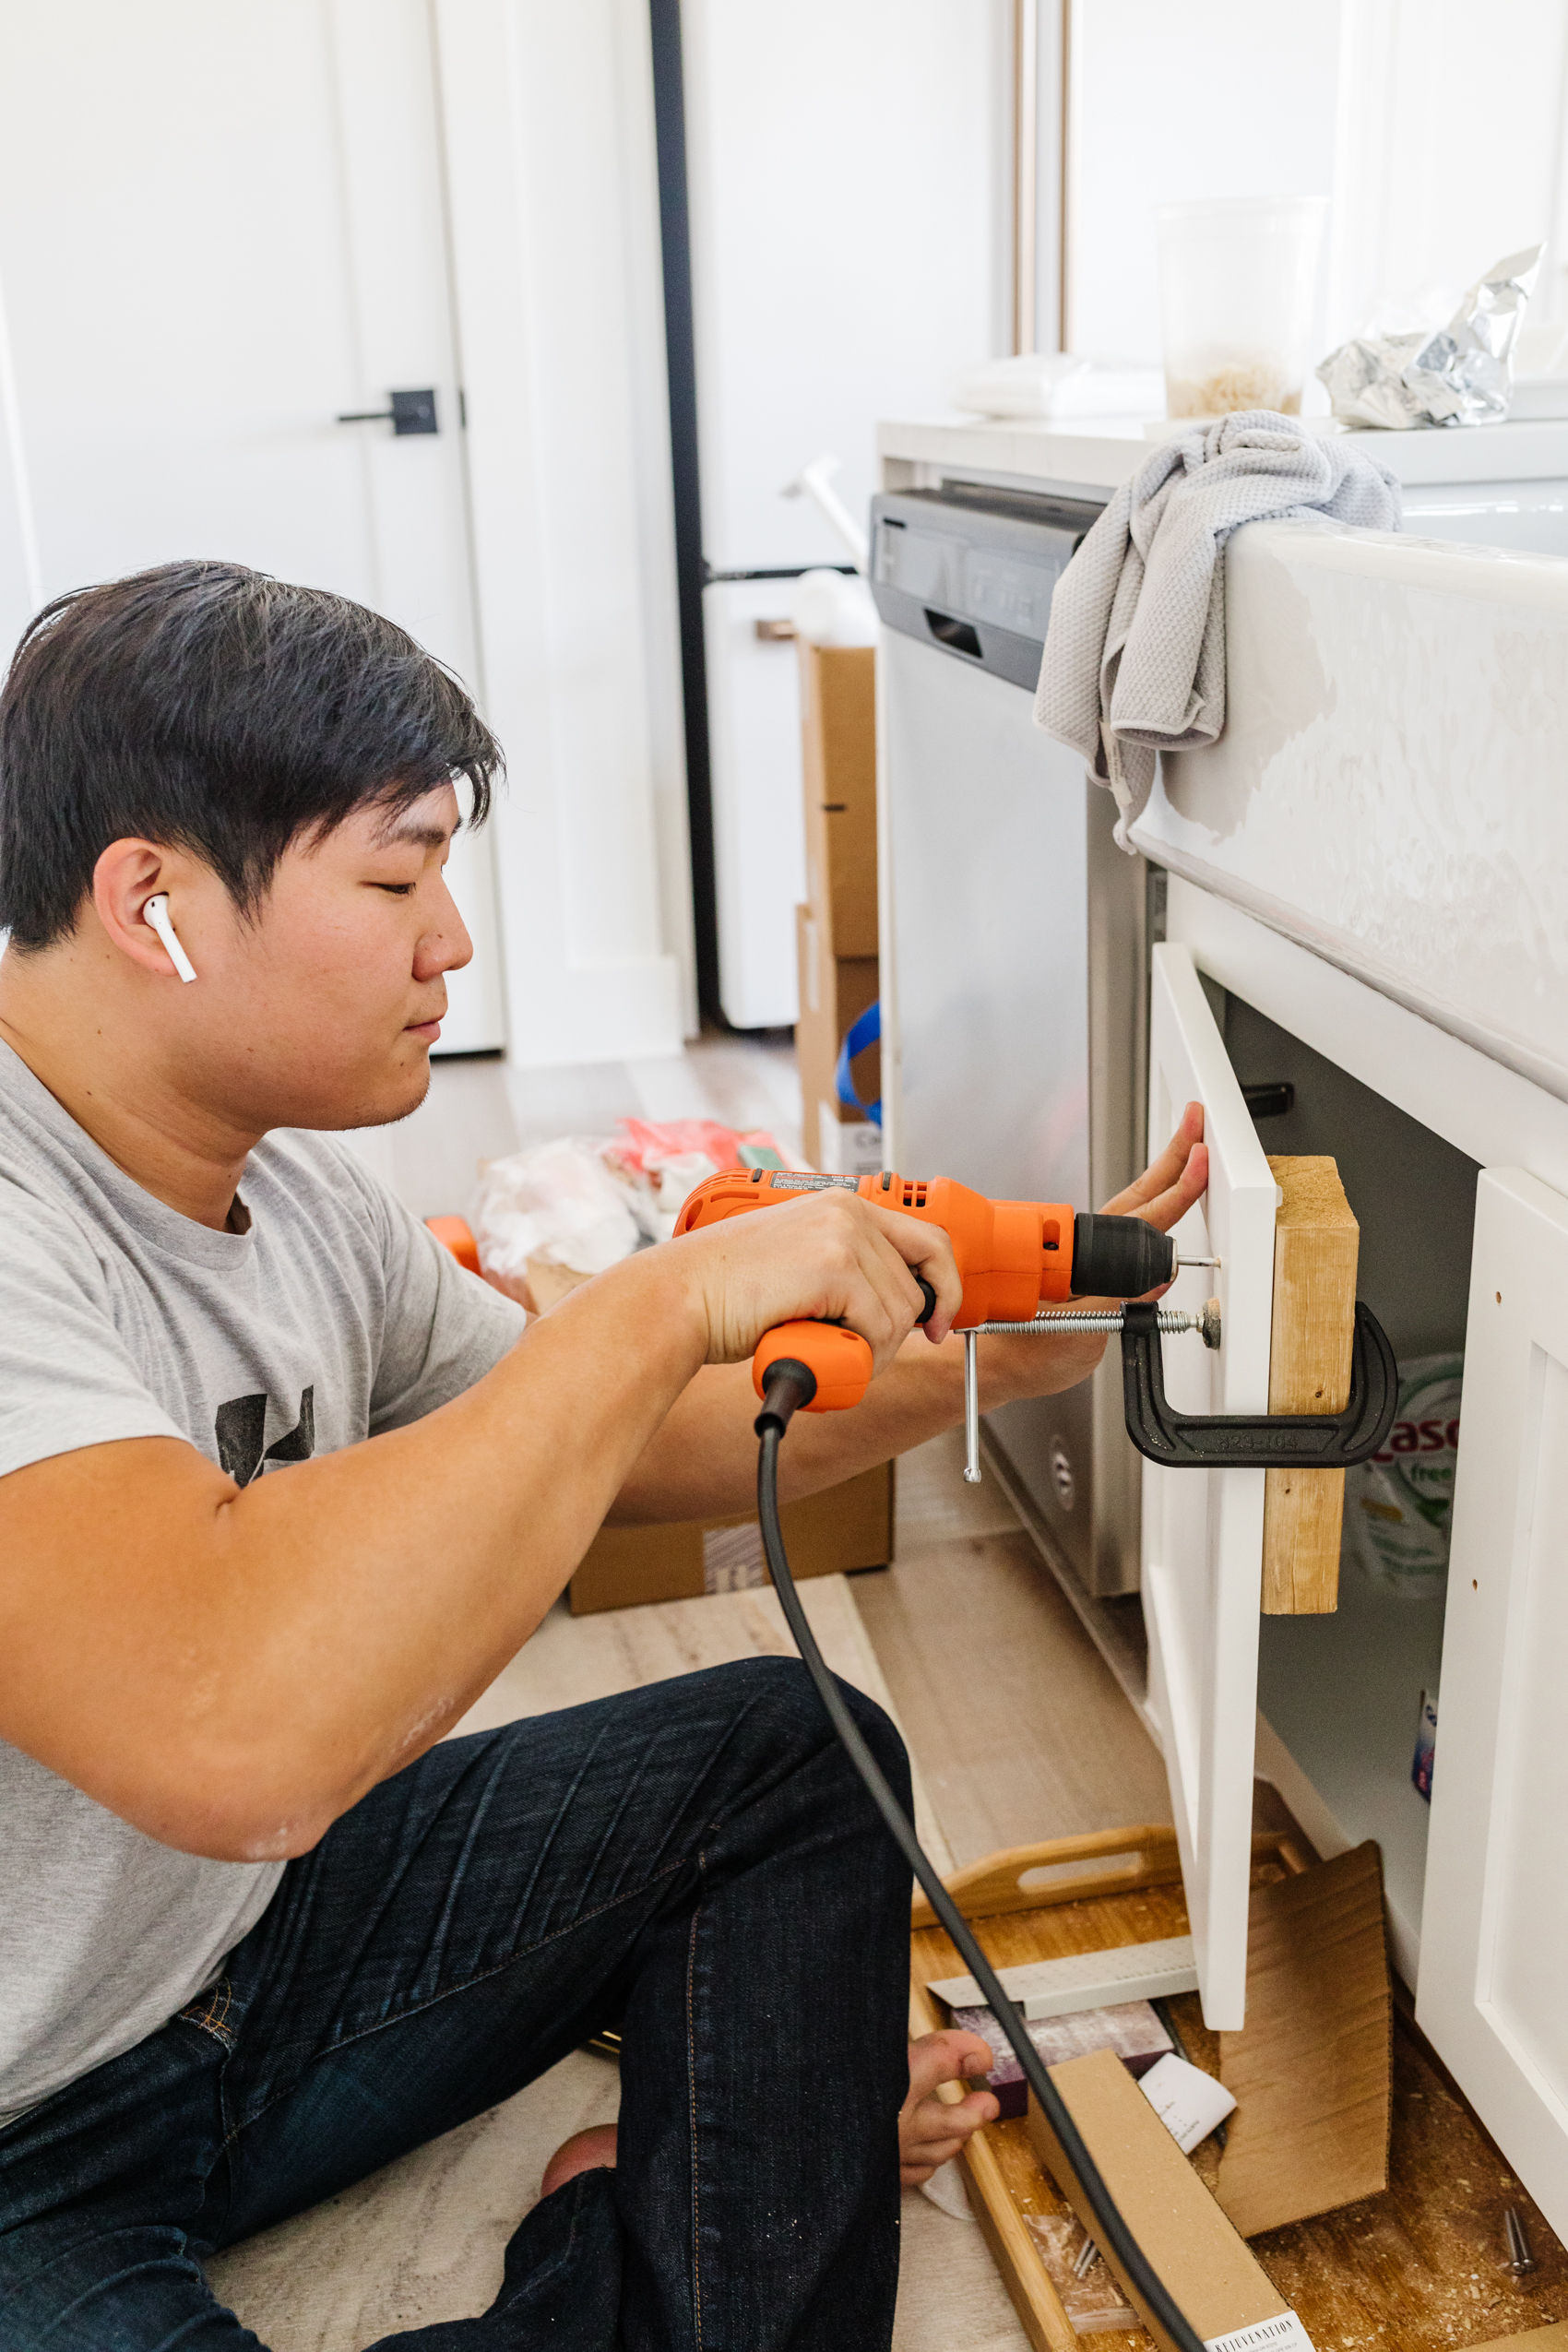
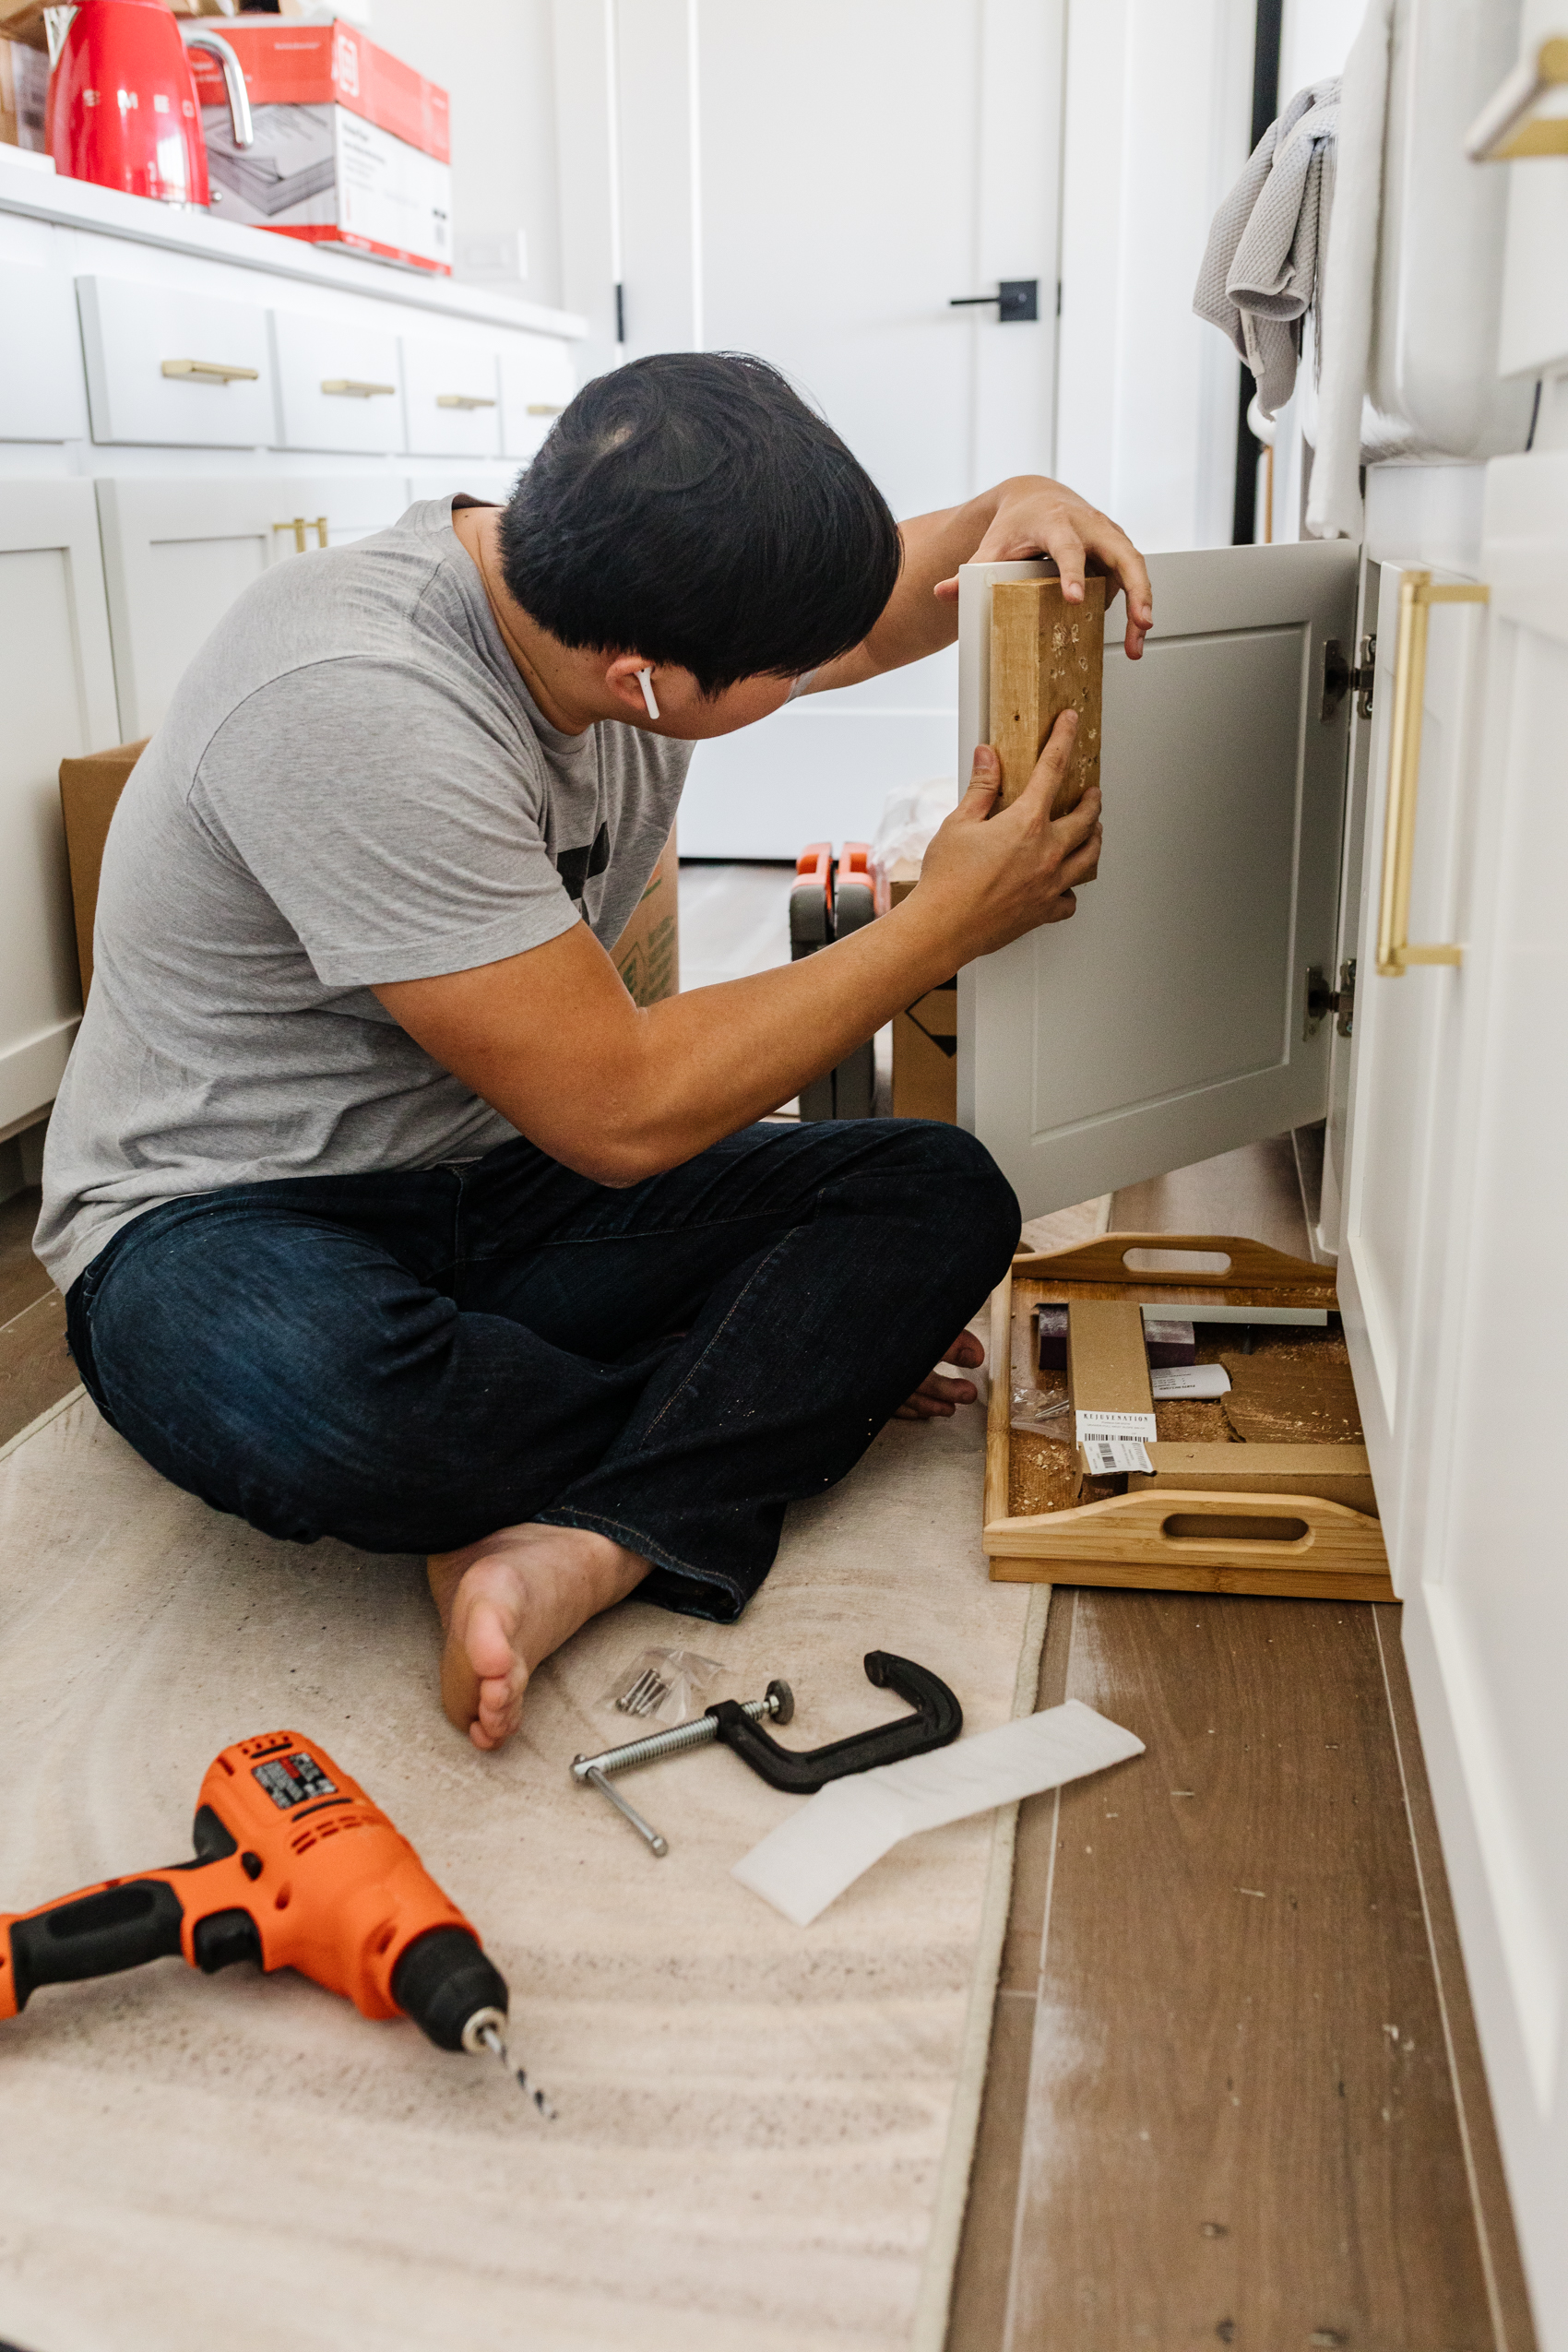
2. Prepare to Drill
I highly recommend having a “practice” place. A powder bathroom or secondary bathroom no one really looks at a lot is great for this. Johnny and I started in our second bathroom and noticed the wood was splintering once the drill went through. Fortunately, we texted our construction manager who said we need to put a block of wood behind where we were drilling to prevent this. This is where the block of wood and clamp comes in handy.
Johnny recommends getting the clamp as close to where you will be drilling as possible. This will be time-consuming. When he was drilling for pulls, he would have to adjust the clamp and piece of wood each time he drilled a hole. That’s twice for each drawer and cabinet. You also will need a piece of cardboard, or two, to put between the piece of wood and your cabinet frame along with where your drill hits. This prevents the drill from putting any marks on your beautiful cabinets once the hole goes through.
3. Don’t Be Afraid
Something I did was check the measurements and level one more time before drilling. At that point, you can drill confidently. The first few holes you drill will be a little slower. I added a small piece of cardboard on the front of the drill because once the drill punches through the door, you’ll jerk forward. The drill will hit the front of the door and sometimes damage the finish. Once you drill about 6 holes and get the hang of it, you’ll move through your doors like a hot knife through butter. Your hardware should come with two sets of nails, a shorter one and longer one. We used the short one for cabinets and longer ones for drawers. You can use a screwdriver or drill to attach it to the hardware. Once you get a few under your belt, you’ll be able to easily install cabinet hardware, almost like a pro!
4. So you’ve made a mistake…now what?
One of the most common mistakes will be the holes you drilled based on the stencil marks might be off by a tiny bit – half a millimeter even. You’ll know when this has happened because the screw to attach the pull or knob won’t catch. You’re likely not off by much, so use the drill to expand the hole. Don’t be afraid to expand the hole by even another half if needed. My trick is to drill from the back and push the end of the drill bit out or in the direction you want and then finish the inside hole straight. Once you attach the pull or knot, it’s unlikely you see anything. It’ll be a tight attachment even with a bigger hole, so no worries there.
5. Not All Drawers Are Equal
Drawers are tricky. Sometimes they look like they are the same size so you whip your template out, mark your hole, get your drill going only to realize you are not centered. Ouch. I highly recommend you measure every single drawer, even if you think it’s the same size. We had a little mistep at our friends’ house when we assumed these drawers in a row were the same size. I’m pretty sure they were off by a marginal number but it really screwed us over. Again, measure twice, cut once!
Nordstrom Anniversary Sale 2021 Preview Picks
TOPS & SWEATERS

BOTTOMS
BLAZERS & COATS
ACTIVE
ACCESSORIES & SHOES
BEAUTY