This DIY Board and Batten Wall & Paint Project is in partnership with Home Depot
I’m blown away thinking about how much Johnny and I learned doing this DIY project together. When we built this home, we knew it was a blank canvas and that’s what we wanted. All of the walls are white so we can add our own touches, whether that’s with furniture or something a little more permanent like this project. We’re excited to share how we did our DIY board and batten wall along with what we learned along the way!
My family has been shopping at Home Depot for as long as I can remember. When my parents bought their first home in this country after starting over, they went to Home Depot for everything from grout sealer to the roses my Mom planted with so much joy. My family outgrew that house and when we built and moved into our next house, back to Home Depot we went. It’s where my Dad bought a lawnmower, tools to fix the kitchen faucet when it broke… and I went with him on most of those trips. I’m so excited to have the opportunity to partner with them on this DIY project and bring this crazy vision to life!
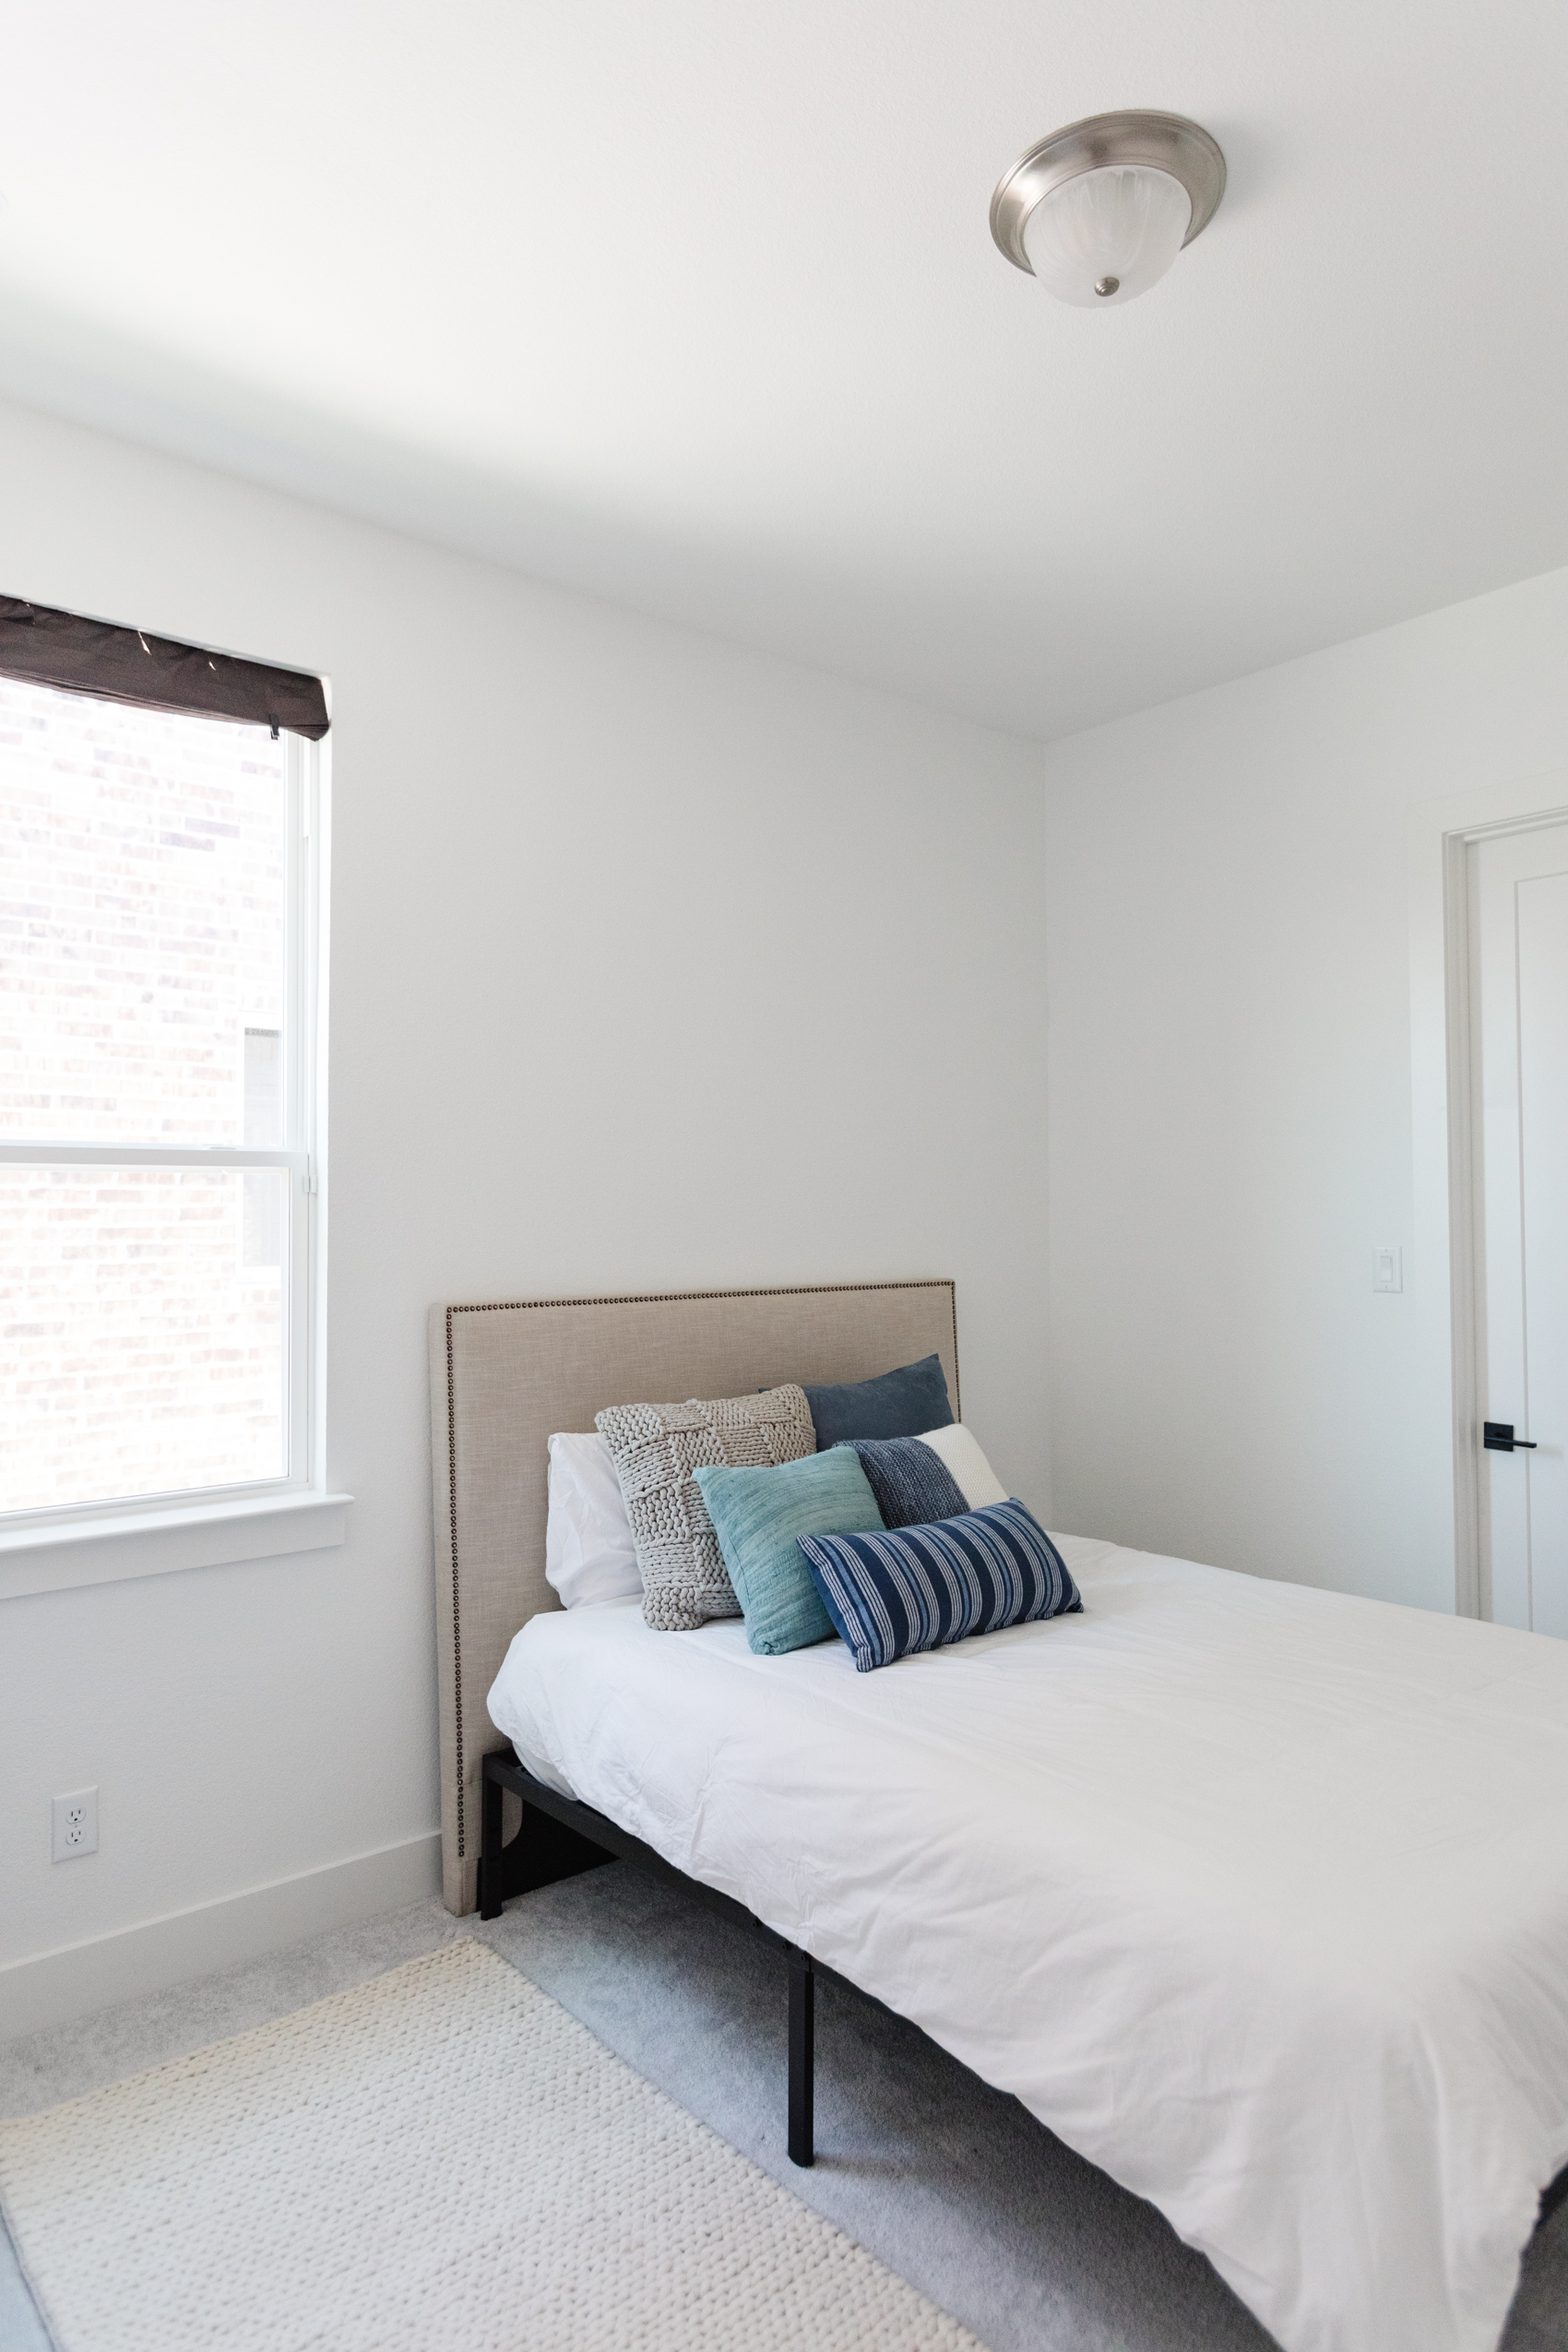
The Before…
Our guest bedroom, also known as my Dad’s room, started out as a blank canvas. The more natural wall to put a bed on has an off-centered window. When we first moved in, we kind of threw the bed in there just to make sure my Dad had a comfortable place to sleep. The room always felt off to us.
Home Depot reached out to us for a DIY paint project. Leave it to me and Johnny to be overly ambitious and decide to turn that into a board and batten project and then a wallpaper project. When we decided to do board and batten, putting it on the wall with the off-centered window felt like a disservice. The window would take up a lot of the board and batten design. Plus, this wall has two electrical outlets and we were not about to cut out two outlets as newbies.
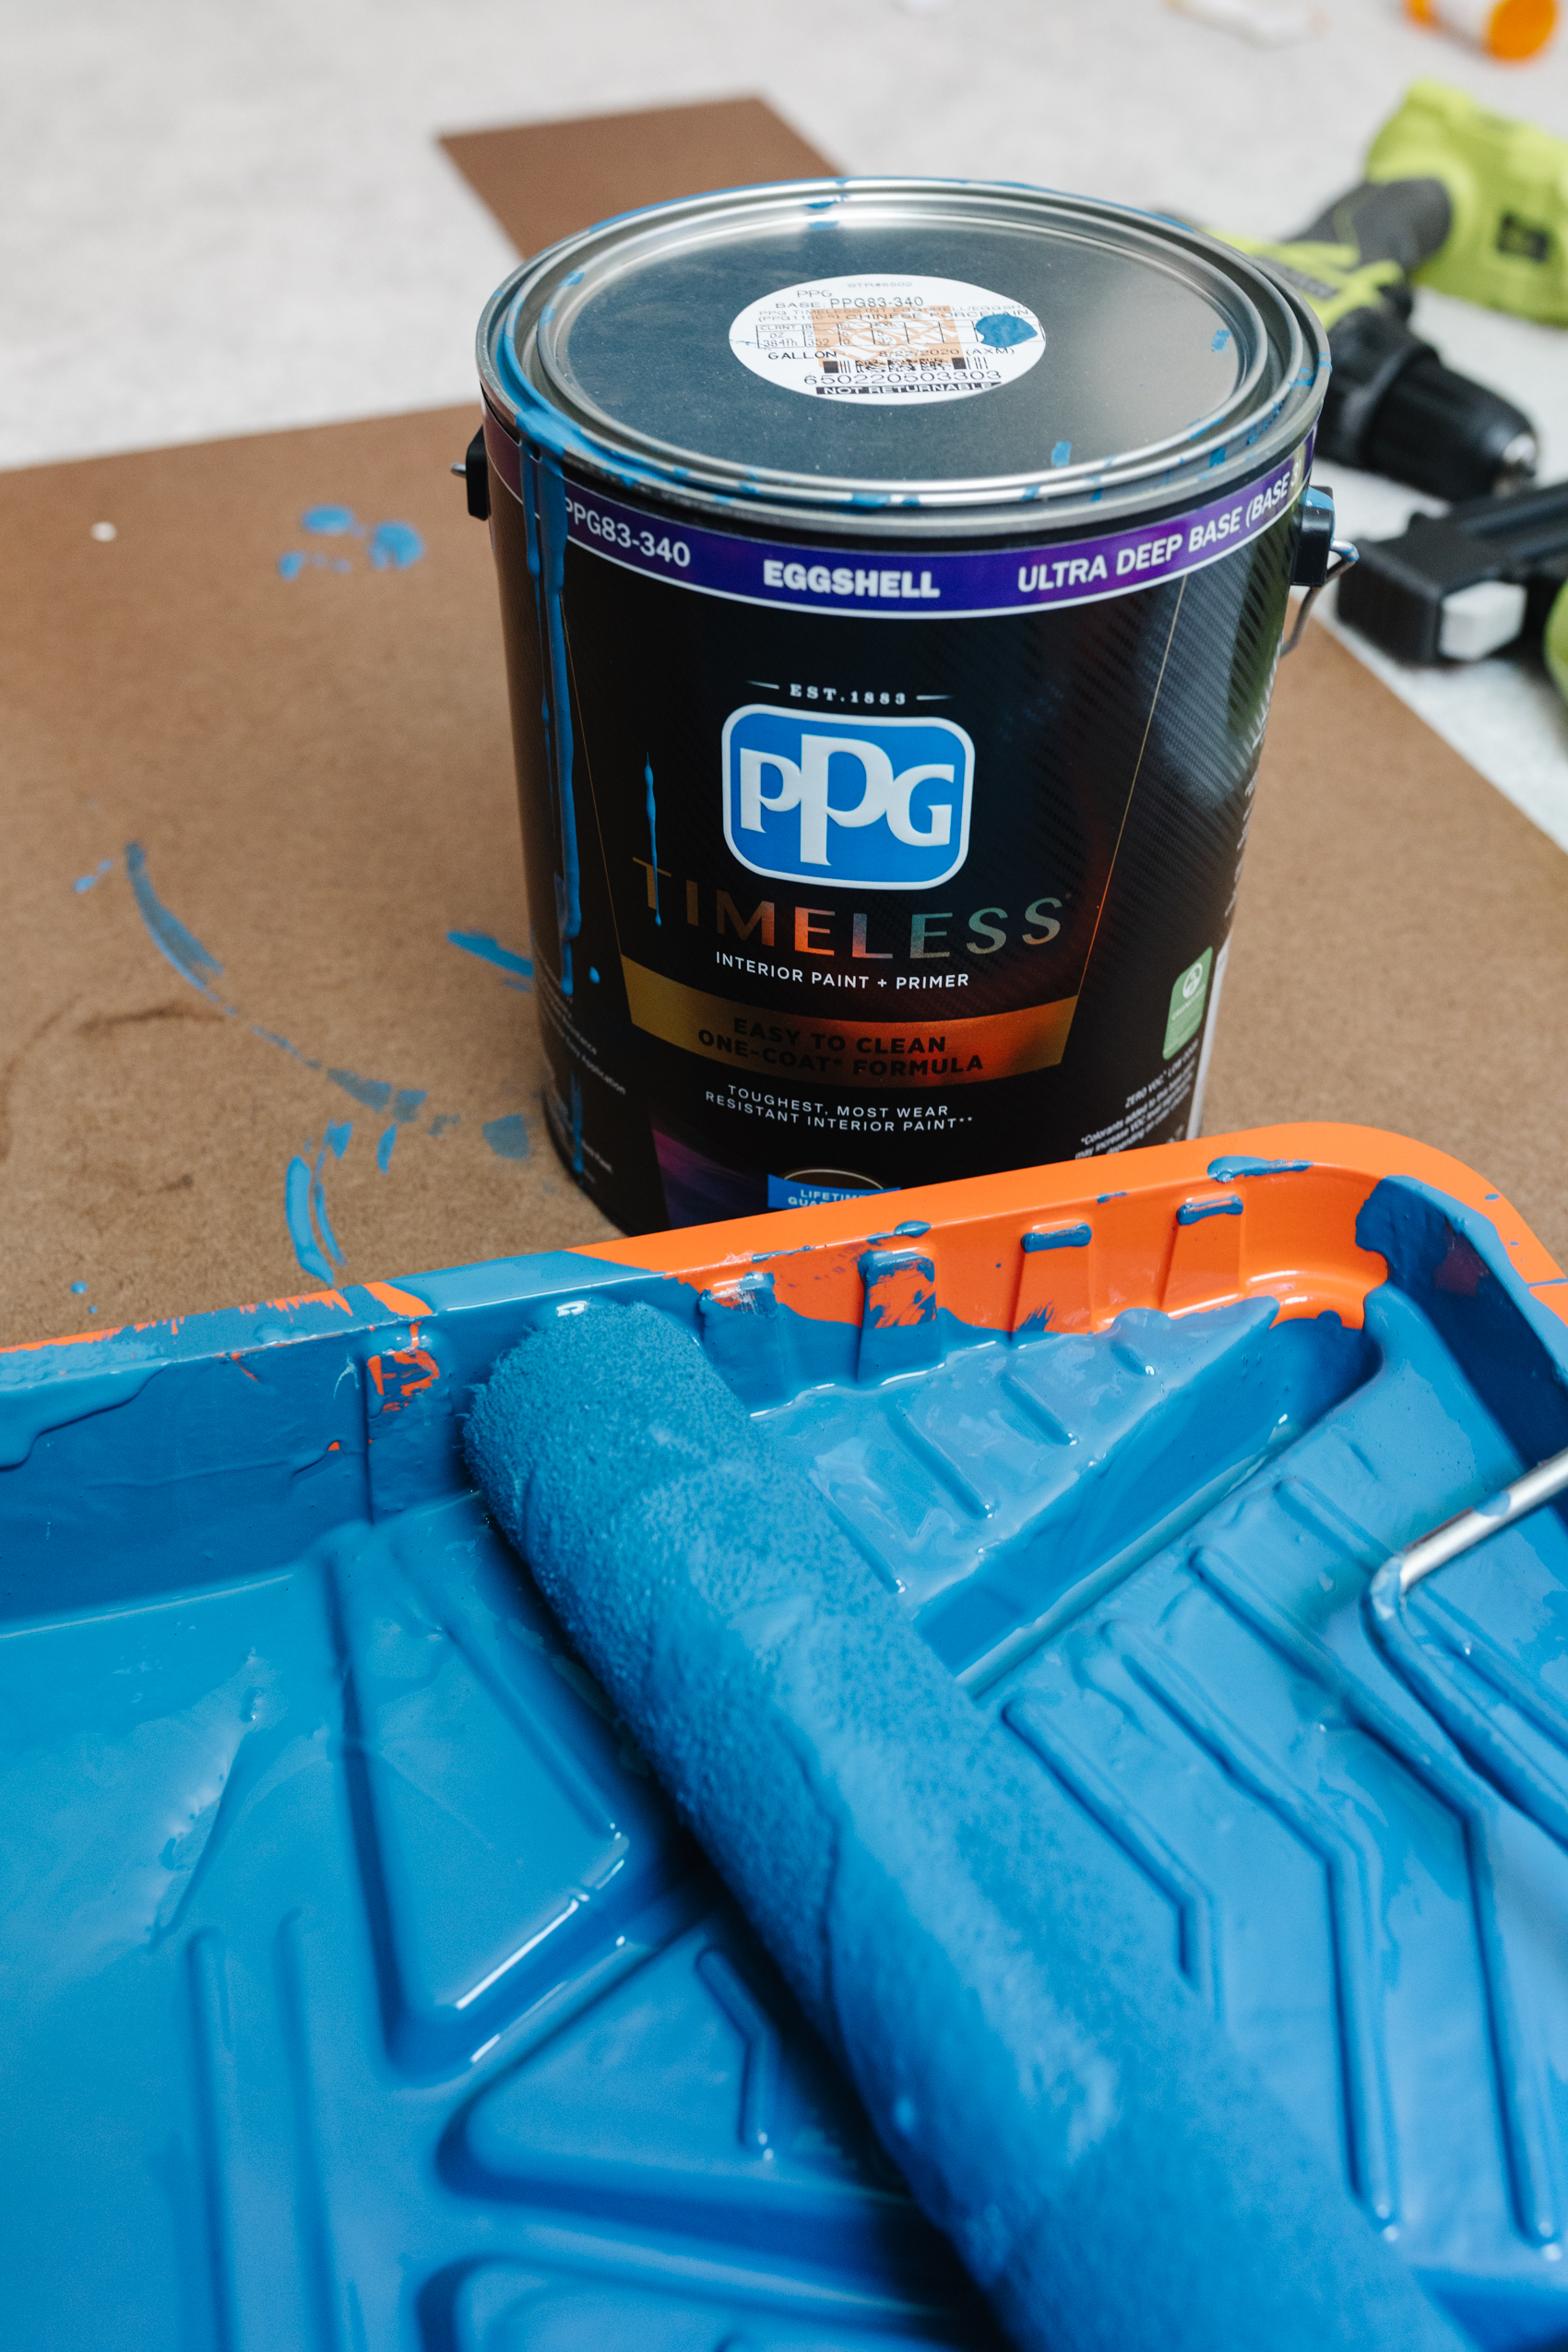
One reason we gravitated toward a board and batten wall is it’s an affordable way to elevate a space! As long as you’re willing to learn, maybe make a few mistakes and put some effort in, you can do it, too! PPG’s Color of the Year, Chinese Porcelain is a vibrant blue we felt would brighten the room and give it some personality. Also, it would be perfect with the wallpaper we chose.
Preparing for the Project
Even before going to get your materials, there are a couple of things that will get things rolling.
- Measure your space – we had a blueprint of our house, but found the real measurements were actually 5 inches short from wall to wall. Height was exact. As they say, measure twice, cut once.
- Decide on the height of your board and batten project. For us, we originally decided to go 60” since that would give us some clearance over most headboards to appreciate the accent wall. This height would also give us a good balance between the board and batten and the accent wallpaper.
- Decide on the number of spaces you’d like and the spacing between battens. Johnny spent a morning on Sketchup to visualize what it would look like. If you want to do great work, measure so that your first and last batten are flush with the wall. Something that happens with most first-timers is they start on one side and then don’t have the exact measurements to finish properly.
- The calculation I used was this:
- First: Wall length (173.5”) – number of battens (9) x width of battens (3”) = 146.5”
- Second: 146.5” / number of spaces (8) = 18.3”. This gives you the measurement between the battens so you can start from one end and finish perfectly on the other end.
- (Optional) – Get some sample pieces at your measurements and see how you like them. What you’ll find is a lot of what you think works visually may change once you get some materials. For example, we originally thought we’d use 2” battens and ended up with 3” battens. We also started with 10 spaces and narrowing it down to 8 spaces based on how it looked in person.
- If you don’t need hardboards or can smooth out your walls first, do that. It’ll make the project go much quicker. If I had to do it over again, I’d have cut my hardboard exactly to my measurements so the battens could hide the seams. Unfortunately, we cut a few things ahead of time and decided to use the materials anyways. For us, that meant cleaning up seams later, which took a lot of extra time and work.
- Once you have all this decided on, you’re well on your way.
At the beginning of the project, we went to the University of Youtube to get a feel for how everyone else did their board and batten. As we gathered all the materials needed, we found that multiple trips to Home Depot would be needed as we learned each step. For example, Johnny went the “economic” route and got a handsaw. After cutting one piece of MDF with a hand saw, Johnny immediately phoned a neighbor for a motorized saw. There was a jigsaw handy in the neighborhood, but in the future, the ideal saw is a miter saw, which will allow you to make exact straight cuts.
Board & Batten DIY
Tools Needed:
- MDF (Medium Density Fiberboard) – MDF is great for decorative projects. Get the size you want. We used 1×3 for the batten and 1×6 to match the existing floorboard.
- Hardboard Tempered Panel – Although, if we would do this again, we’d rather smooth the wall with joint compound.
- Jigsaw or Mitre Saw (optional) – you can get many of your pieces cut at Home Depot with your exact measurements.
- Nail gun – we used 2-inch nails.
- Prybar or Chisel and hammer – if you need to remove any existing floorboard, this is a must.
- Joint Compound
- Primer
- Paint – we decided on an eggshell finish for easy sheen and maintenance afterward.
- Caulk
- Paint Roller and matching paint holder- We used lower quality paint rollers for primer to get everything into the nooks and crannies and then used better-best rollers for the finishing color. We didn’t get to try the microfiber rollers, which are supposed to give the most polished finish.
- Drywall Tape
- Measuring Tape
- Laser Level
- Dropcloth or tarp – protect your floors and surfaces from paint and other materials.
- Stud finder
- Spreader
- Joint tape – paper or fiberglass mesh.
- High grit sandpaper
One thing we did first was smooth out the top half of the wall we knew we planned to wallpaper. The only reason we did it first was Johnny felt like it. If we did it all over again, we’d have just done the whole wall. Also, some joint compounds are “fresher” than others. We got two bottles that were fairly hard to apply, which caused a lot of frustration. We bought another bottle for use later and celebrated how easy it was to apply. Smoothing out the entire wall ahead of time, would’ve saved us the need to remove the floorboard and add another 12” of hardboard that adding one long seam to cover.
One silver lining is that we are a lot more comfortable removing finishes like our floorboard and putting them back. Also, we’re now relative experts in closing seams and fixing drywall holes. That skill always seemed like magic when we watched contractors do it. Who would have thought?
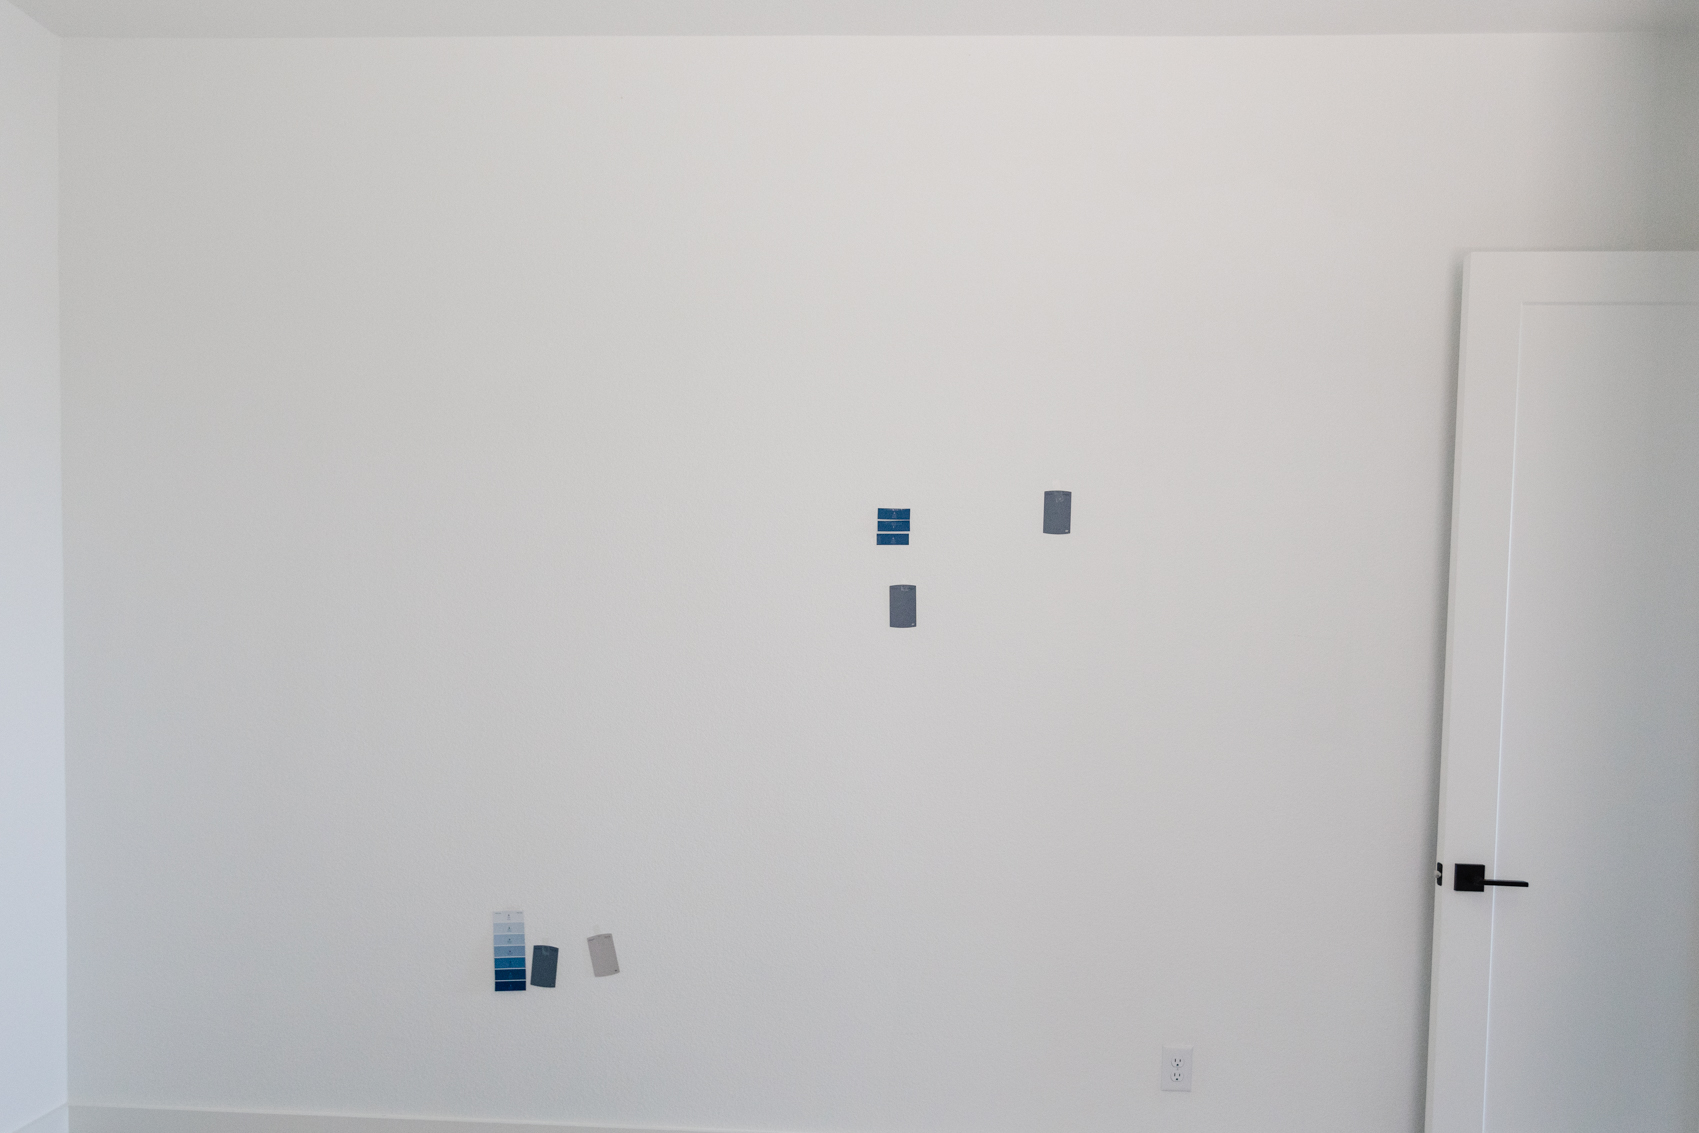
Once you have the materials, start marking your room and paint some swatches
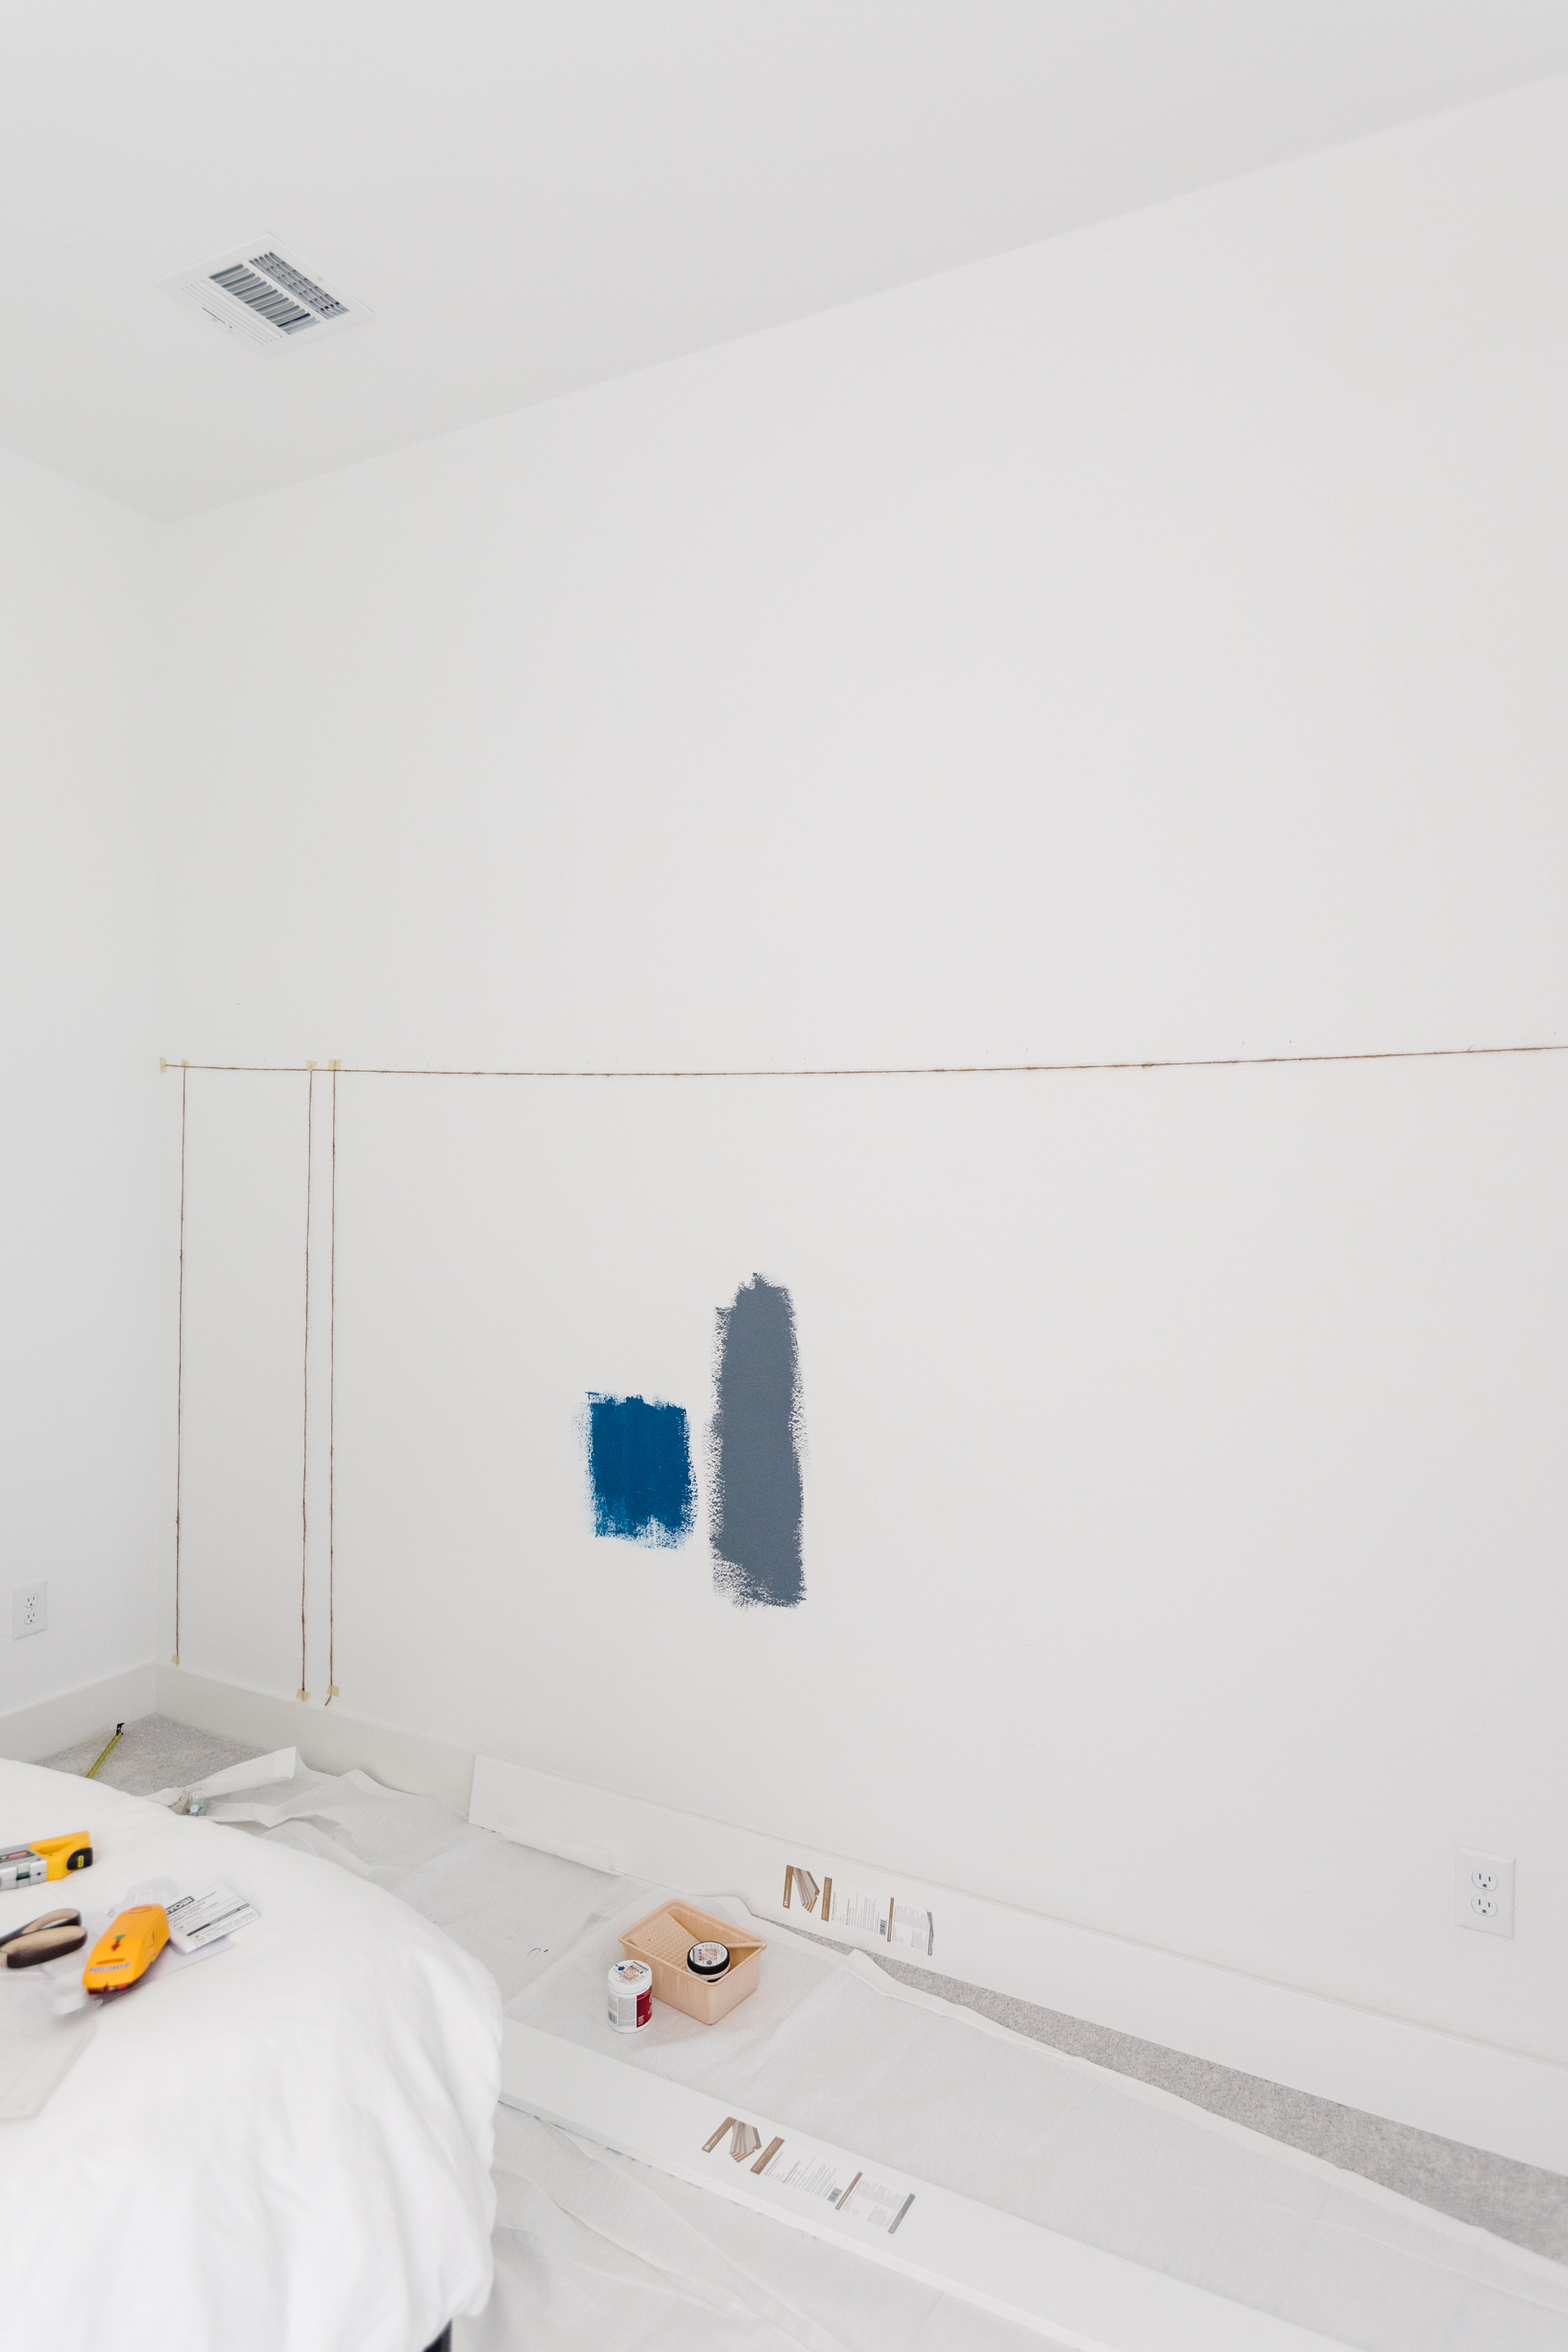
So you have your materials and you’re revving to start. Start by painting a few swatches on your existing wall. You’ll be covering it soon, so don’t worry. It will help you see how the color and finishes look in the room with the light throughout the day and how it looks at night with your light. Our Chinese Porcelain blue changes with all different lighting situations and we love it.
You can start outlining your project using a pencil, laser level or level, and measuring tape. This way you can quickly see where your board and batten will be. We used string originally, but found it quickly to be cumbersome and generally helpful.

Start the board and batten.
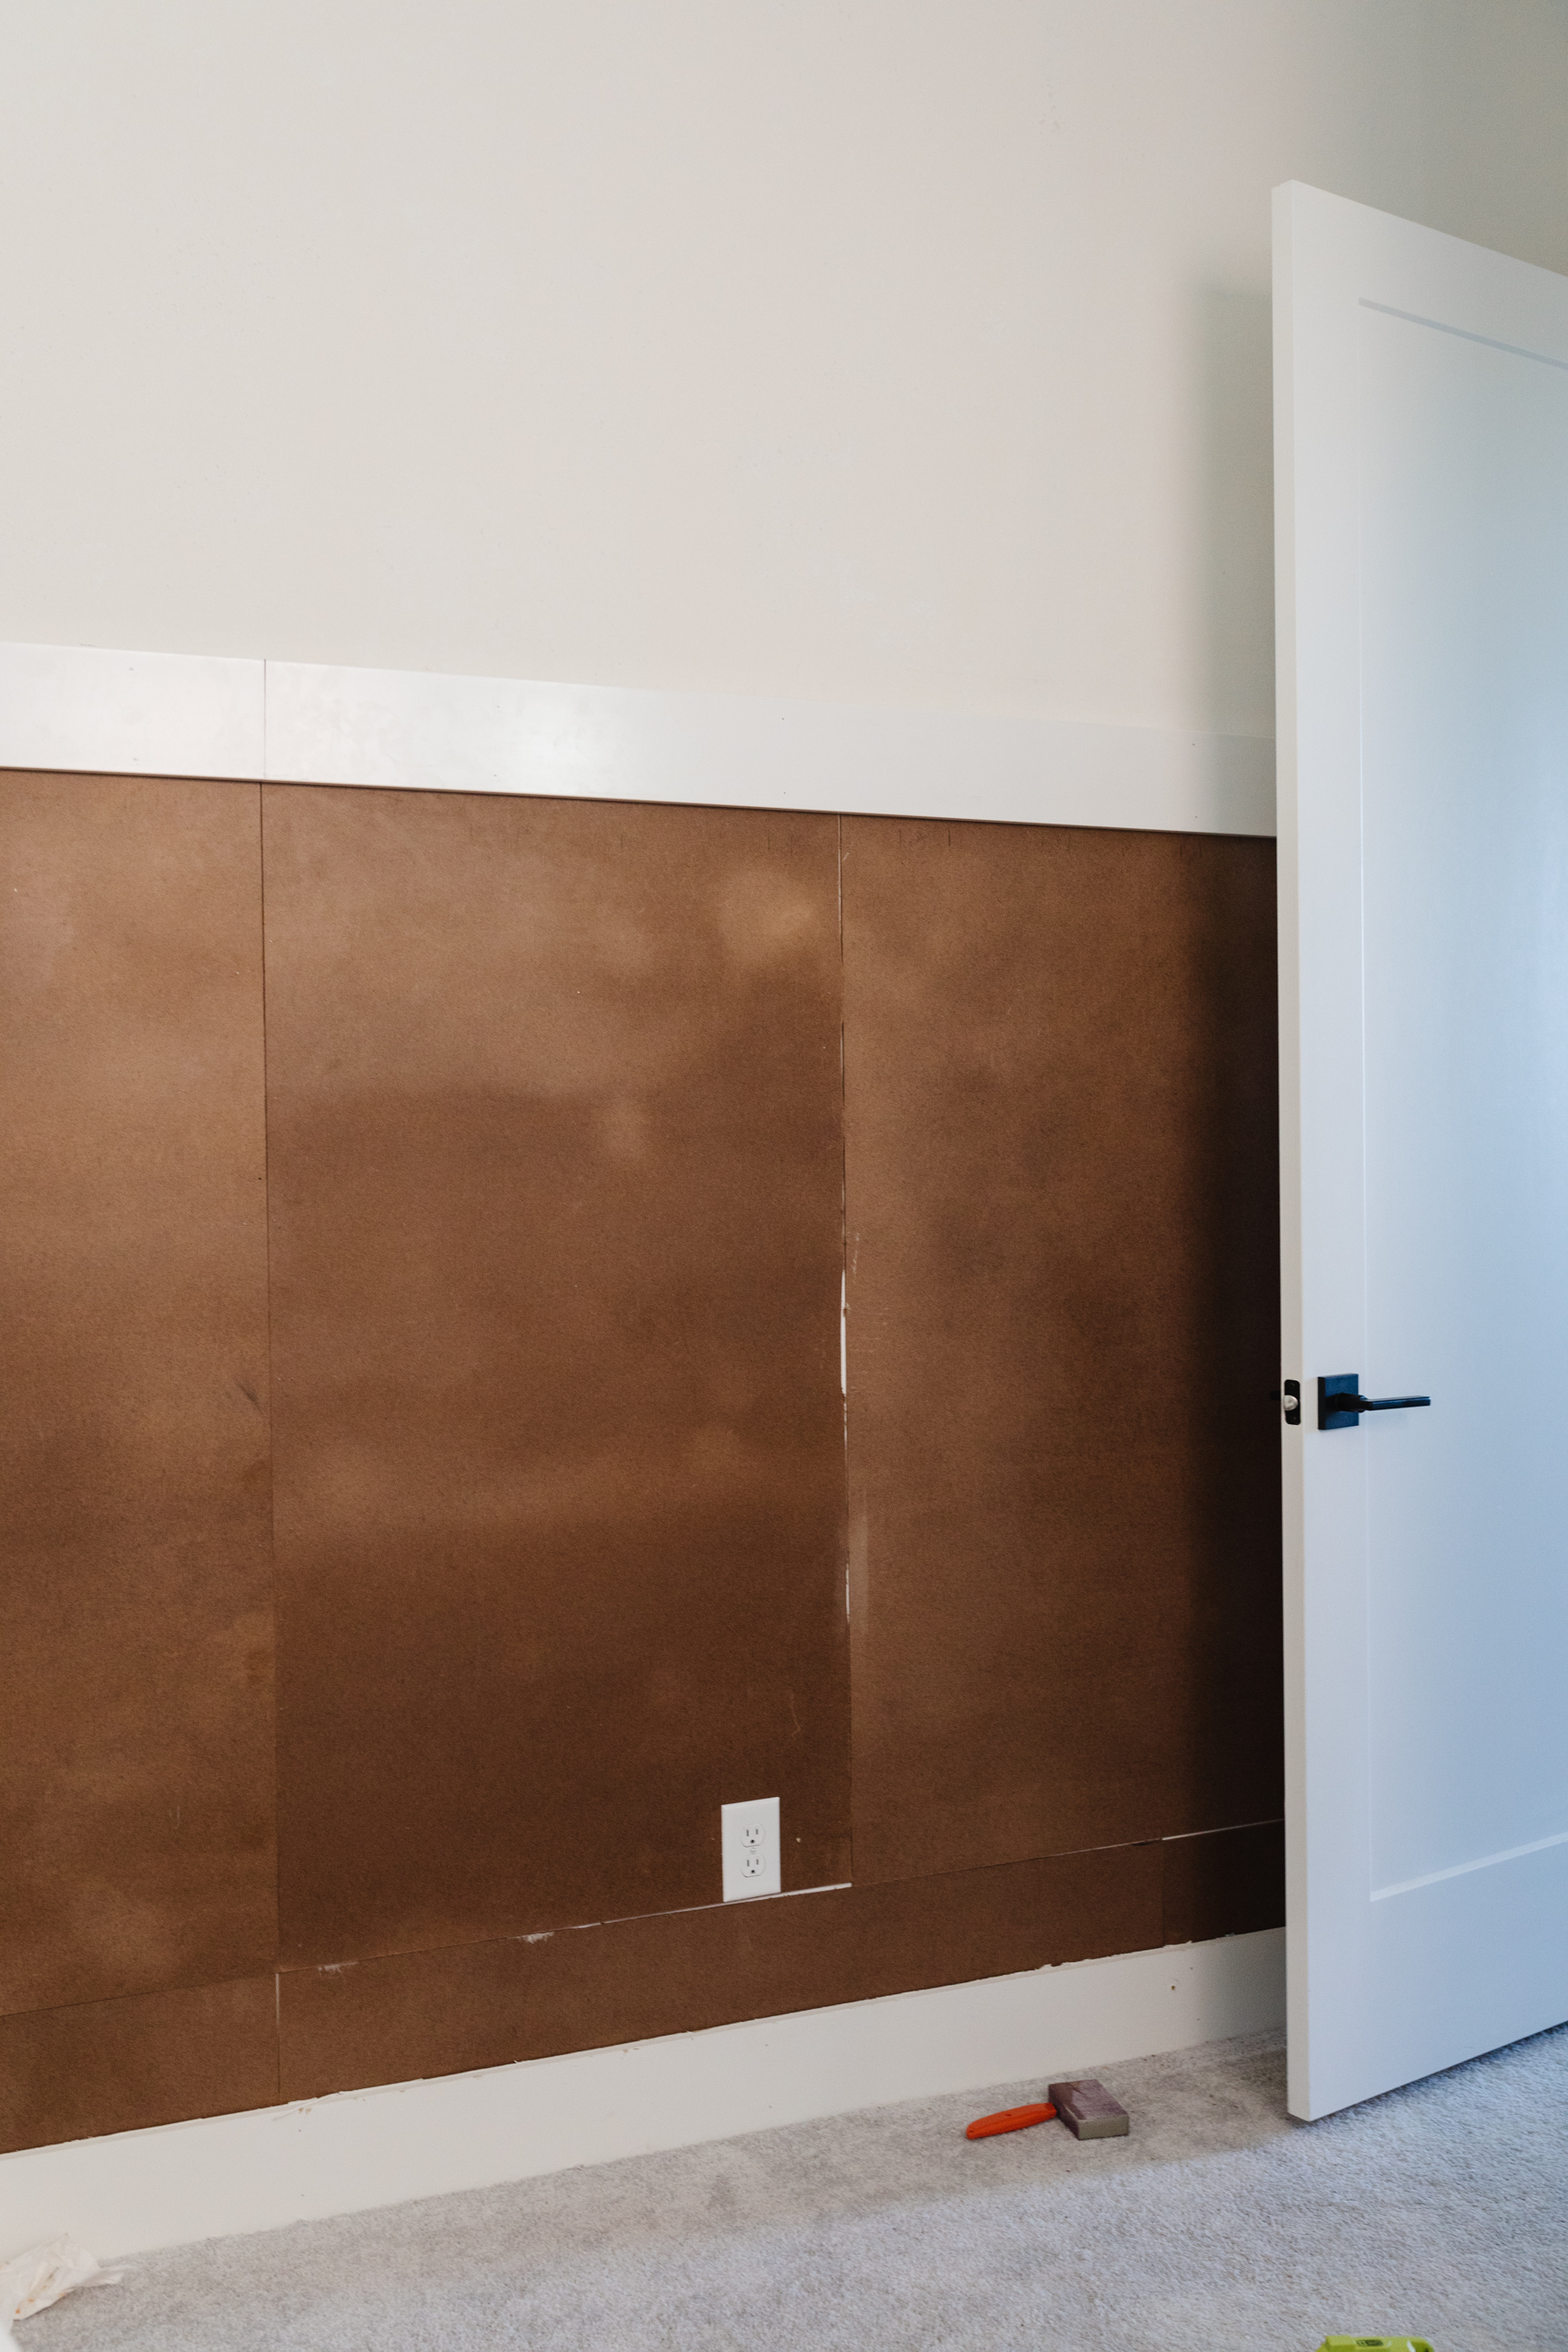
For us, we used hardboards to give ourselves a smooth surface. What we didn’t account for originally was the ?” depth. That meant if we didn’t remove the floorboard and put hardboards behind it, the entire wall would pop out ?”. If you have textured walls like us, I’d suggest just smoothing out the wall with joint compound. This might take 2+ layers of additional primer down the line, but it’d keep you from removing and re-attaching your floorboard.
Once you have an even surface to work with, attach your top board. Because of a slight mistake, we brought up the board 1” higher. This is where having our battens cut at home helps since we could make any slight adjustments. You can always cut more, but you can’t get material back.
Once you have the top board mounted with some nails, you’ll feel extremely accomplished. We did anyway. We used a stud finder to attach the top board to studs for stronger support. This is especially important if you plan to put a ledge or shallow shelf to finish.
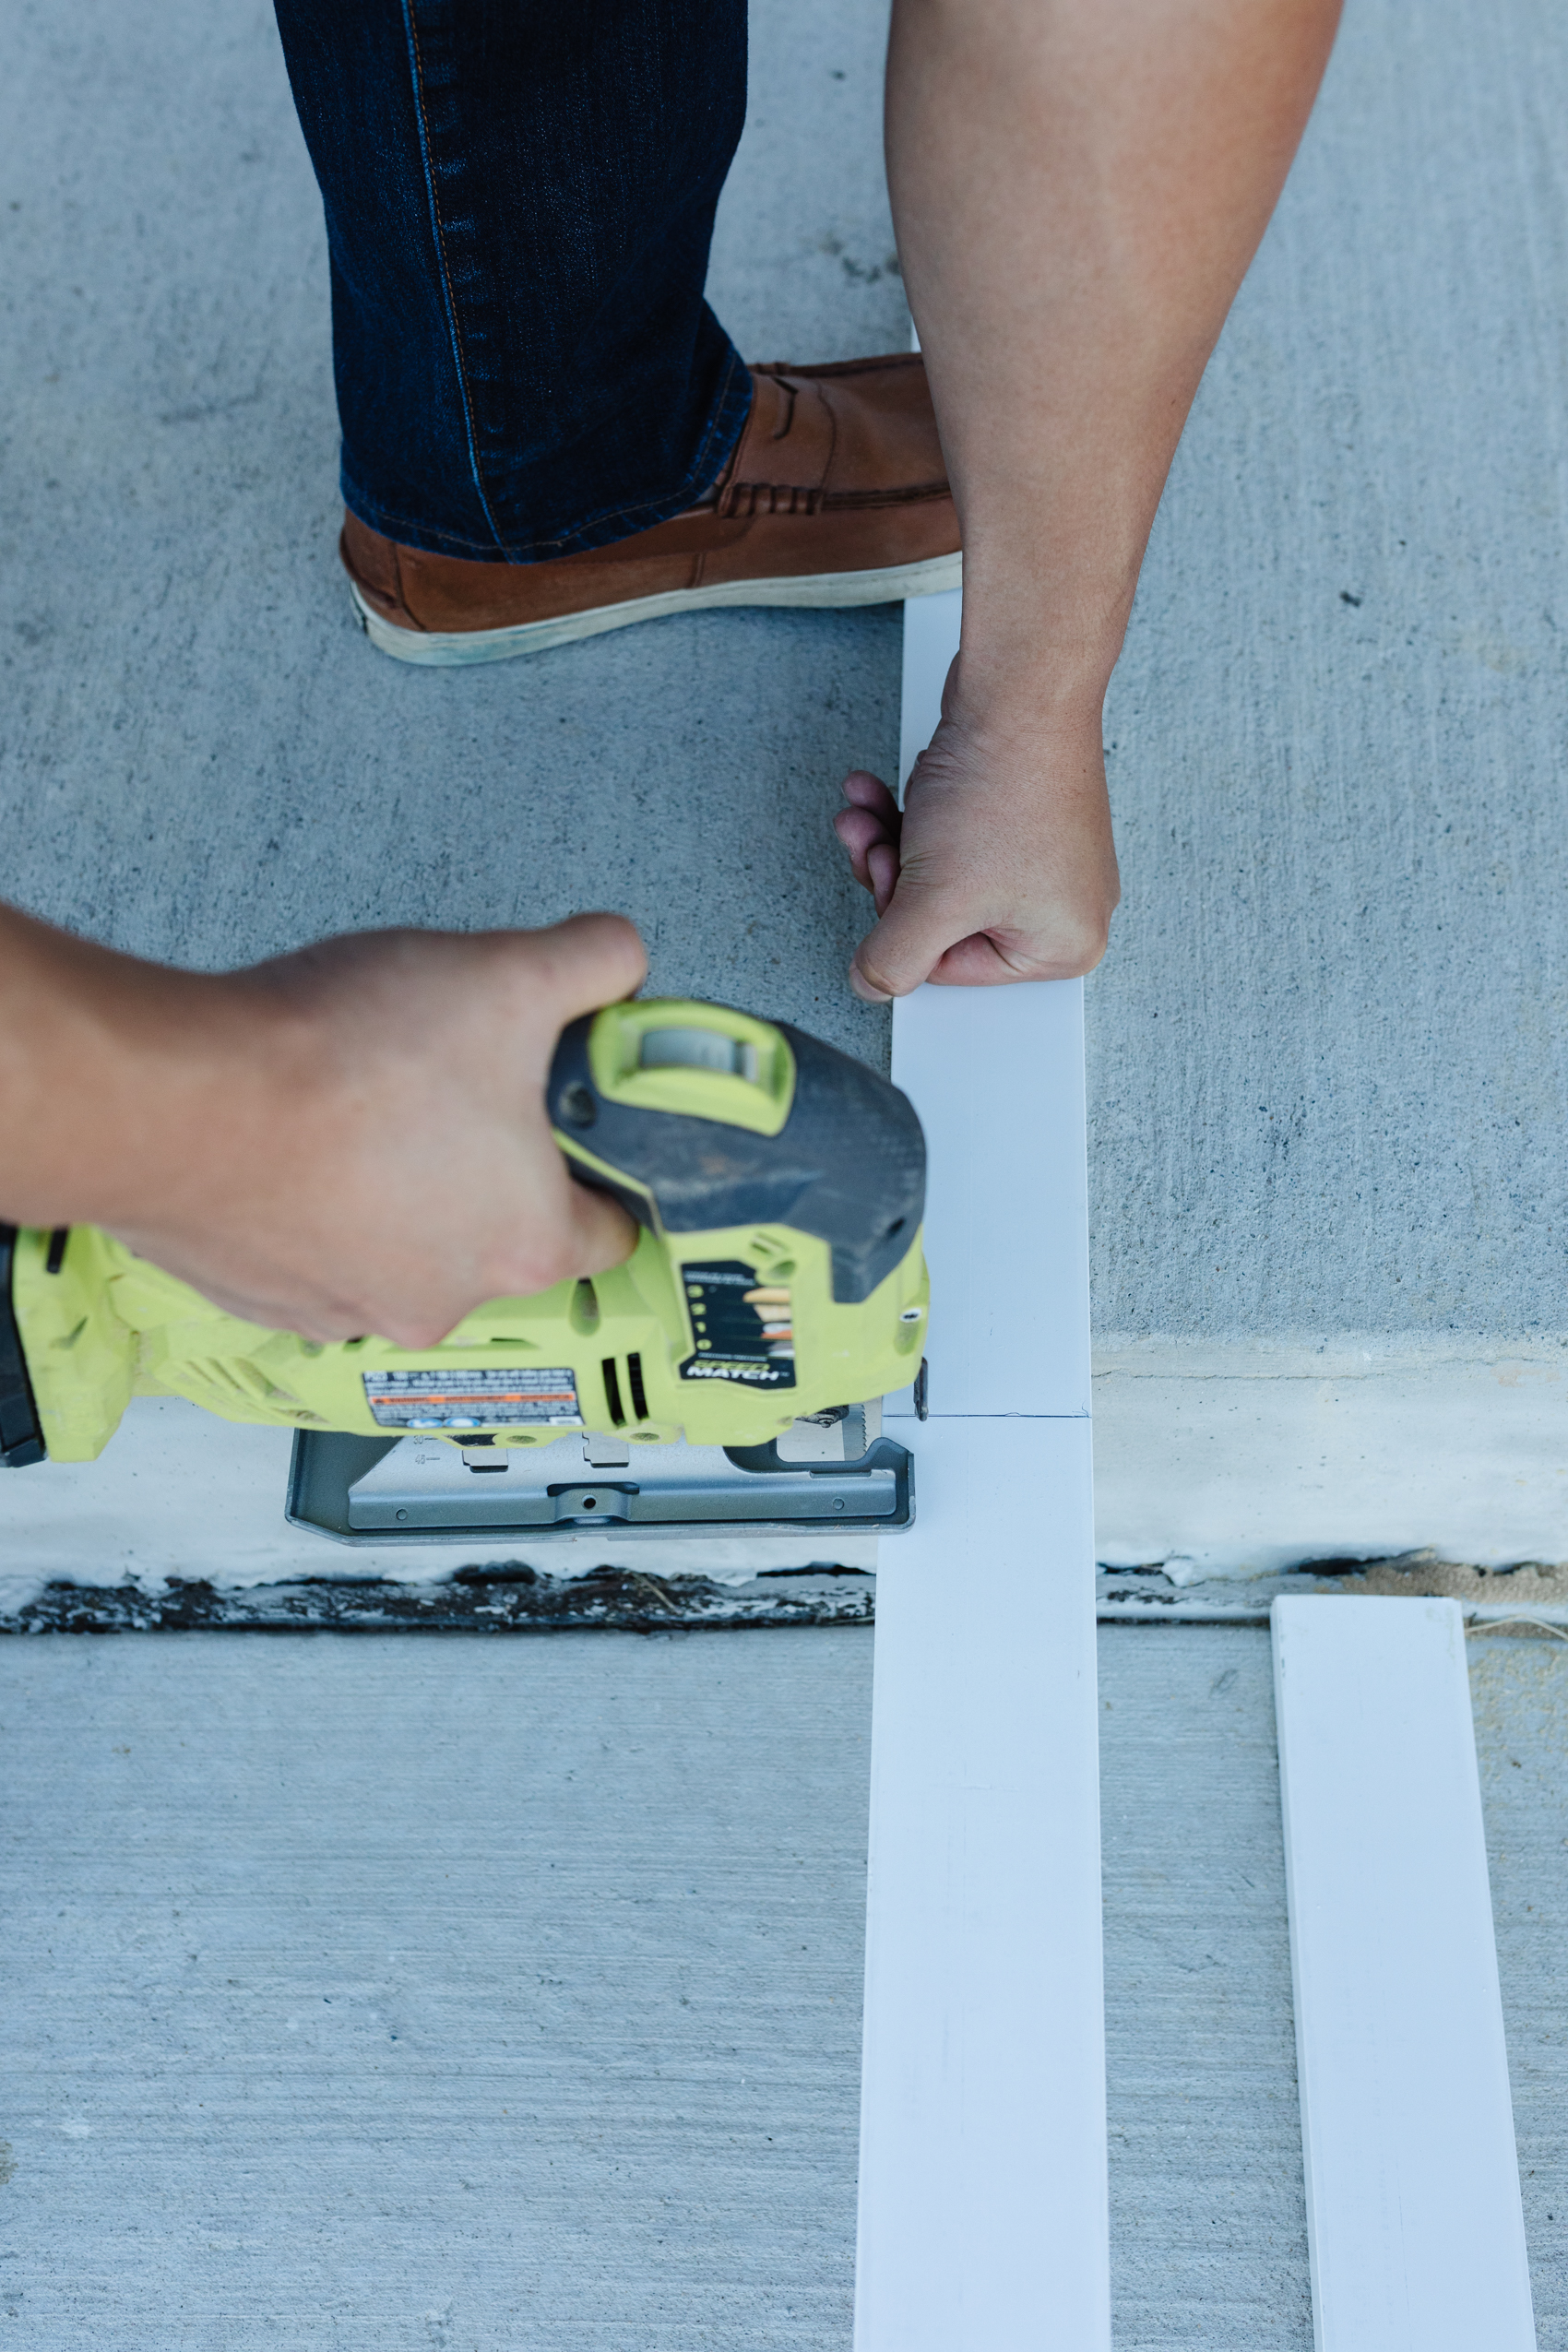
After this, things move fast. We cut all our battens and using our penciled in marks put them in the right place from end-to-end. Big chef’s kiss when the last batten fit flush to the end of the wall – exactly to measurement. YAY!
One thing to note is you can cut your battens an extra millimeter longer. When you put it in, it’ll warp outwards. It’ll feel wrong at first, but when you nail it to the wall, it’ll actually be more flush and tight. We had a few cuts that were a millimeter short and some that were long. I much prefer the ones that fit flush.
You’ll need to finish any nail holes, so while making sure everything is secure, keep in mind you’ll need to go over any nail holes with spackle. I only used 3 nails per batten since they’re decorative.
Finishing the wall
This is where you’ll thank yourself for making perfect cuts or hiding any seams behind your board and batten.
Take out your fiberglass tape and start covering your seams with this fiberglass mesh tape. This will allow your wall to shift here and there with the foundation without showing any cracking. We almost forgot about it until talking to a very handy friend the night before starting.
We looked up a couple of videos on this. There’s a lot of contractor videos who argue for using paper because it actually provides more tensile strength in all directions and provides better finishes. While that’s true, we opted for the easier to install mesh tape. The tape has adhesive built-in whereas the paper needs to be covered in a joint compound or spackle and really soaked in. It’ll definitely give you a better finish if you’re willing to learn.
We had about 4-5 large seams to cover, so once the tape was installed we applied one layer of joint compound using our 2” spreader. I’d suggest a 6” spreader so you have a clean application across the hardboard seams and the seams between the board and batten. The first layer is really to get the mesh tape attached to the wall and do the initial closing of the seams. After we applied the first layer we waited 12-24 hours to sand smooth. Then, we did a second application. Another 12-24 hrs and we smoothed it out as much as we could.
After, you can start the joyous process of caulking. Line a small bead along all four sides of the spaces and the top board. I caulked one space at the time and then smoothed it out with a caulk tool we purchased, but this can be done with a wet finger.
This was relatively easy, but messy since the caulk does not want to come off my hands with soap and water. I used rubbing alcohol to get it off my hands after we finished everything.
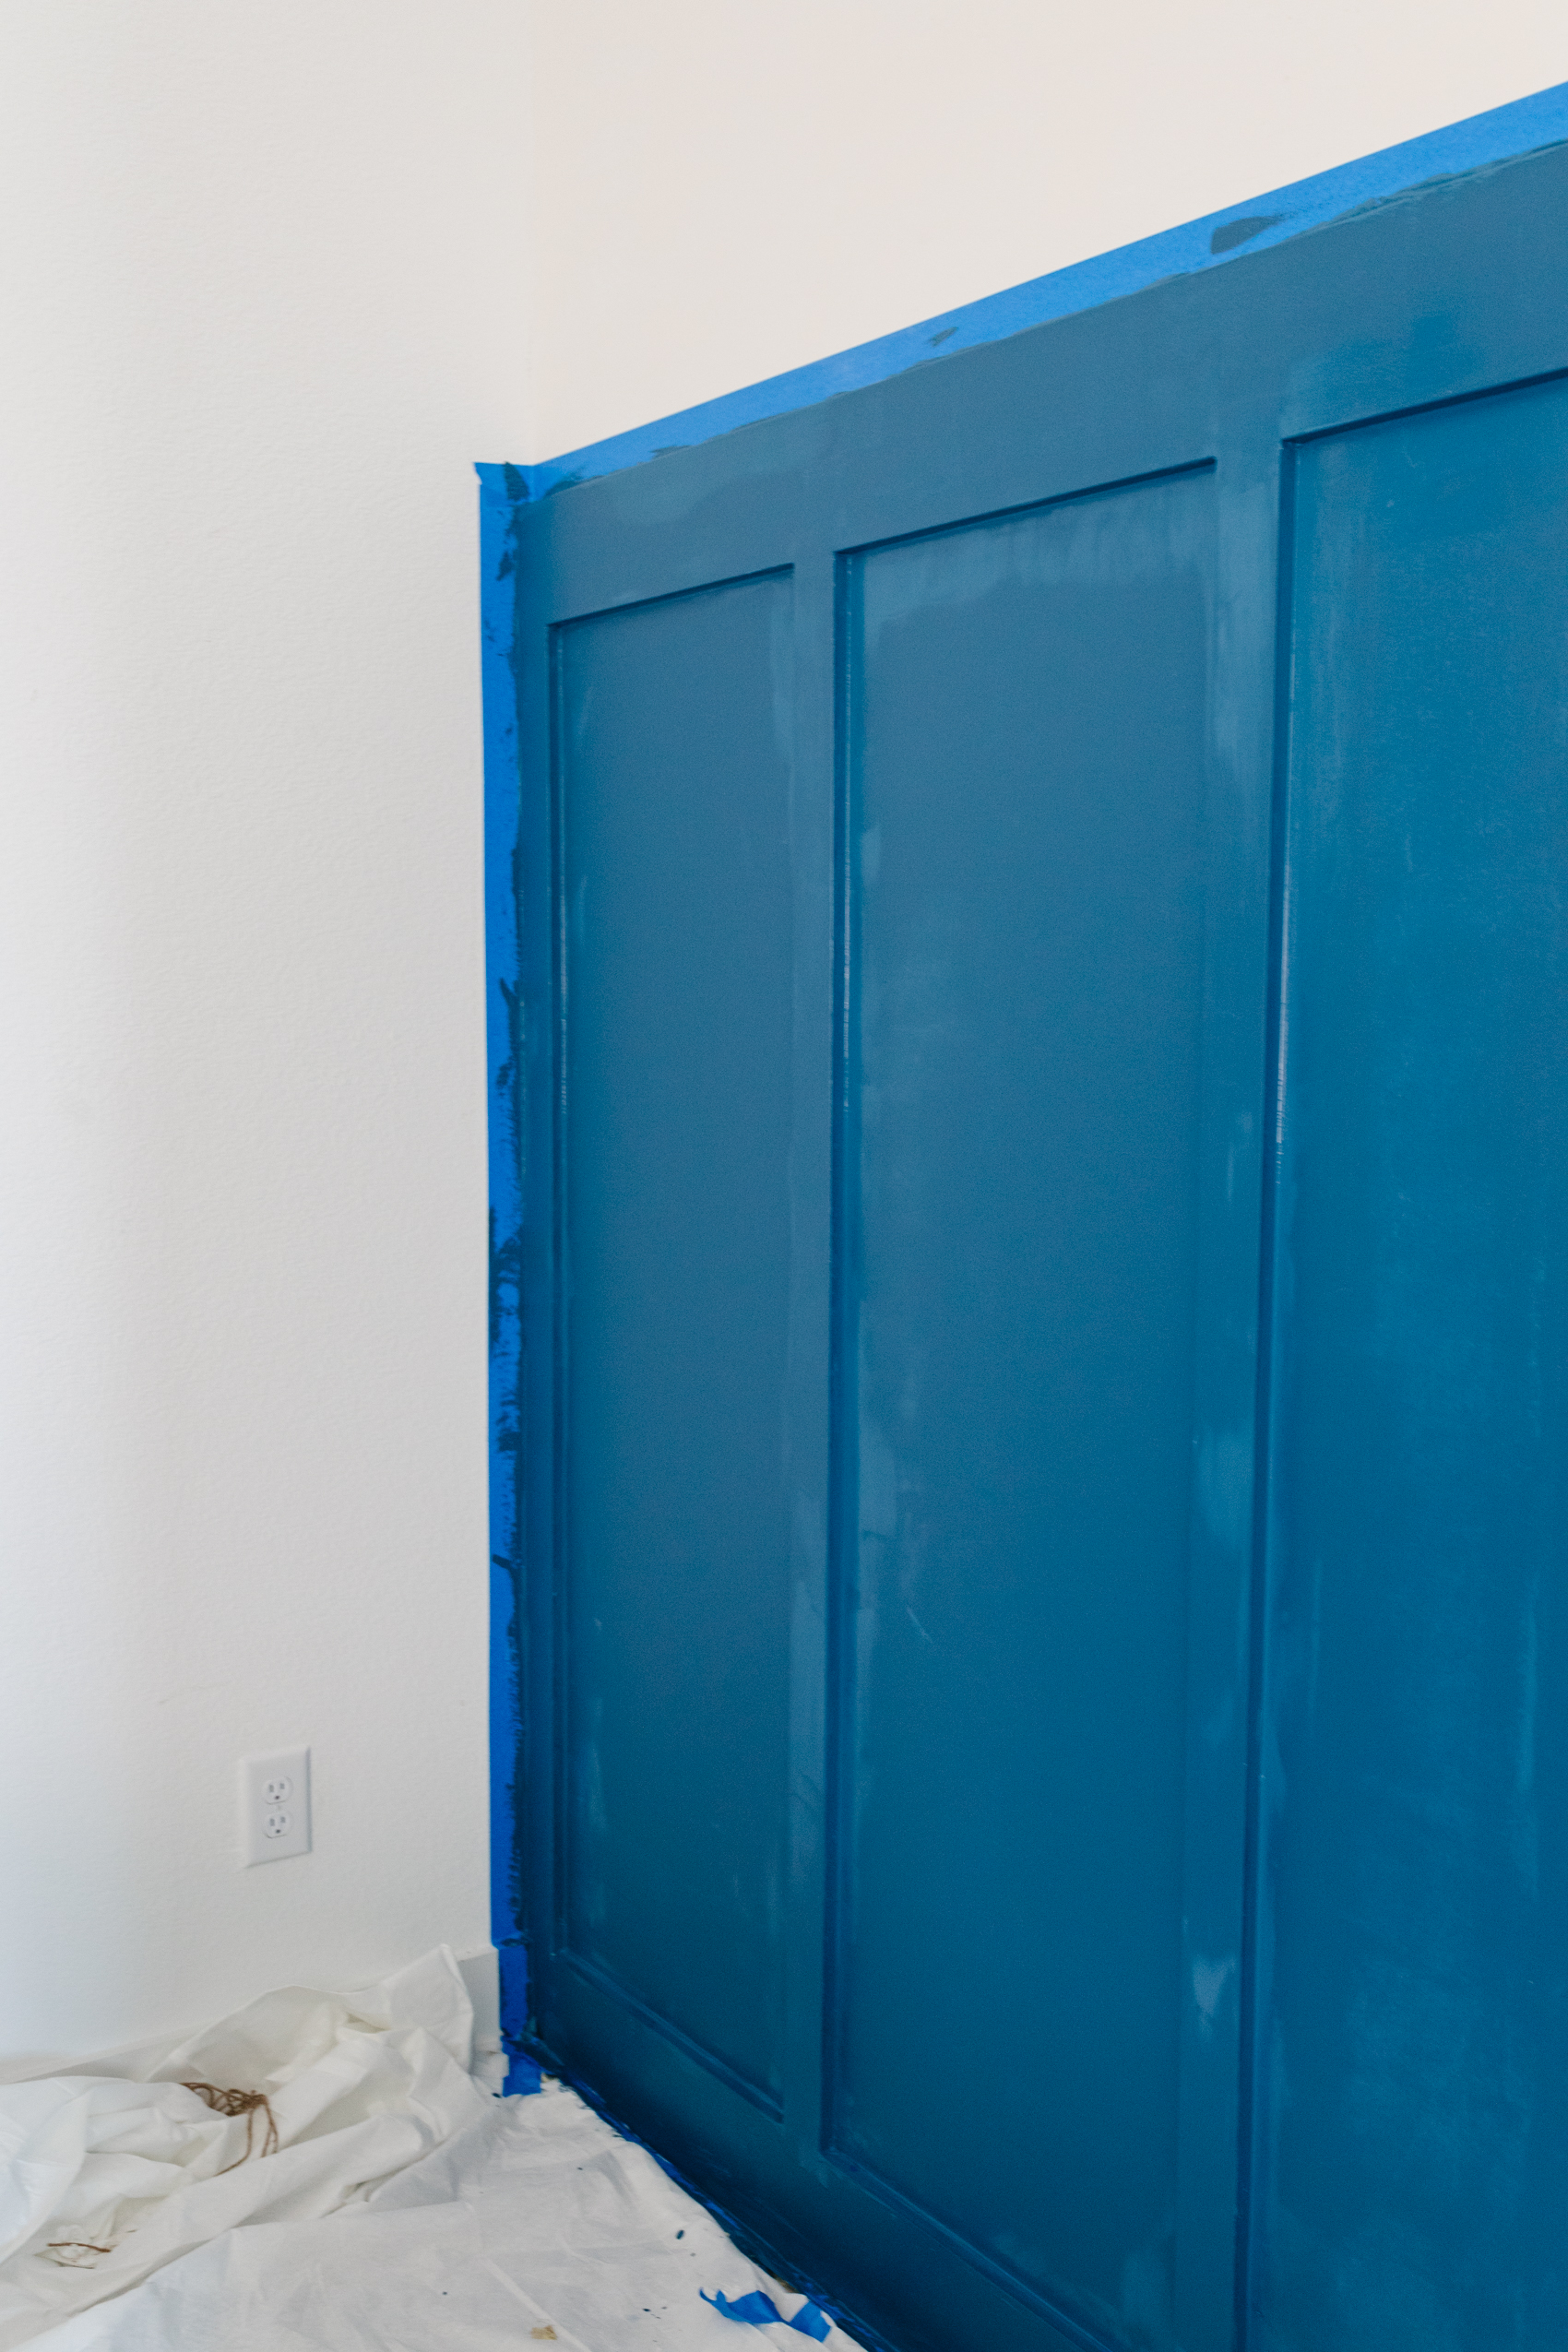
Prime and Paint
Some MDF needs to be priming before getting paint. Our boards were primed ahead of time, so we only needed to prime the hardboards. Because the hardboard doesn’t absorb much, we only needed one coat.
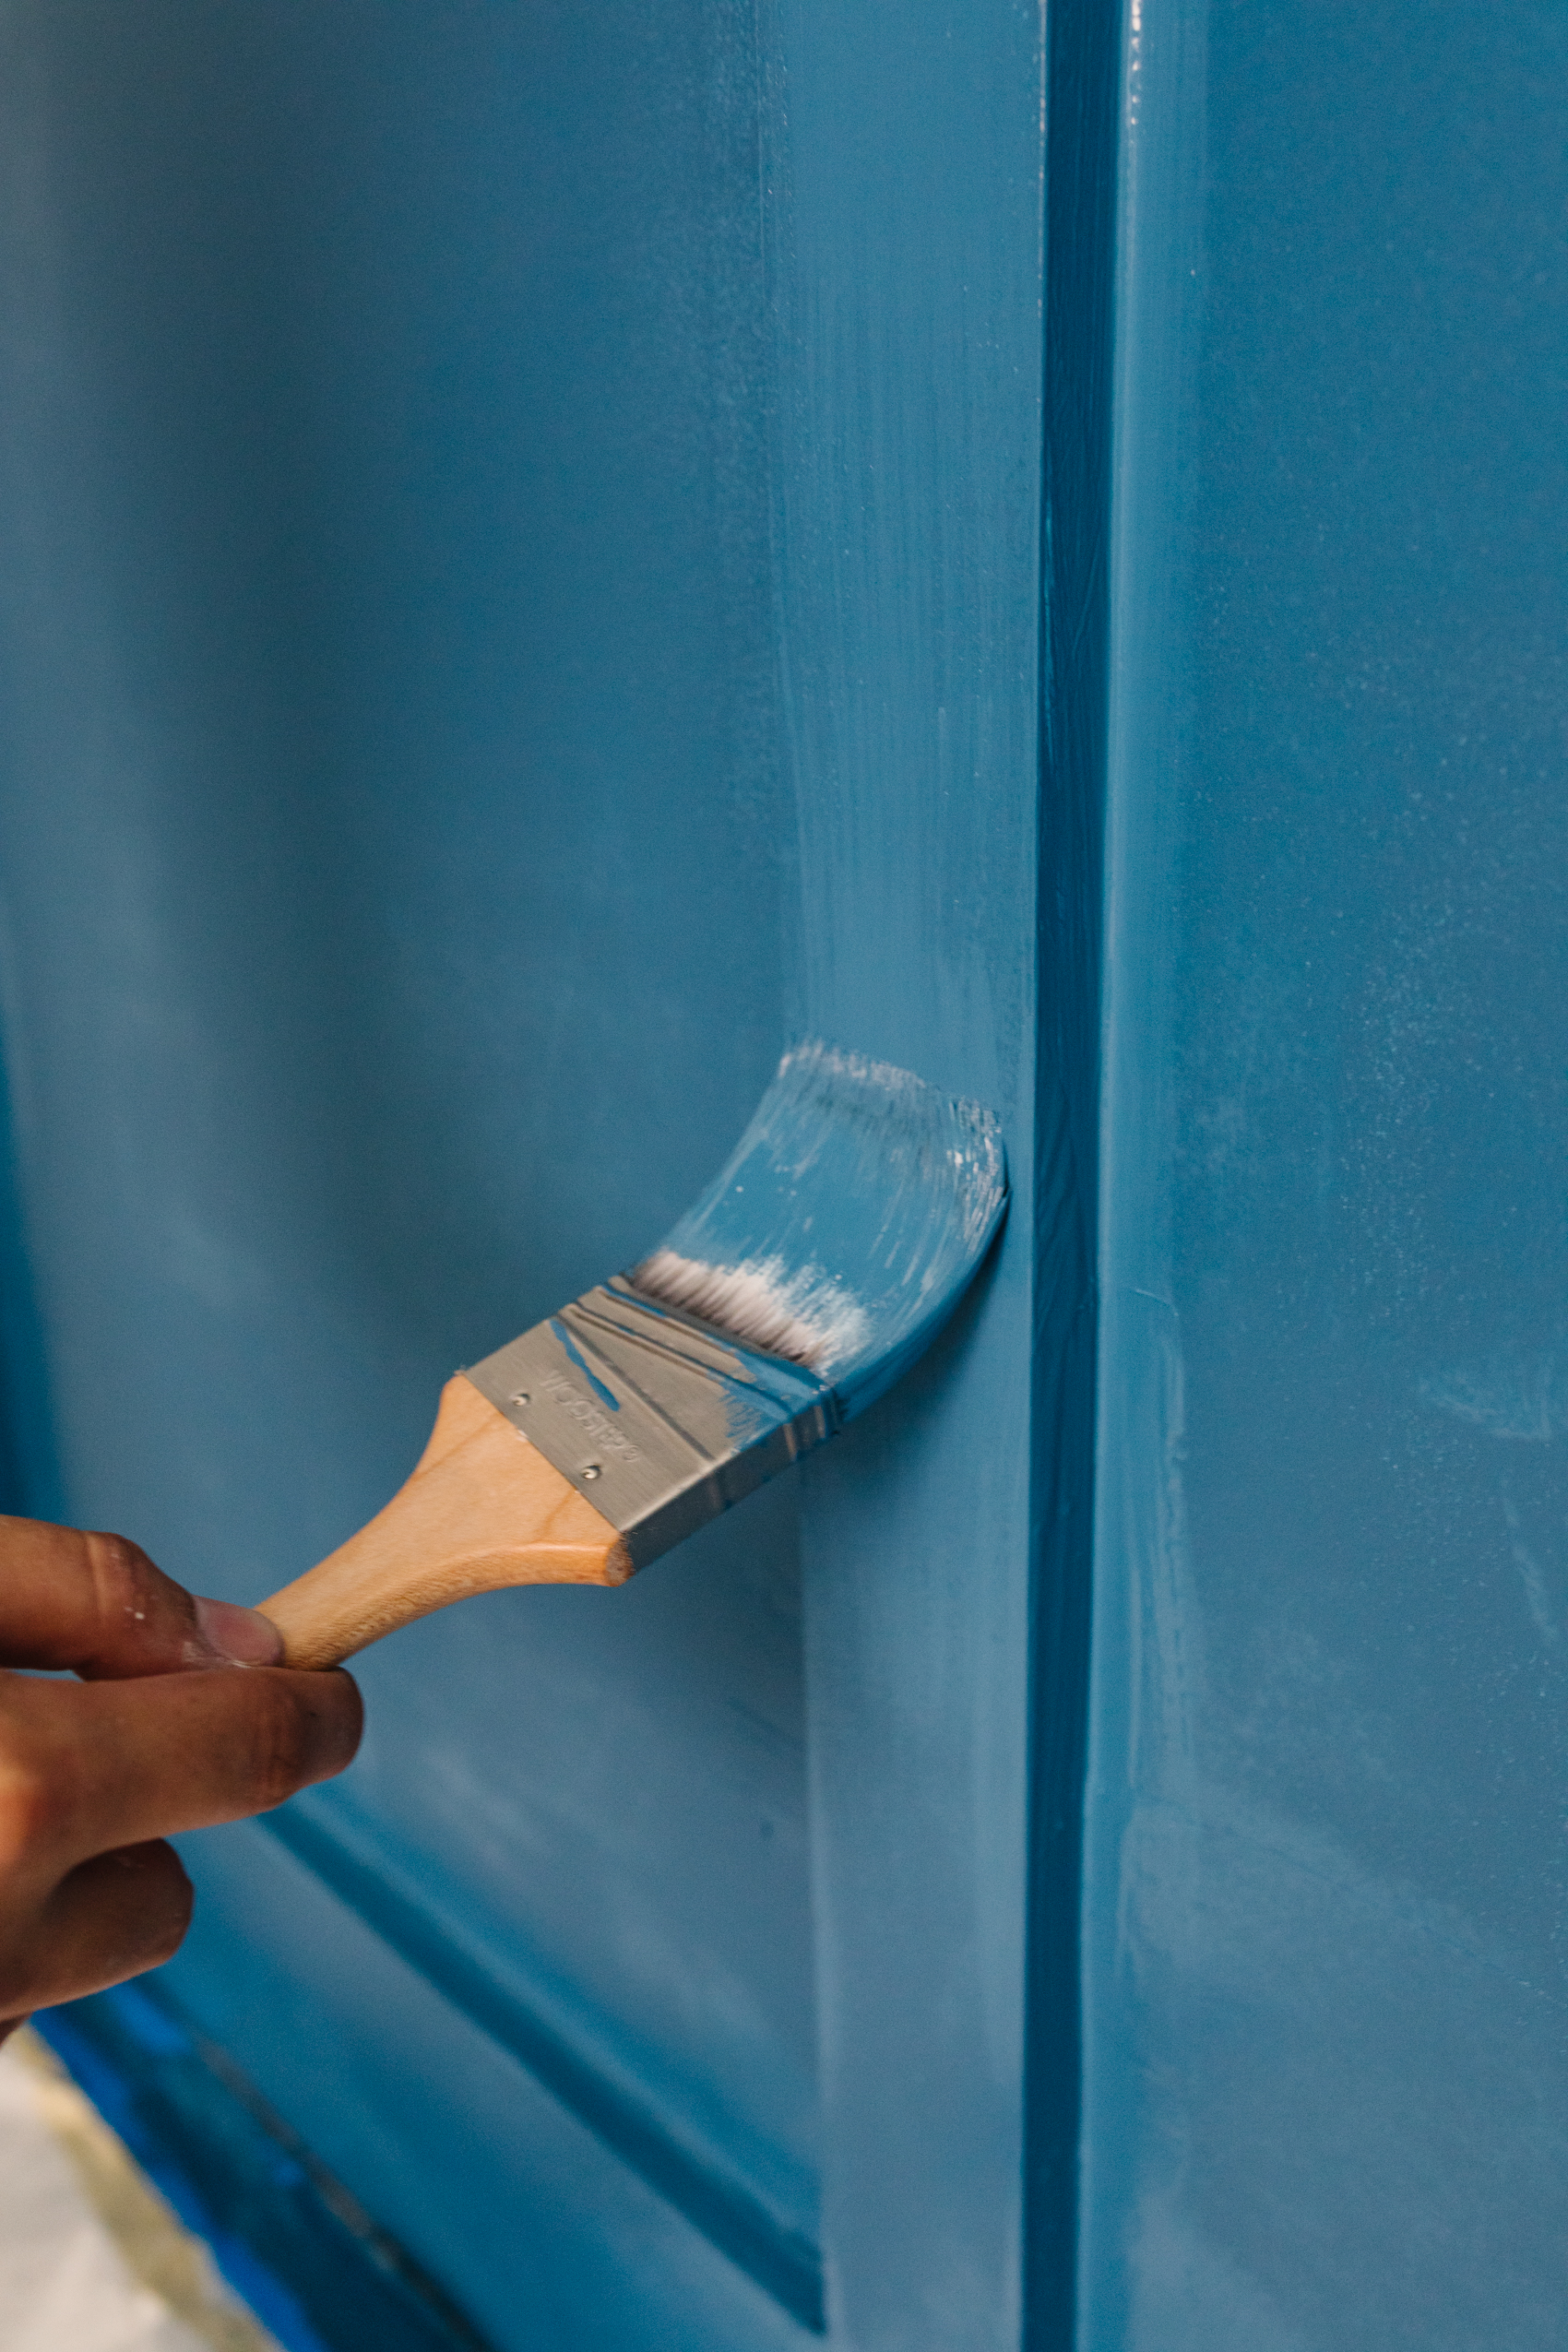
Our primer only needed 2-3 hrs to dry before paint application, so we painted the same day. You can use a 3”-6” roller and a paintbrush for the edges.
We only bought one paintbrush, so we looked up how to wash it properly. The answer is it’s not soap and water. We used vegetable oil to get the primer off the brush in preparation for painting the Chinese Porcelain.
This was the easiest part. We used what’s supposedly the “better” – “best” rollers to get a smooth finish and applied two coats of Chinese Porcelain using the 9” roller and our point brushes. After applying the first coat we waited a few hours and then applied the second coat.
At last! We high fived and hugged. What we thought was a one-weekend project turned out to take two weekends and several weeknights to finish. I think if we did it over again it would take one weekend with everything we know now. I hope we can save you a lot of time.

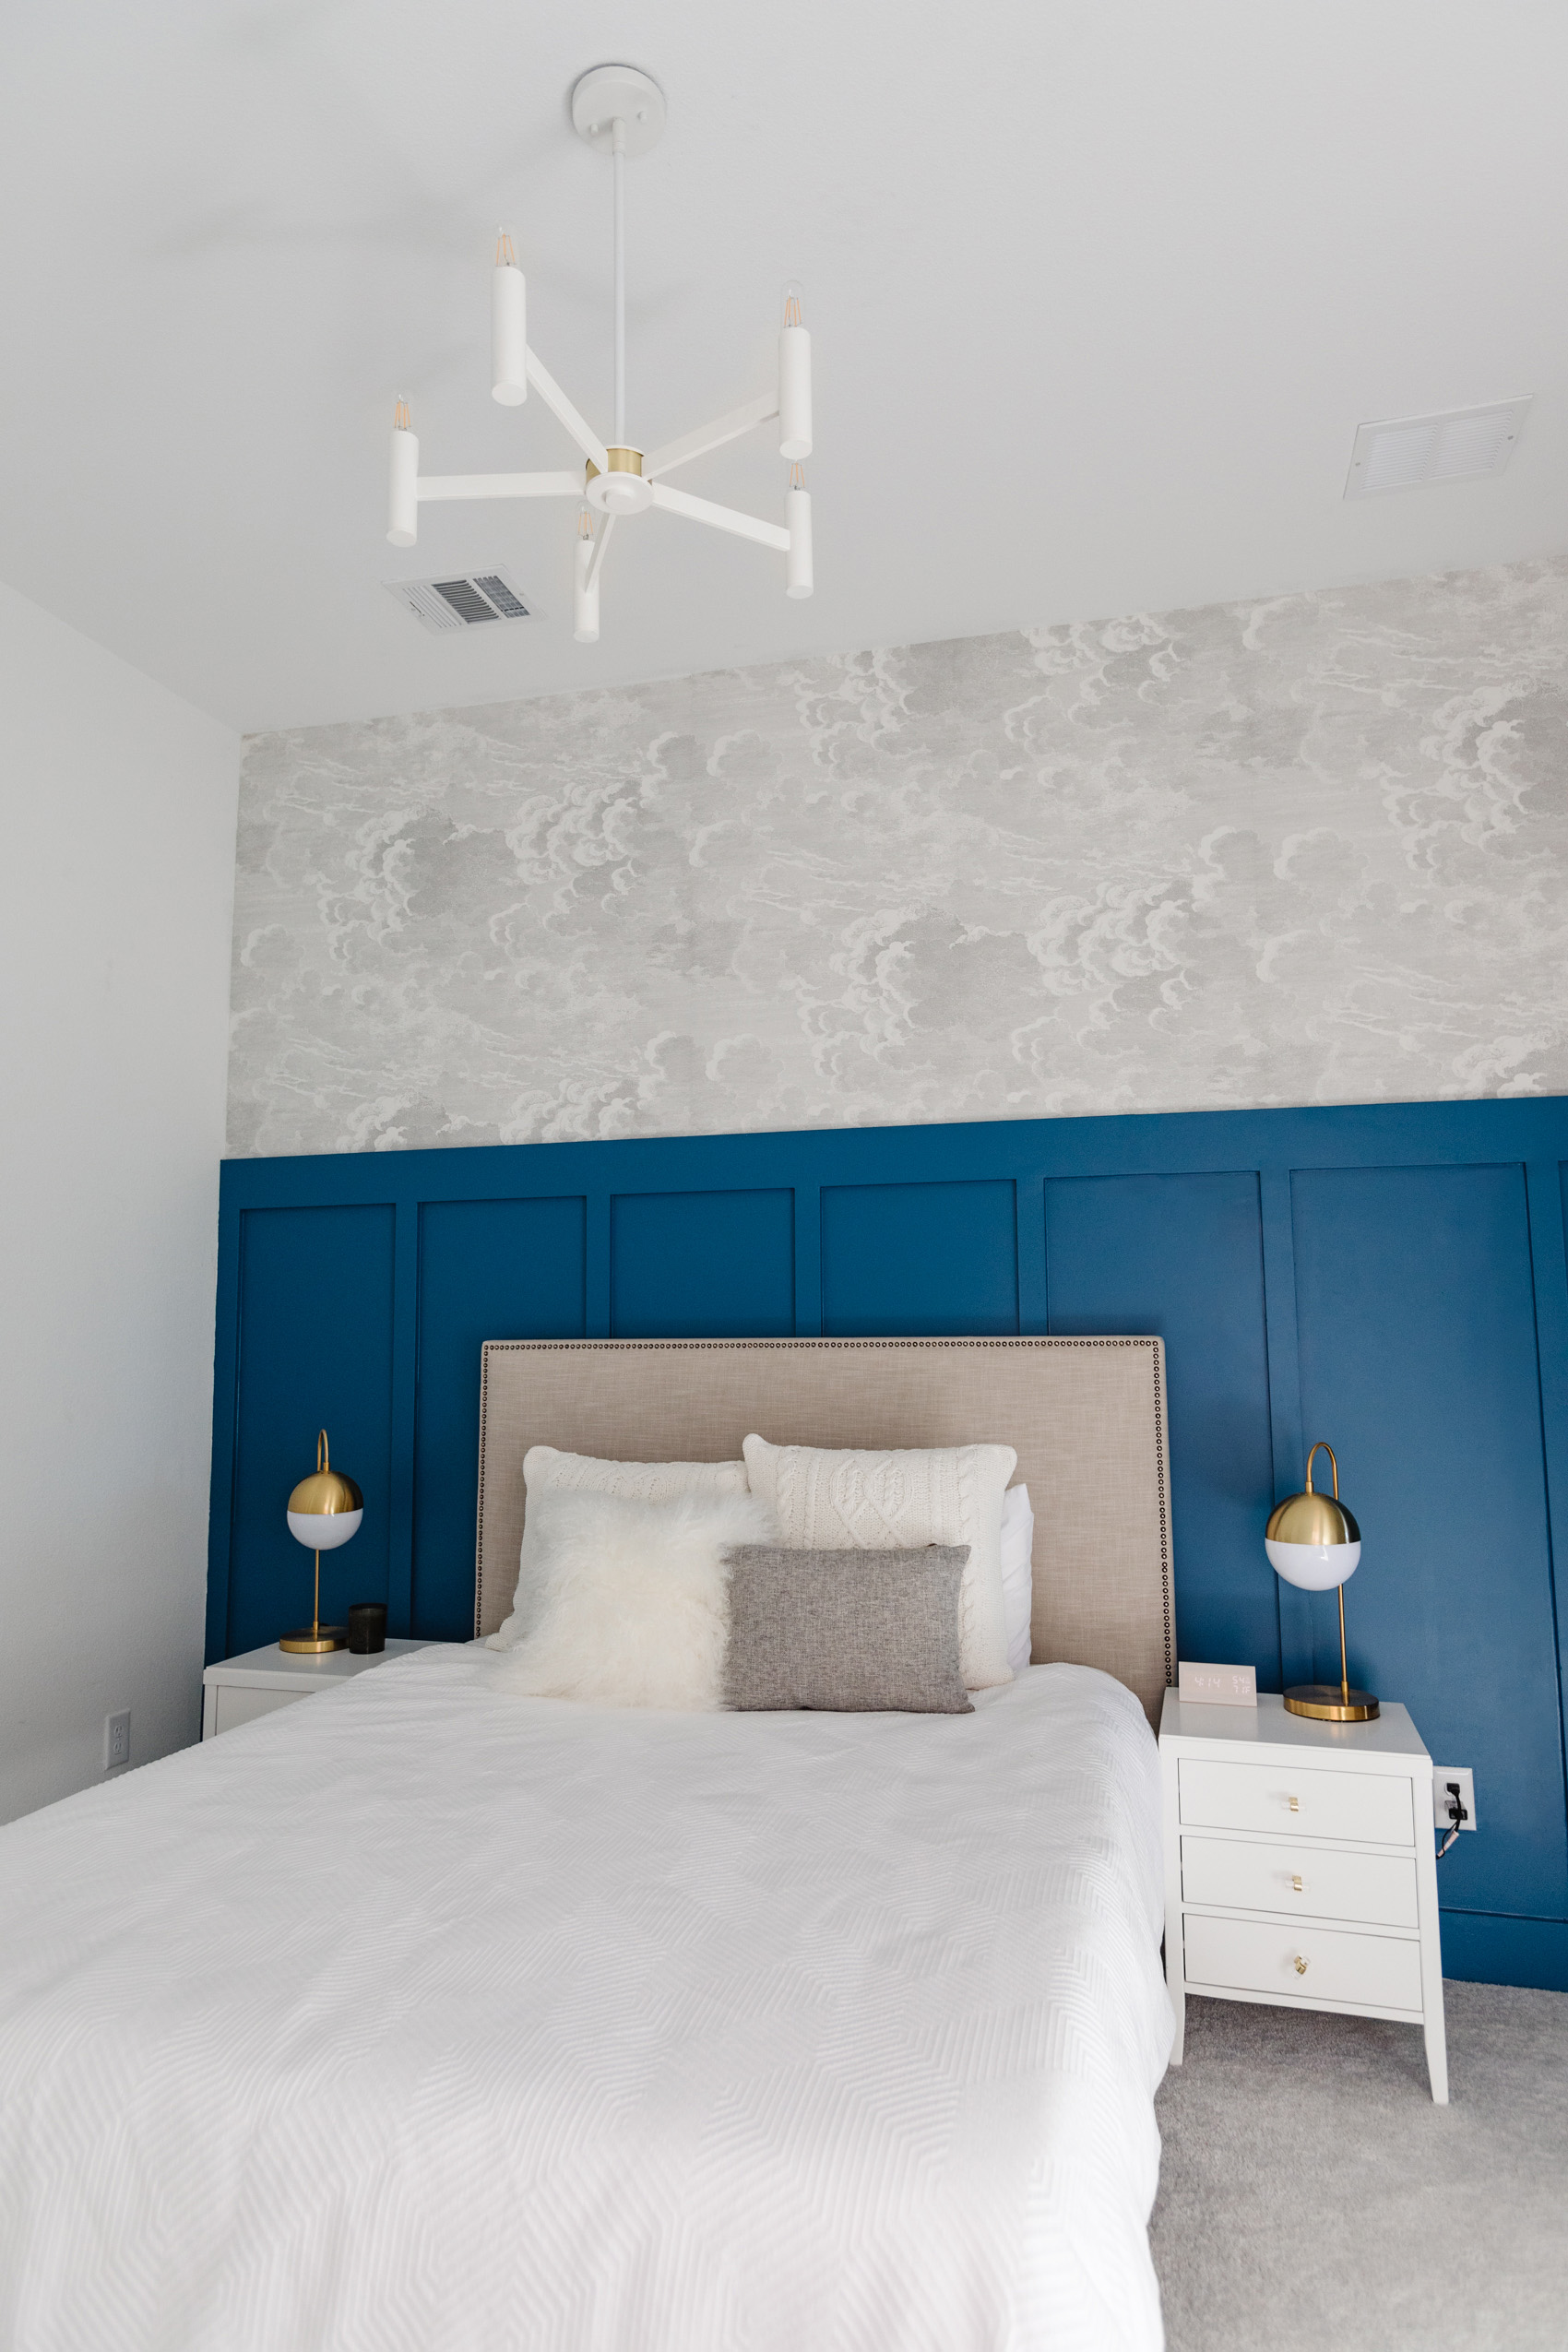
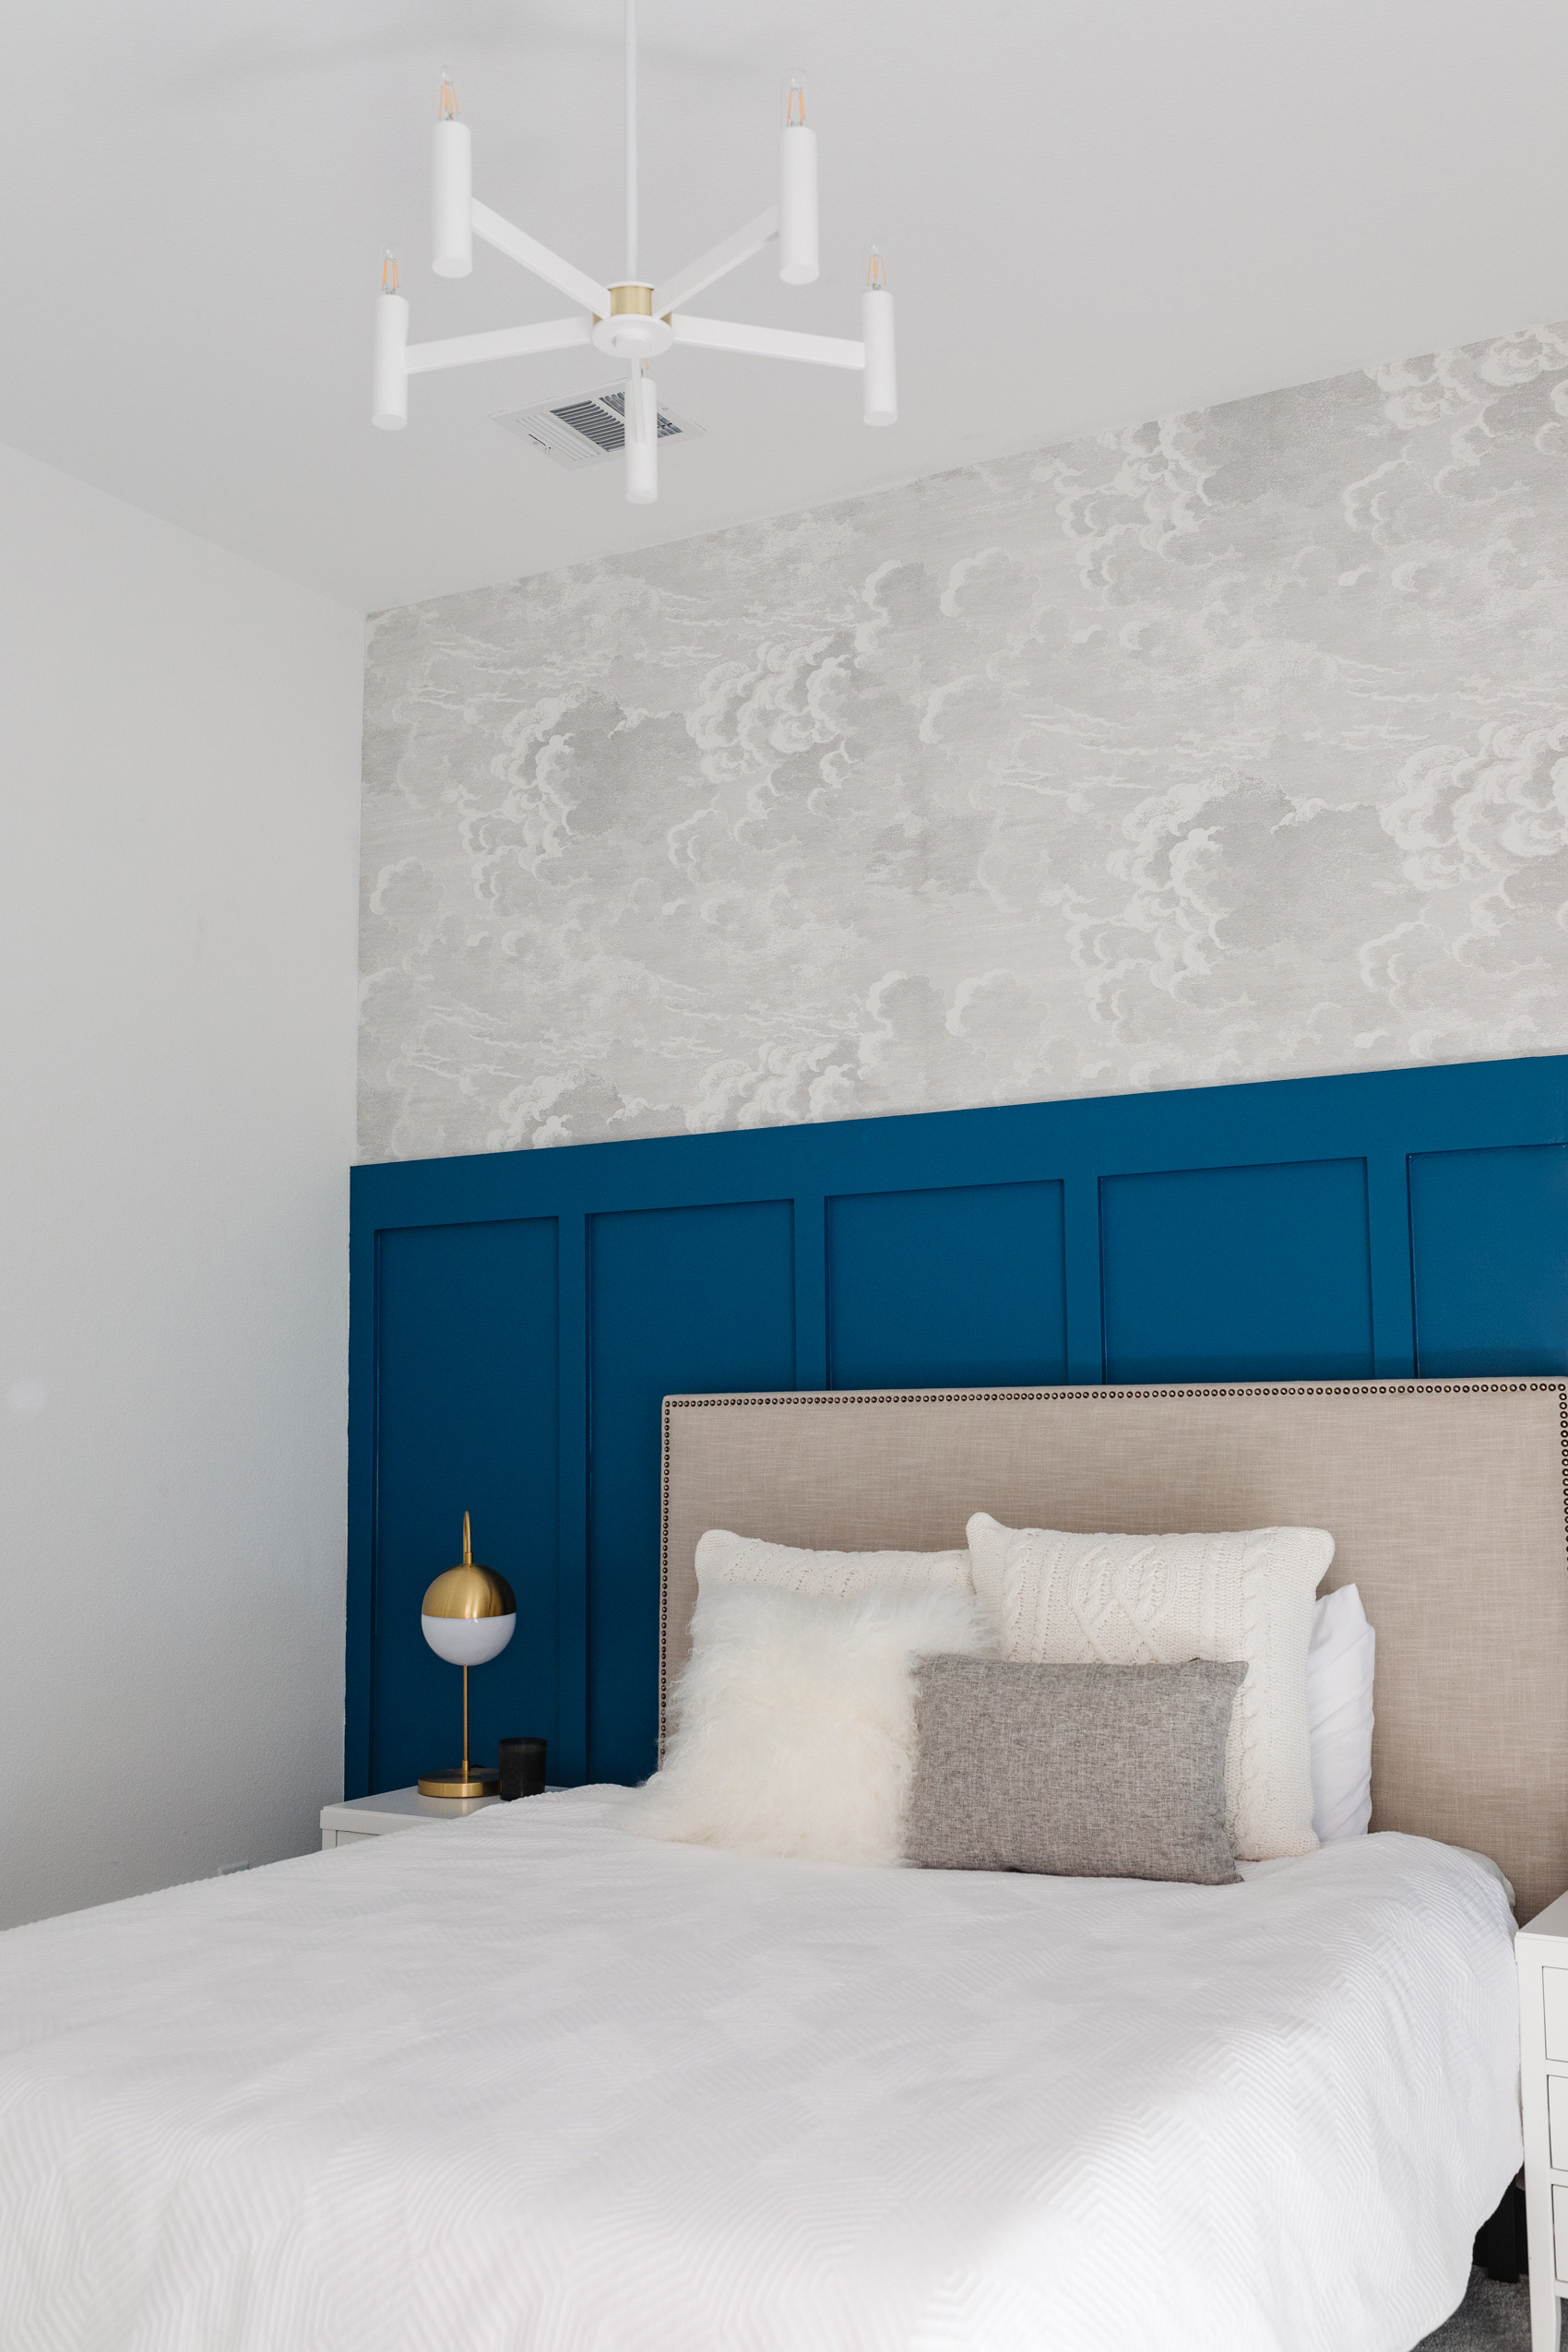
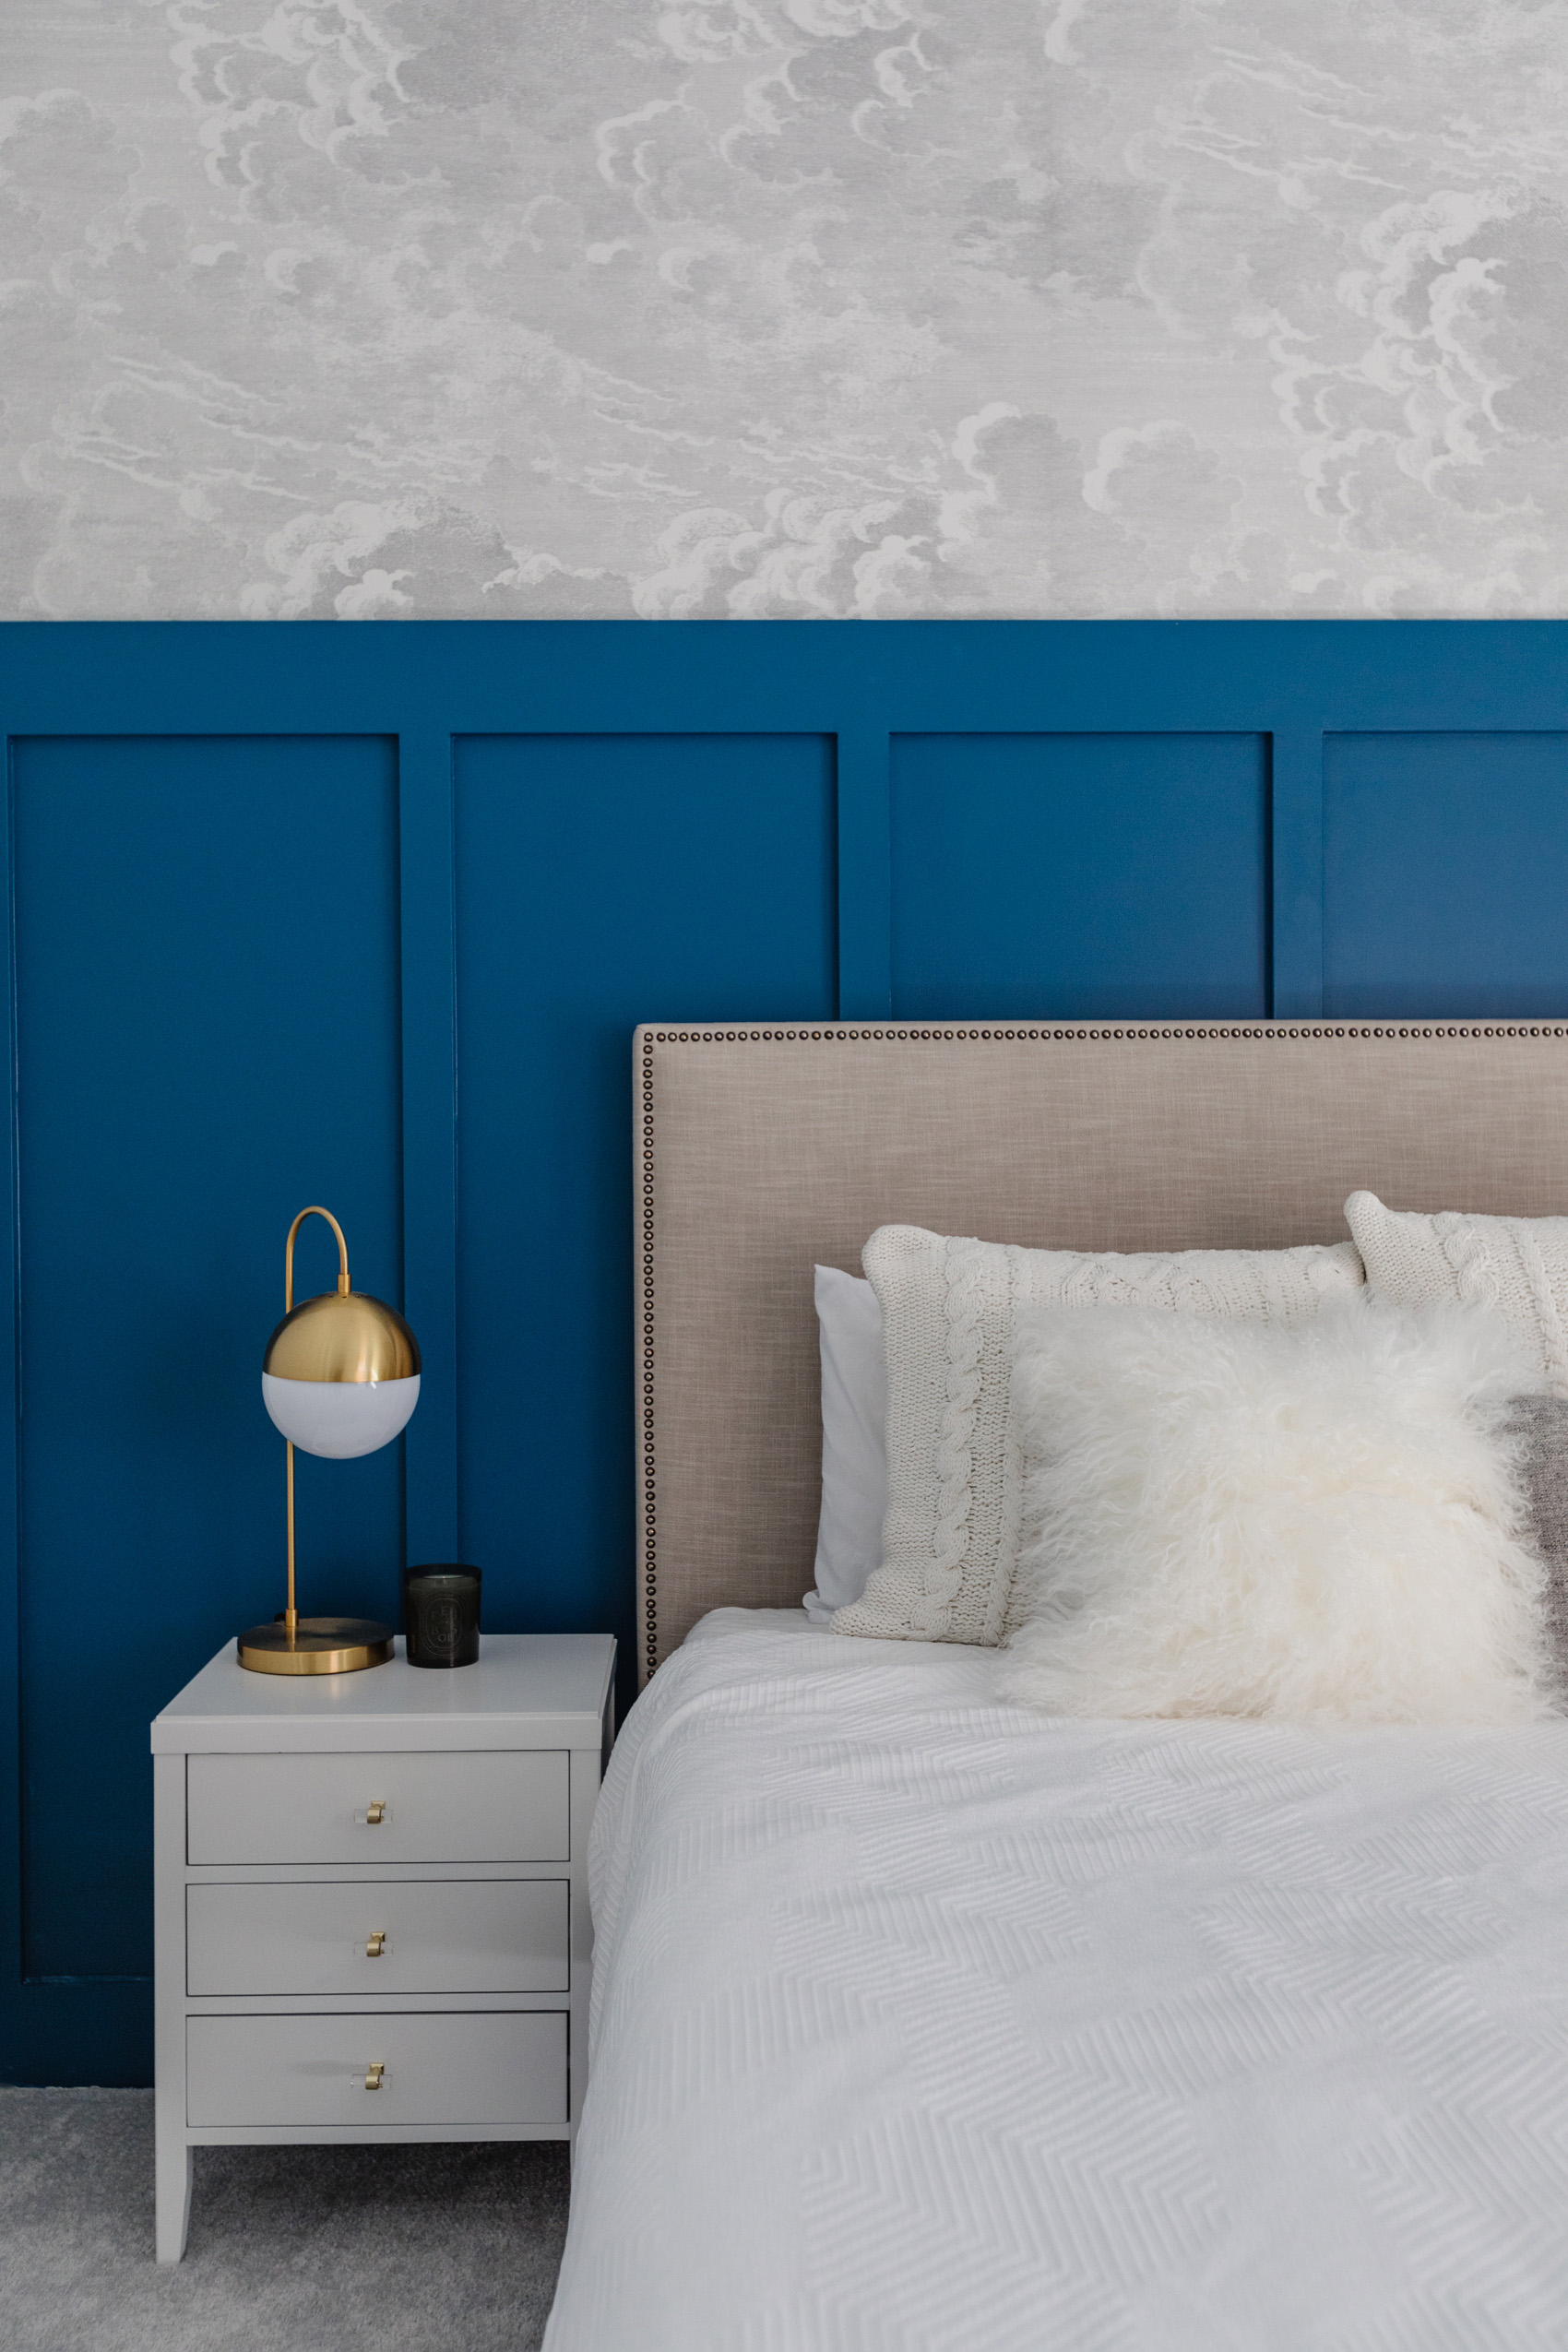
The Reveal…
We took the project one step further by adding wallpaper. We learned so much about wallpaper, we’ll write a separate blog post for that. Essentially, this wallpaper is what started the entire project and we love the finished project.
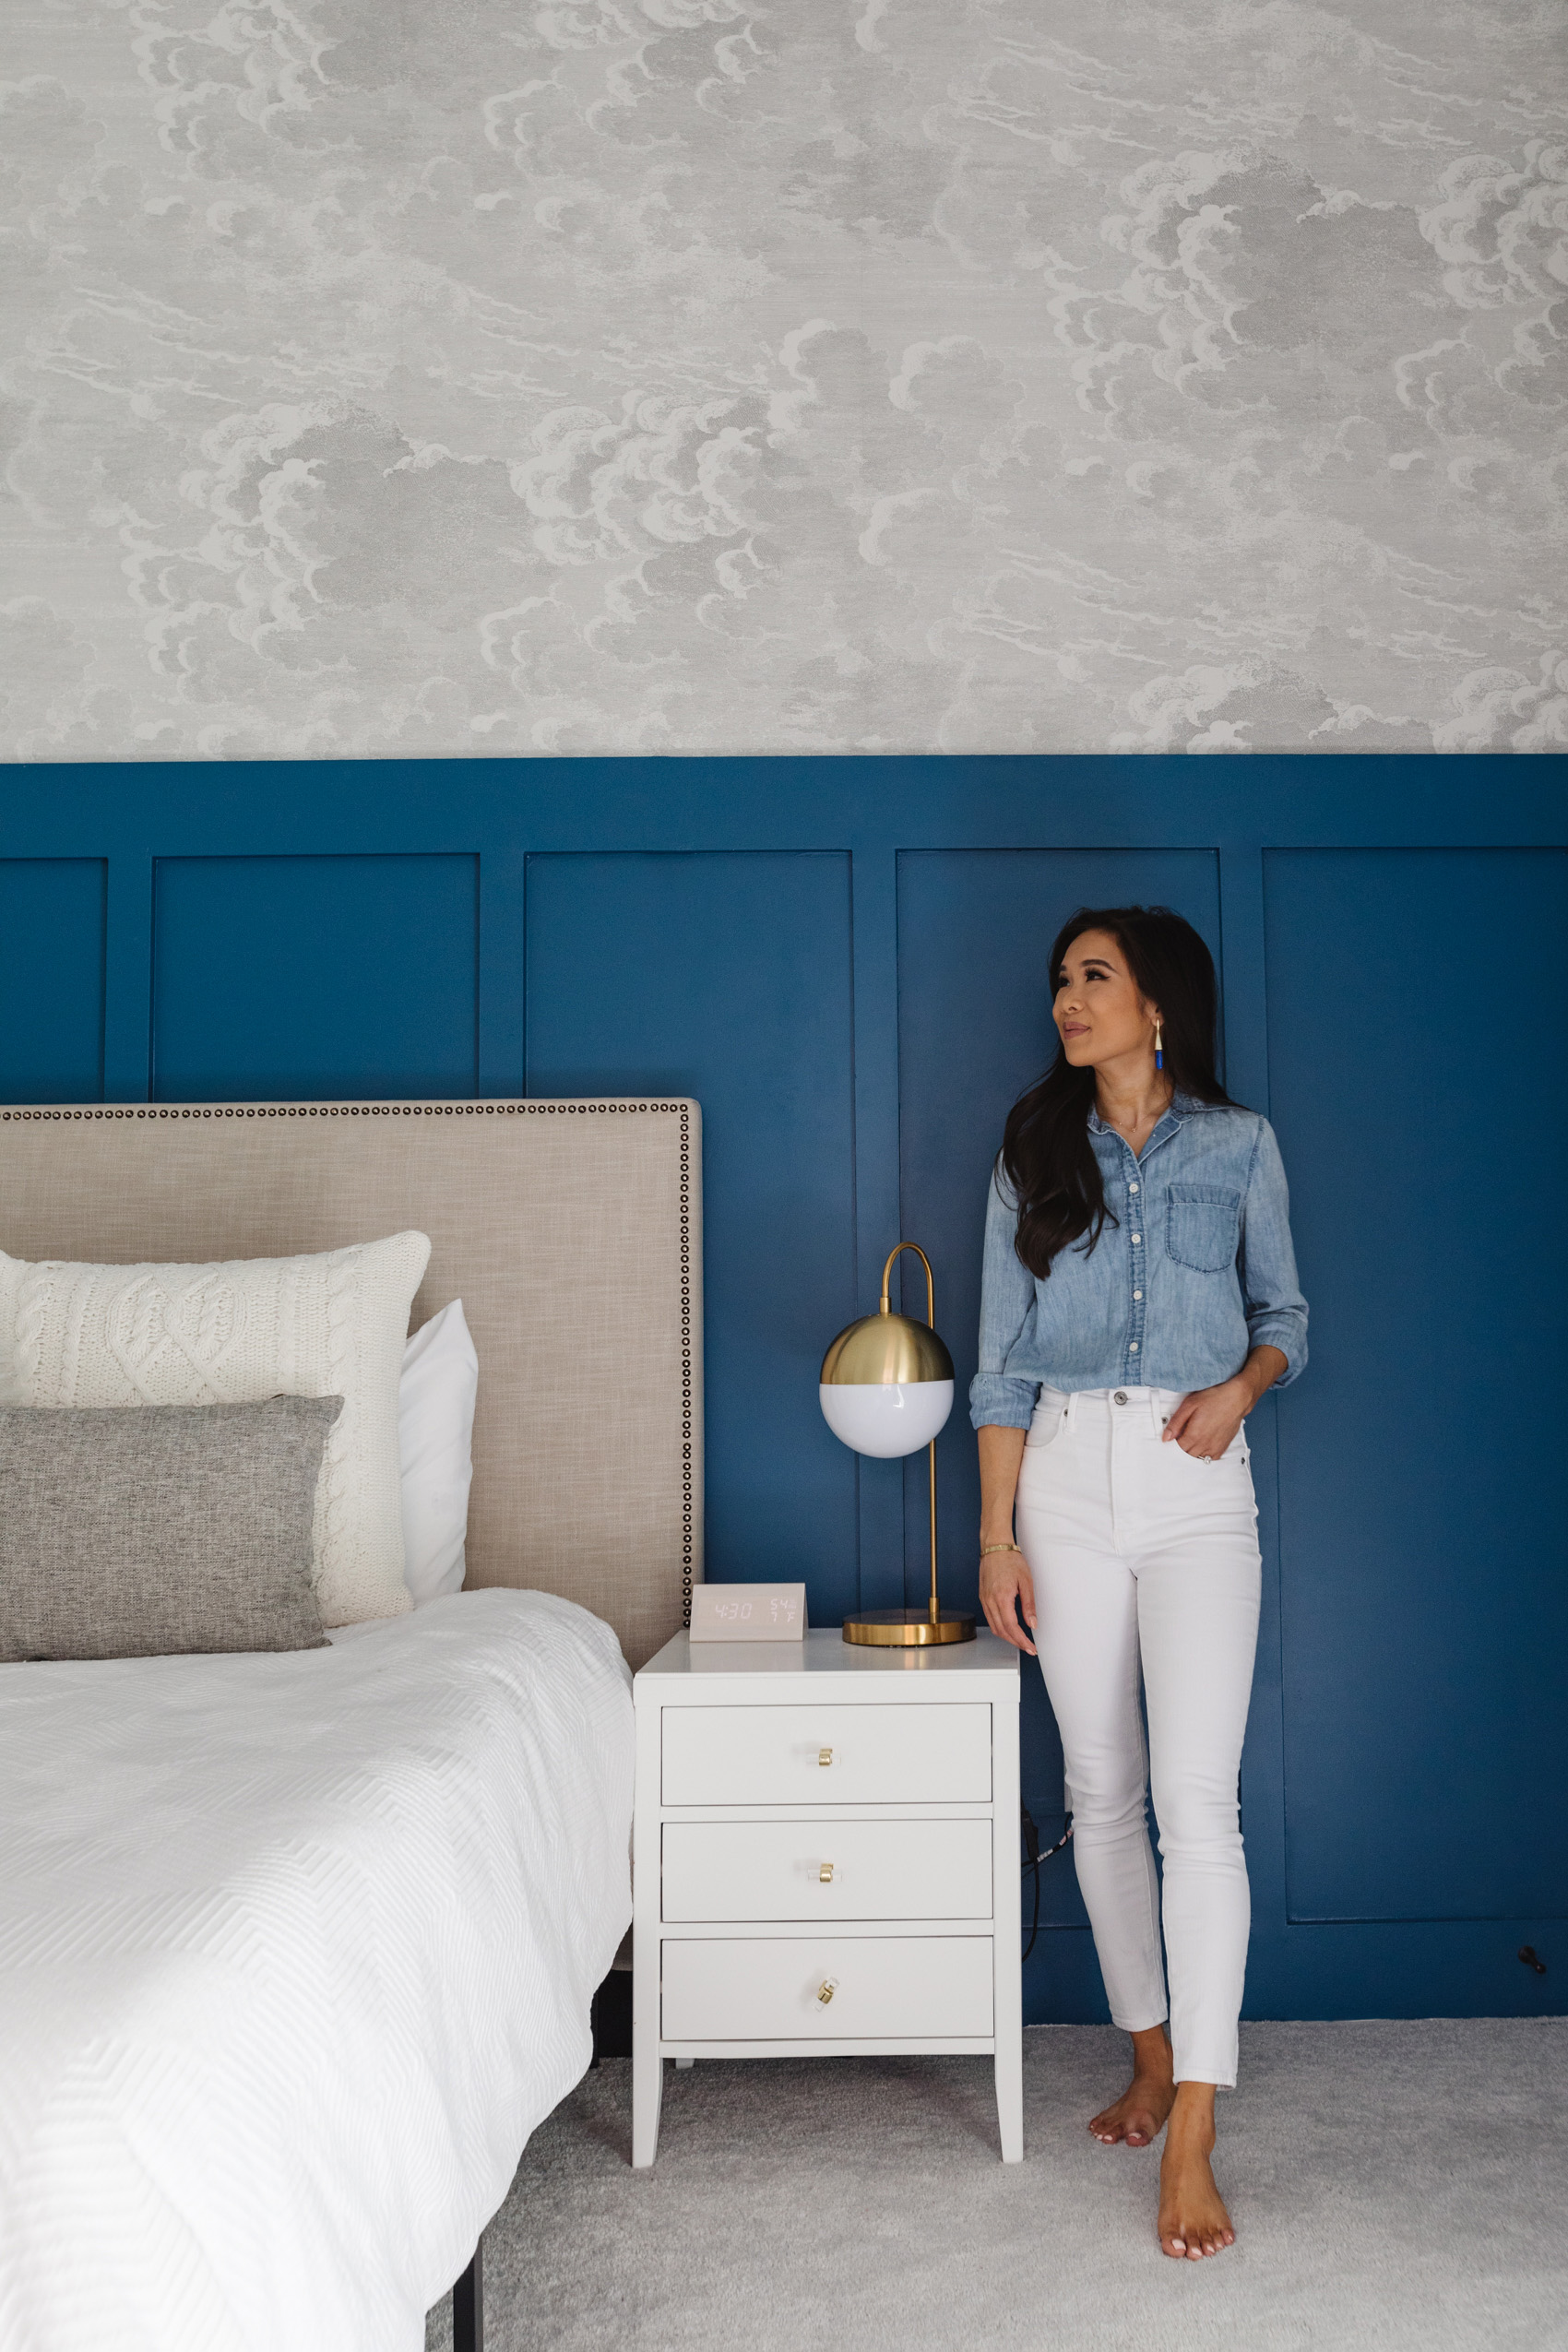
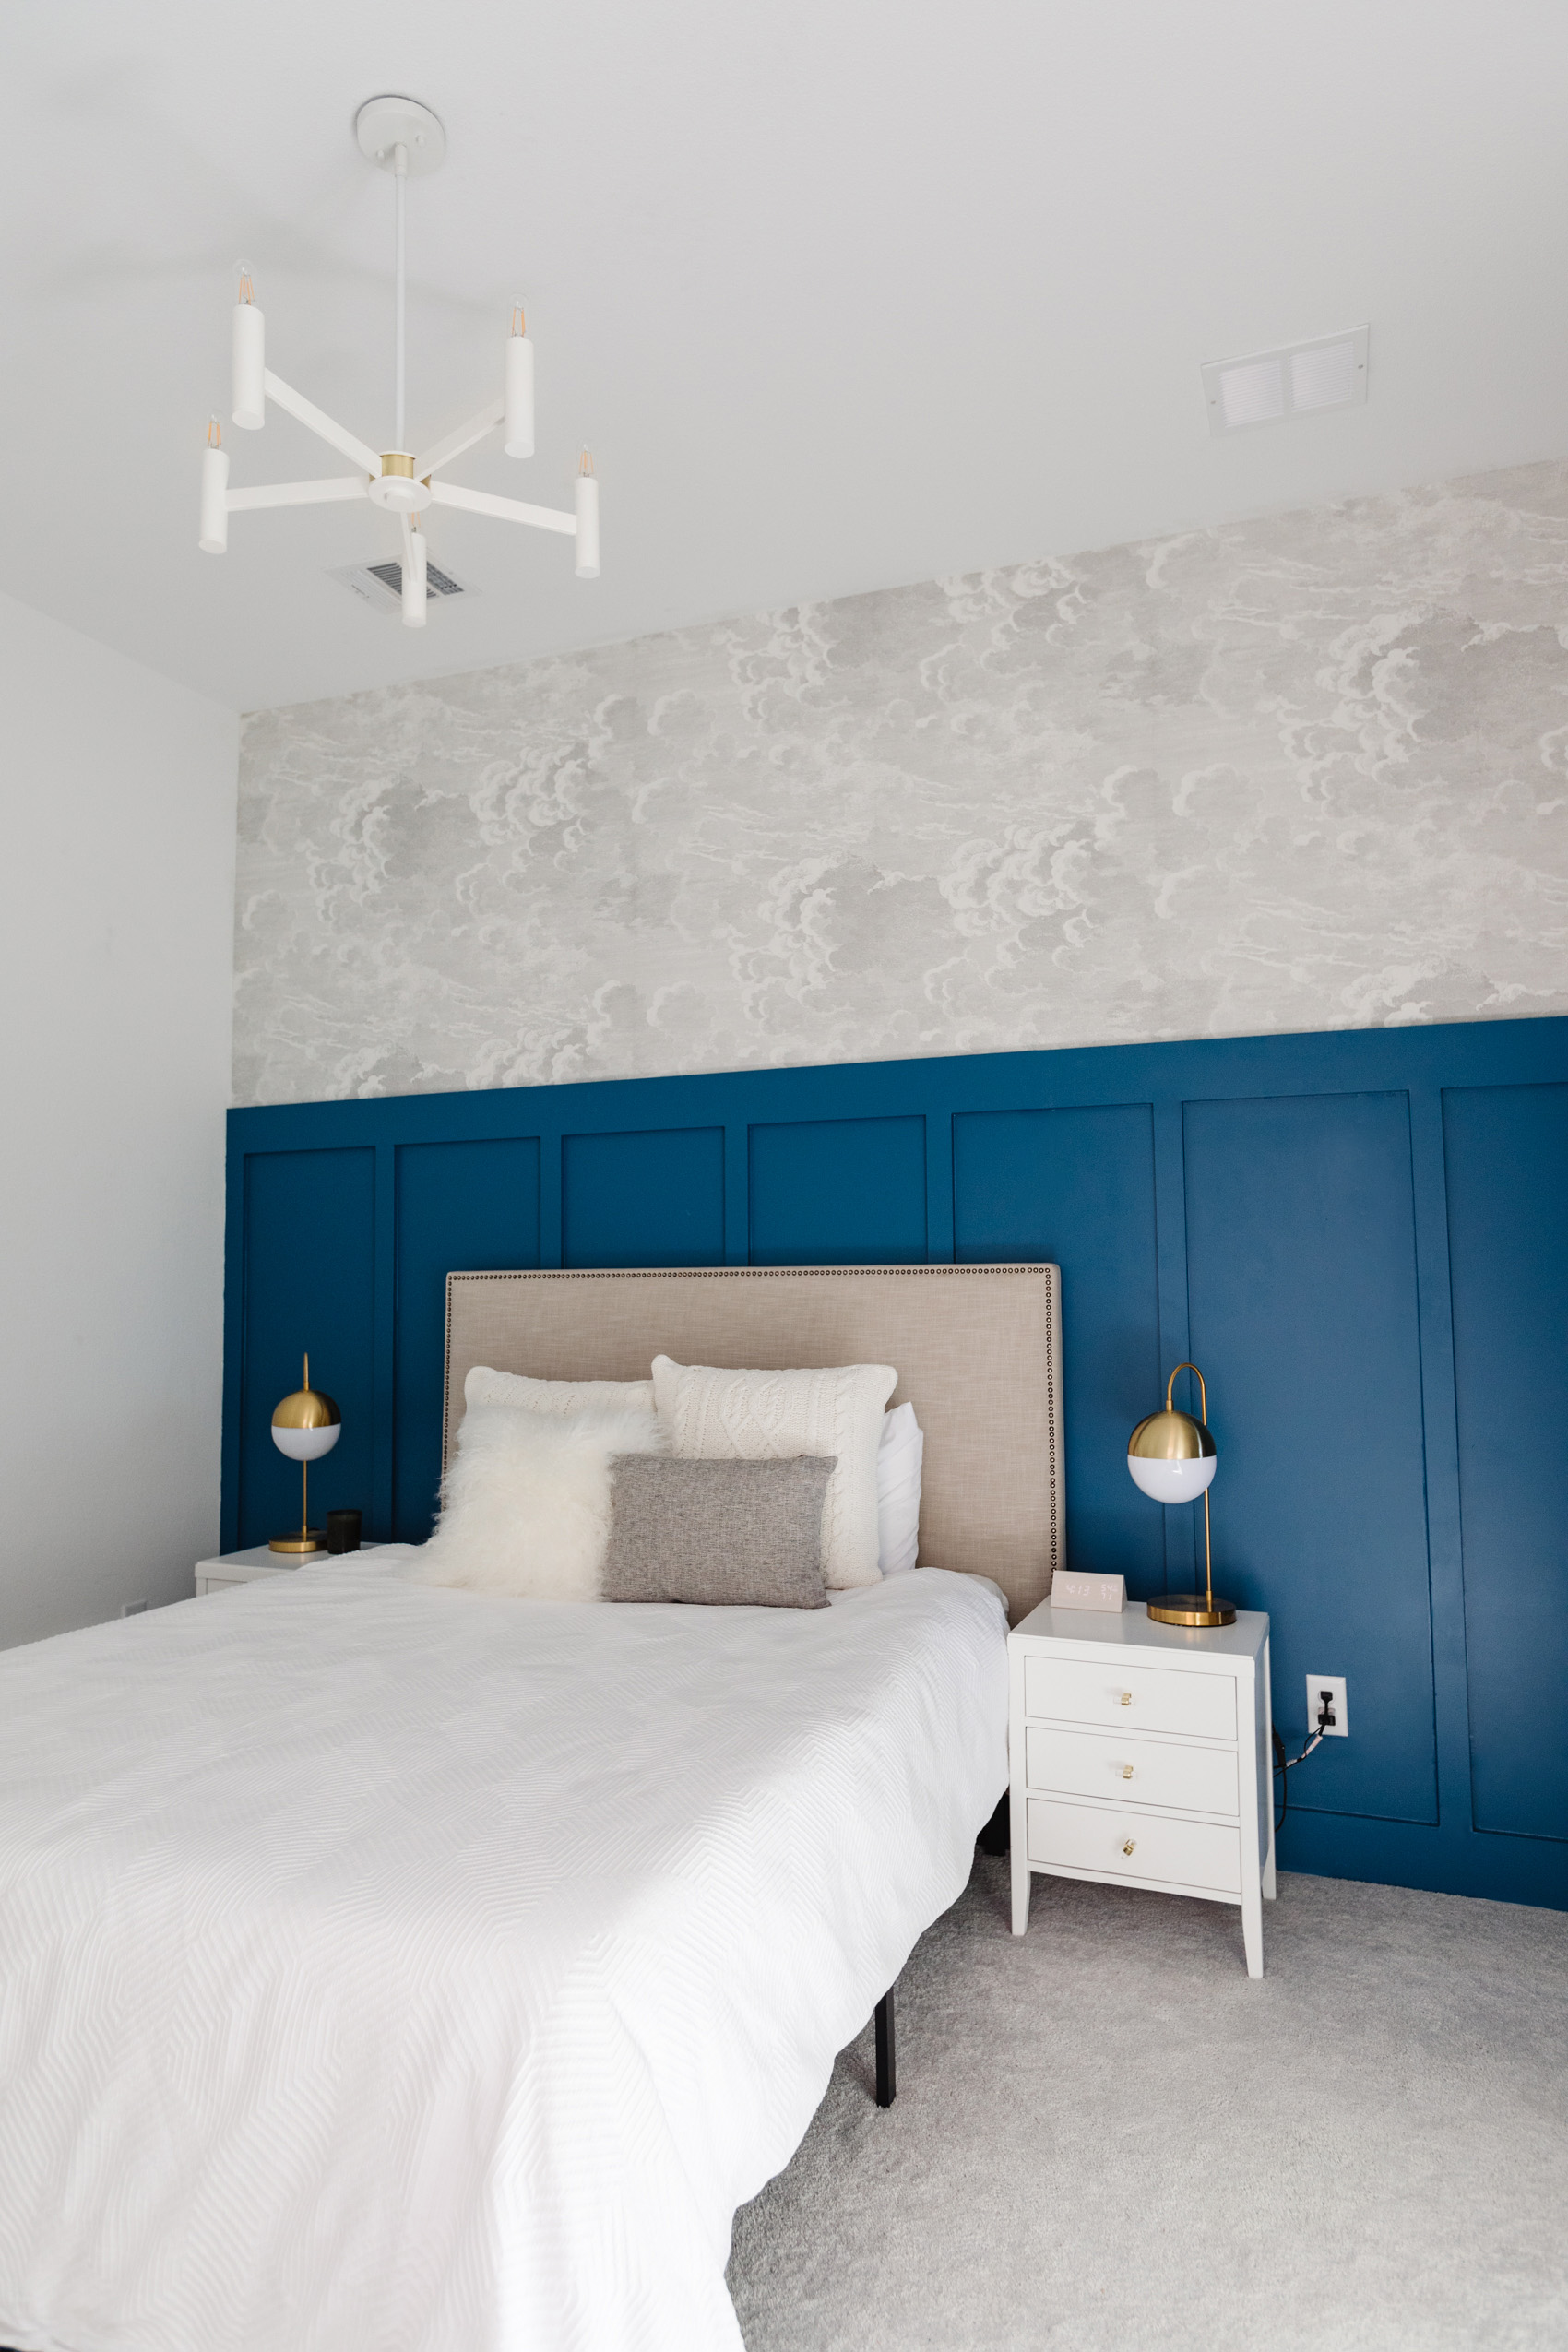
This room is completely transformed and I couldn’t be happier! Before we moved into this house, Johnny and I started making some smart furniture decisions. I got this upholstered studded headboard a few years ago knowing it would ultimately be the perfect guest bedroom headboard. We have the Stone Twill fabric and it’s been so good to us! It’s a fantastic neutral that can work with both cooler or warmer tones. We are getting new nightstands in our bedroom to match the scale, so we brought our existing nightstands in here and it’s perfect! The size is much more proportionate.
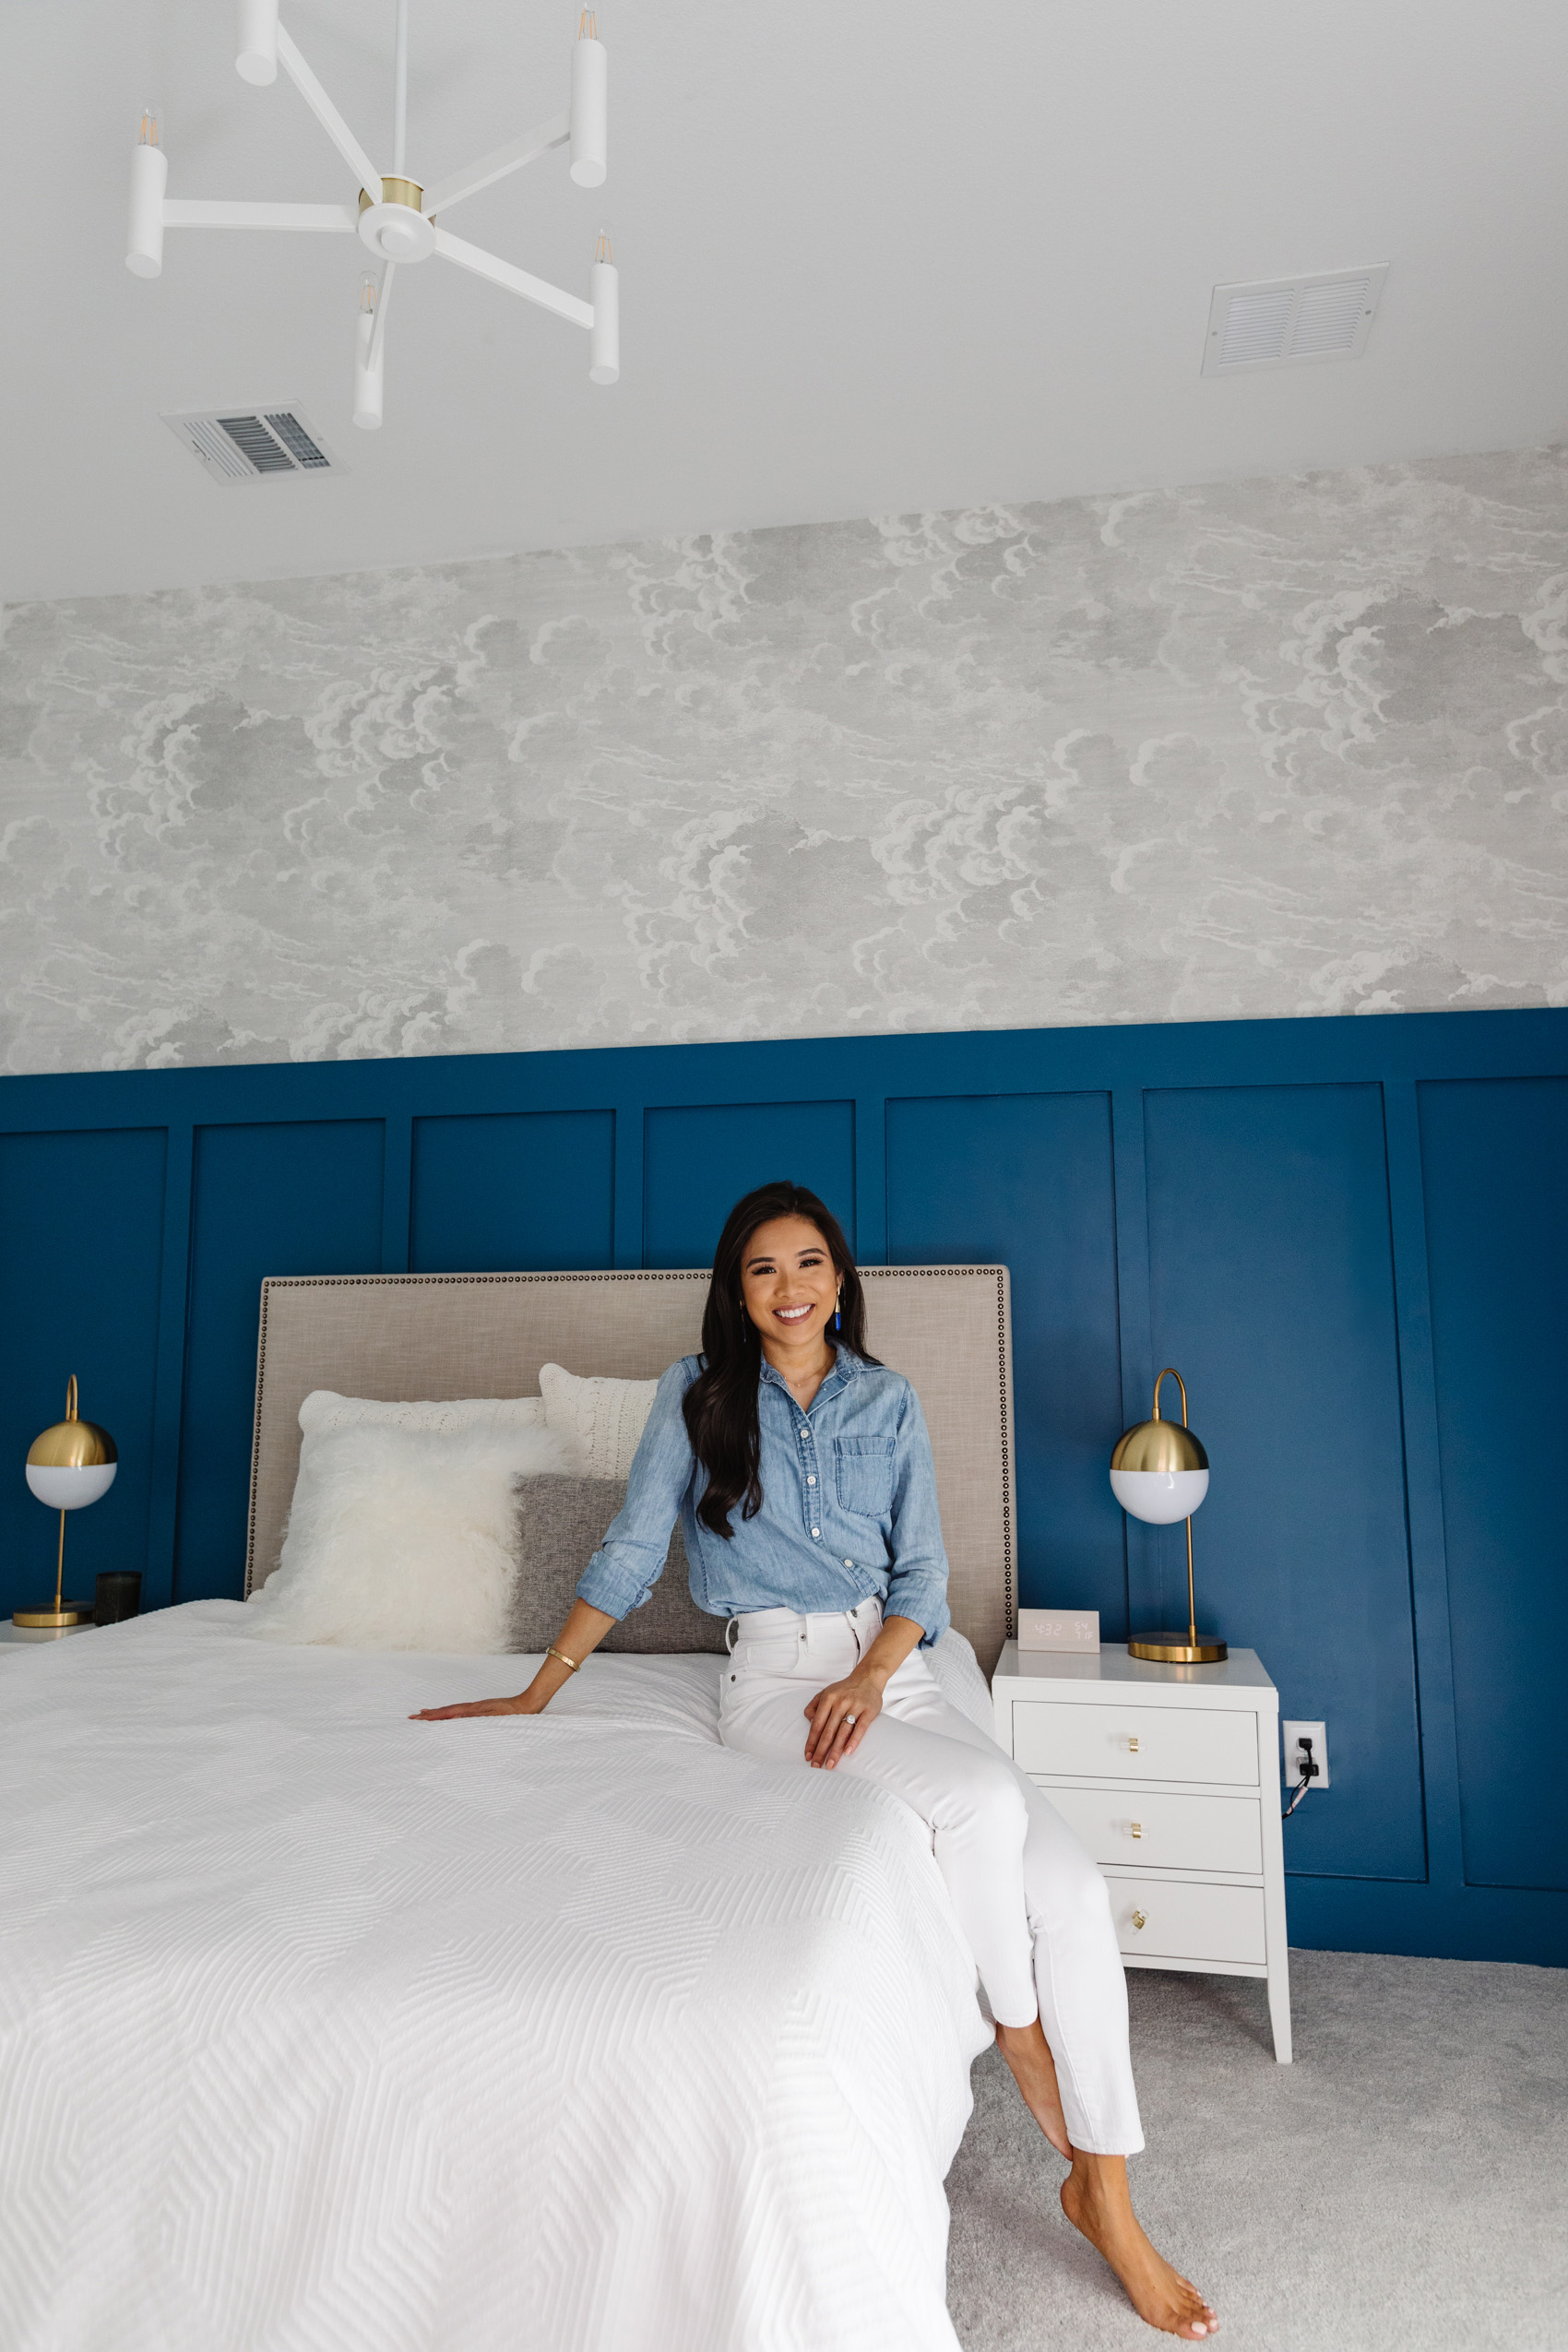
The only new items we purchased are the modern chandelier, alarm clock, fur throw pillow and gray throw pillow. Everything else we had! Of course, this doesn’t mean this room is done by any means. Ideally, we’d add some artwork on the blank wall to the left, a soft rug and a desk so guests can work. But for now, we really couldn’t be happier.

Nordstrom Anniversary Sale 2021 Preview Picks
TOPS & SWEATERS

BOTTOMS
BLAZERS & COATS
ACTIVE
ACCESSORIES & SHOES
BEAUTY